|
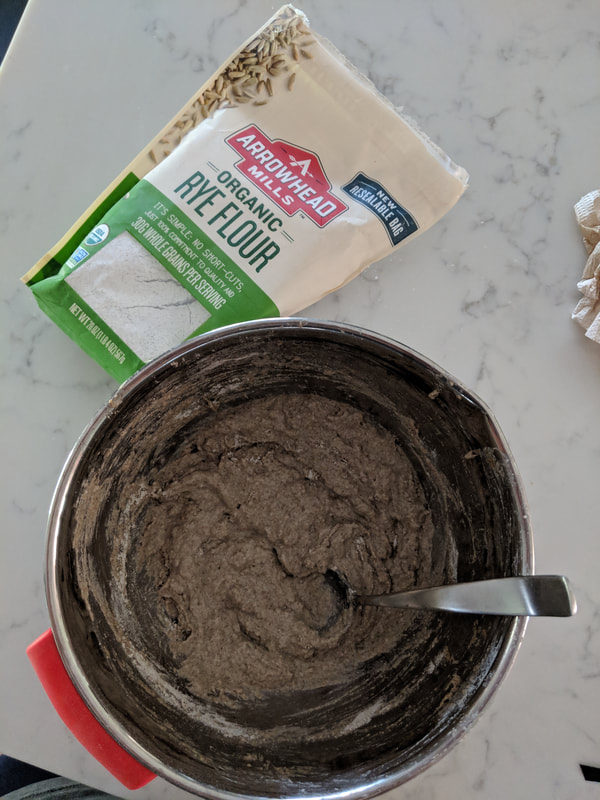
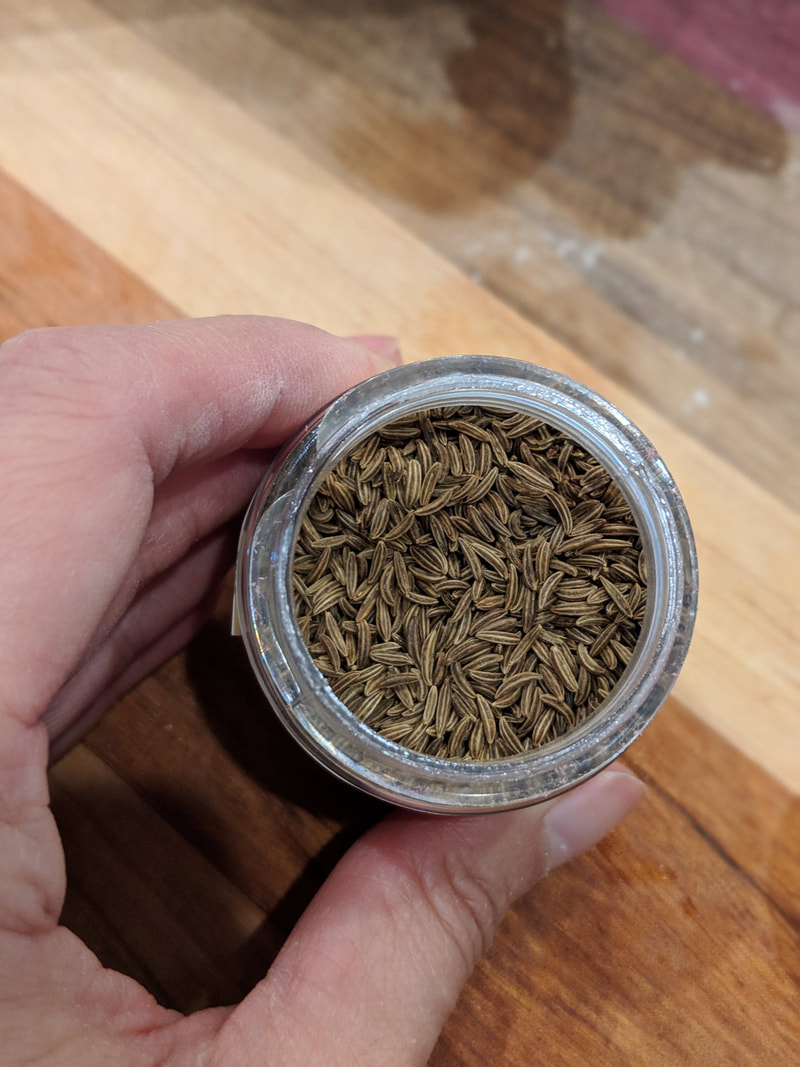
Ok. I finally got my baking act together and got on the #rye train. I have been super excited for #breadweek, which I found weird, because if you had asked me 4 years ago — There would be no way that I would have said “oh, I’m excited to make bread.” Me, a breadmaker?! Yeah, right. There was NO WAY I would bake bread at home. It seemed like it was too finicky. Too time consuming. Too little reward. In fact, on my wedding registry, I asked for a bread machine and some generous person got one for us (and by that I mean me). So, I began use the machine to make bread. It was the epitome of “set it and forget it.” You press a button and walk away. Now, I realize how young and stupid I was. Having your house smell like freshly baked bread every week is AMAZING! I am certainly no Paul Hollywood...yet. But I am working on it. It’s so great to create the dough out of a few simple ingredients then knead it and feel it come together. I am getting the feel of how different bread doughs should feel. I am geeking out, I know. Rye is the issue at hand, however. Now, I have never made rye bread before. I started to consult my Crust and Paul Holllywood Bake bibles to figure what the heck is #ryebread. Rye is lower in gluten protein than in other types of flour (think: AP, Strong bread, Whole Wheat, etc.), which can make it tricky to work with since building up those protein strands during kneading is a very important component of baking bread. Rye seems to be always associated with caraway seeds… and I don’t know why… I tried to find out but didn’t have much luck. Just like a bread made with regular AP or strong bread flour (all the gluten), there are so many recipes out there to make delicious rye bread. I personally love rye bread to be the foundation for a pastrami or ham/cheese sandwich...but I digress. (Here's an article about RYE) Since I had never baked Rye bread before, I had to get some new additions in my pantry. You guessed it, rye flour! I also decided to bake a couple loaves of rye as practice, in order to get a feel for the dough and to know what to expect. The diligence you need to have as a baker, I-tell-ya! I opted for a couple of recipes out of Crusts: The Ultimate Baker’s Book. First, I made a rye sour. No, it’s not a cocktail, it’s a rye bread starter. Though I do love me a rye old fashioned….mmmm, with a side of ham/cheese on rye…(again I digress)
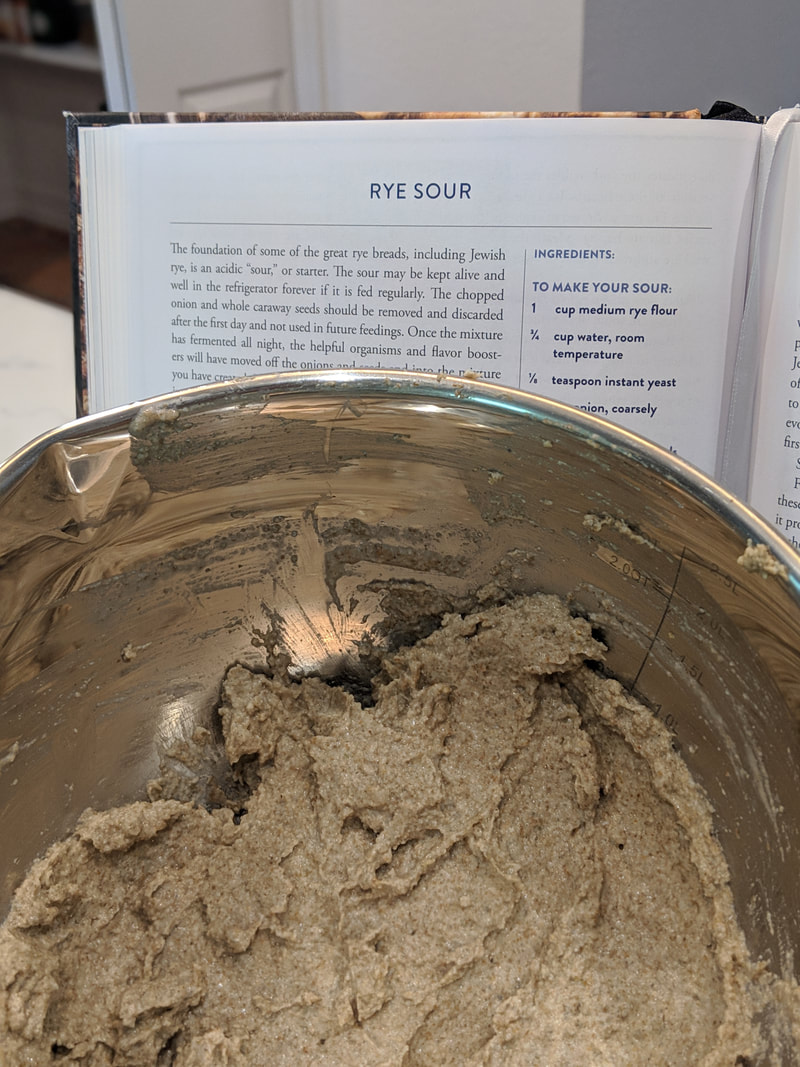
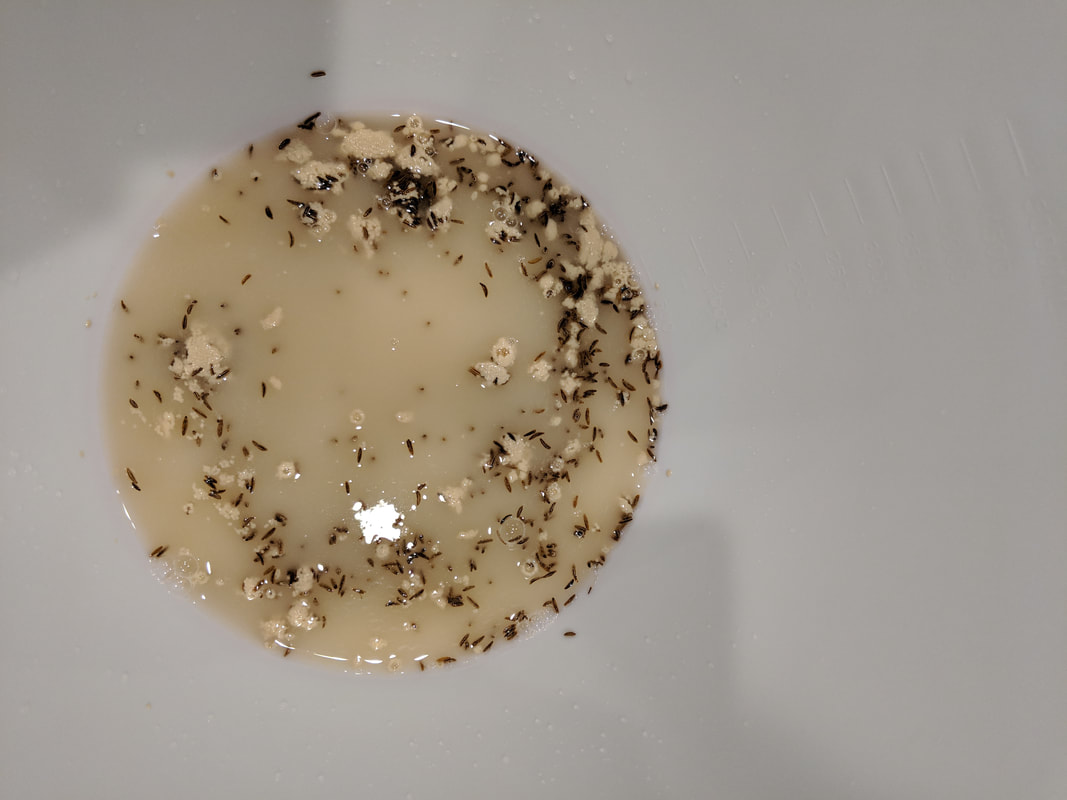
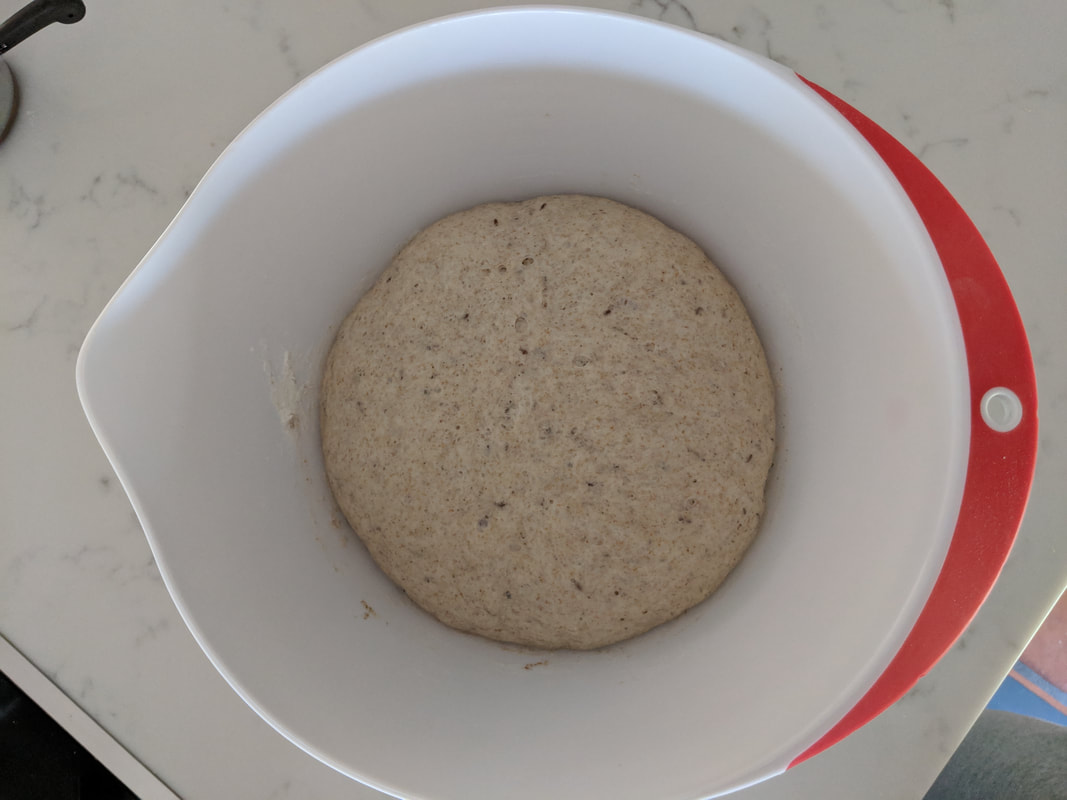
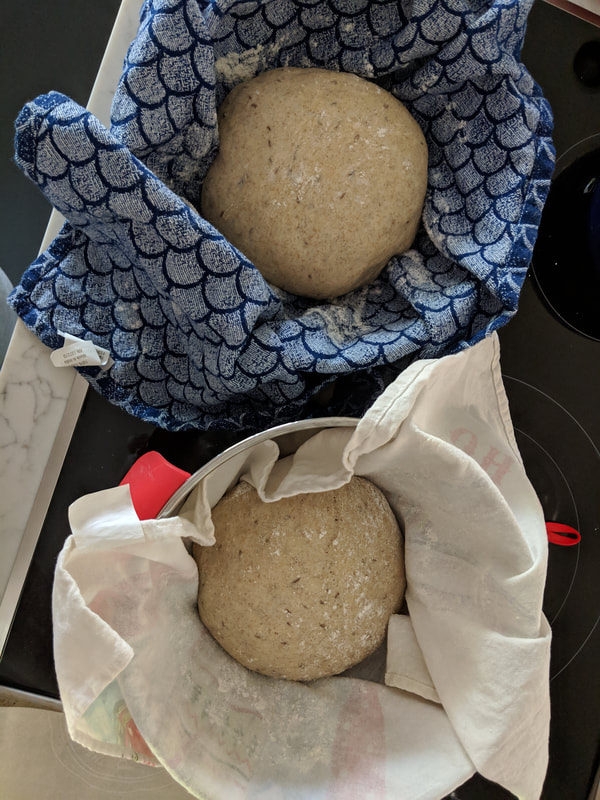
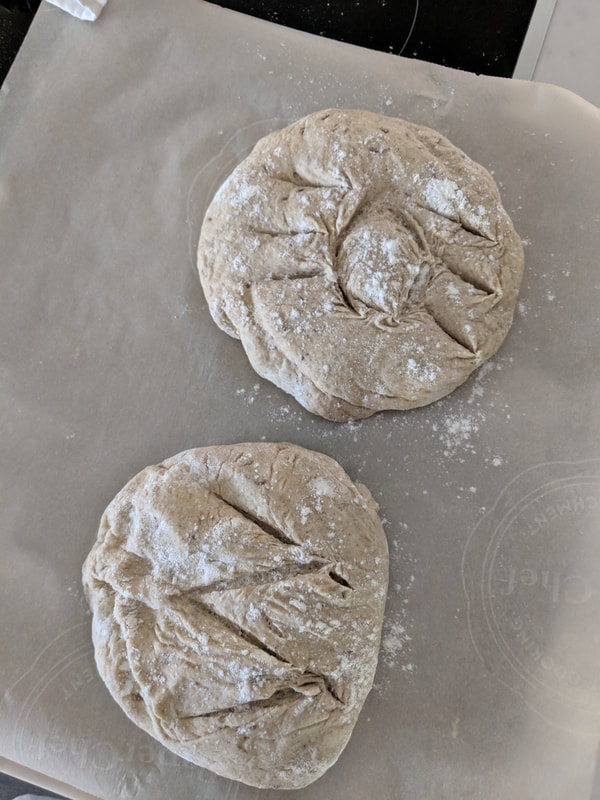
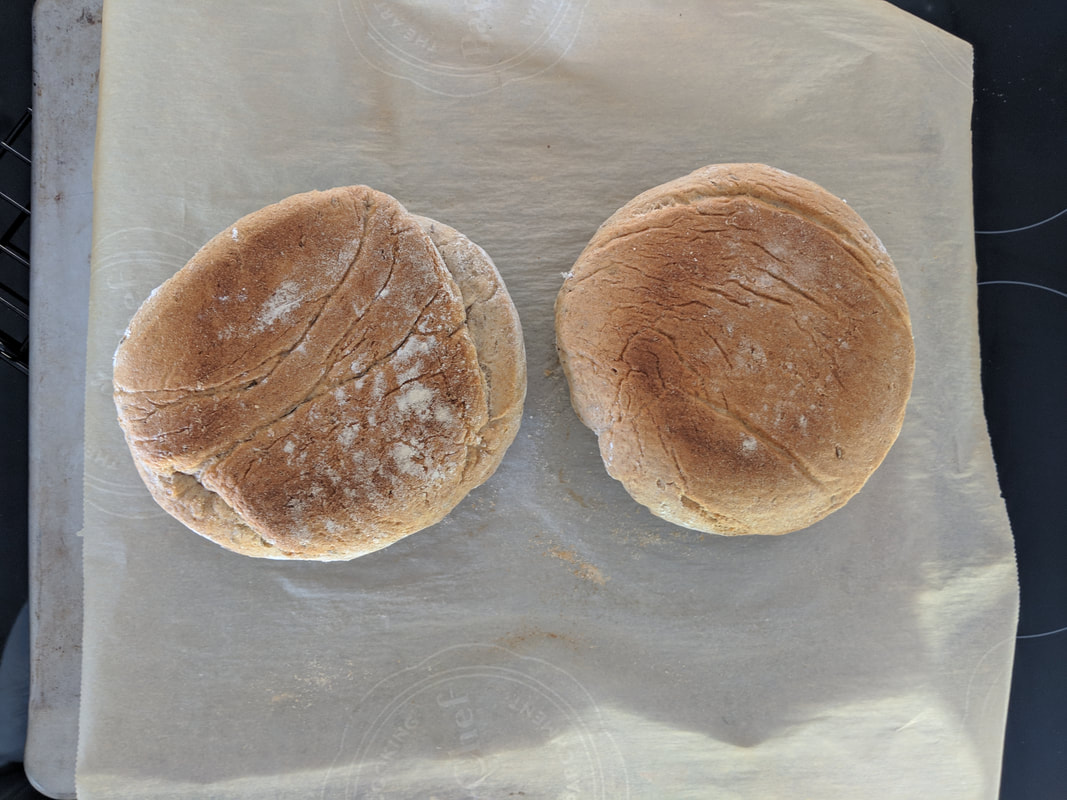
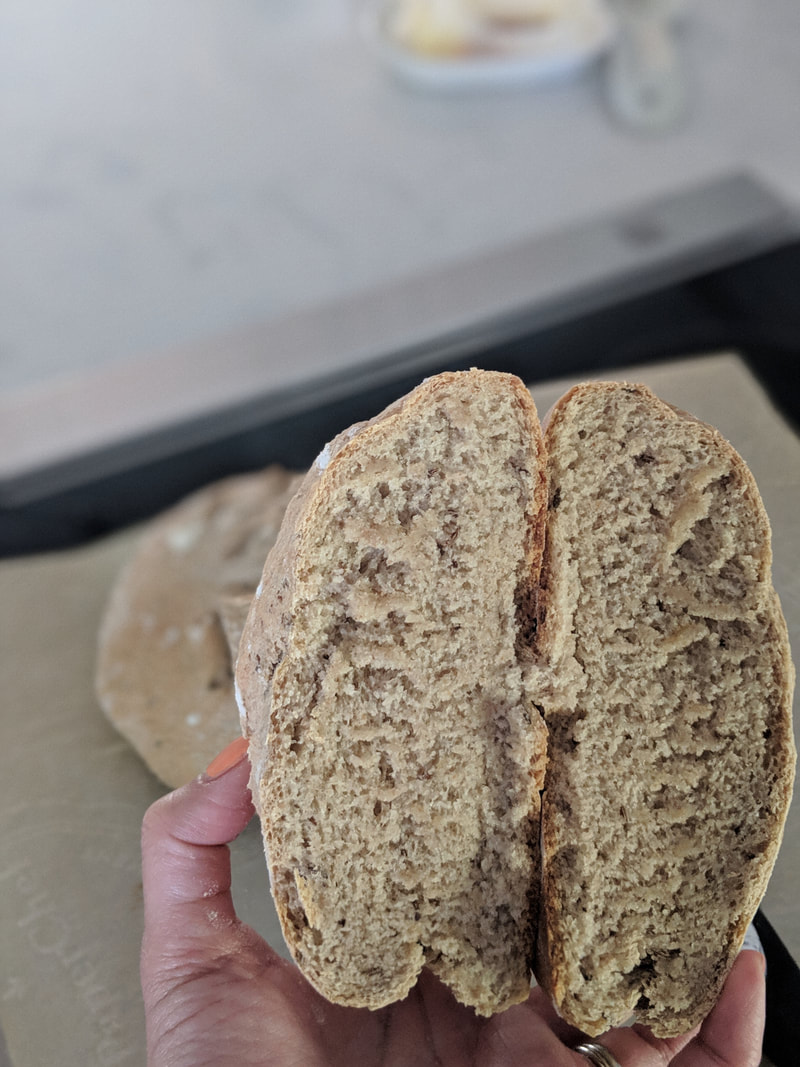
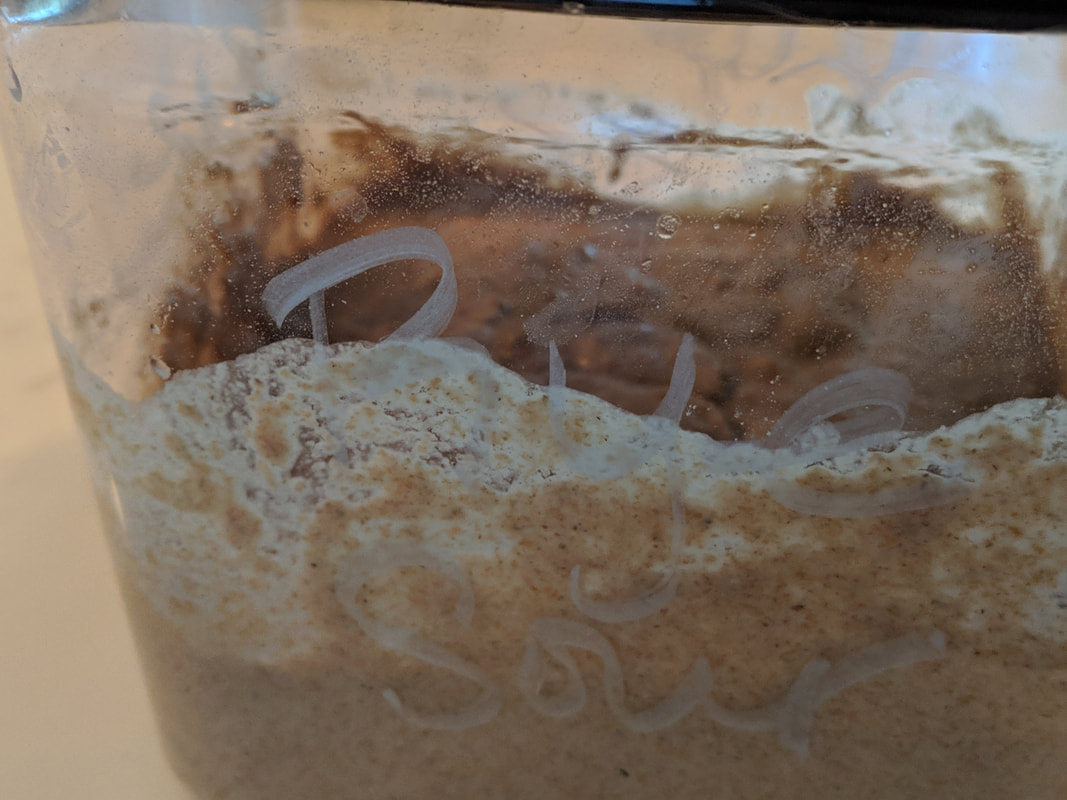
Since I had never baked Rye bread before, I had to get some new additions in my pantry. You guessed it, rye flour! I also decided to bake a couple loaves of rye as practice, in order to get a feel for the dough and to know what to expect. The diligence you need to have as a baker, I-tell-ya! I opted for a couple of recipes out of Crusts: The Ultimate Baker’s Book. First, I made a rye sour. No, it’s not a cocktail, it’s a rye starter. Though I do love me a rye old fashioned….mmmm, with a side of ham/cheese on rye…(again I digress) I have seen “sourdough starter” floating around for awhile - in my casual baking research and, of course, on GBBO. I didn’t feel that I bake enough bread to justify making a starter and mostly I have only heard of sourdough starters. How surprised I was was when I found out sourdough starter is not JUST sourdough bread… it’s used in a variety of different breads. *face palm* A starter helps produce a great leaven and build up yummy, delicious flavors in your bread. And in case you didn’t know, during the proofing stage is where the bread builds up its flavors. That’s why you don’t want to skimp on the proofing time. But a starter has had time to ferment and turn into bubbly goodness and will add a lot of flavor to your dough. Different flours will require different amounts of time to “start” the starter. But then, you can keep it like a little pet in your fridge, and “feed” it when necessary to have some on hand for all your bread baking. Now it was my turn to make a rye starter. This called for a medium white onion and caraway seeds wrapped in a cheesecloth and submerged into the mixture of flour, water, and yeast. Well, I guess you can add another episode of the "Pantry Caper" to the baking histories, because this baker did NOT have any cheesecloth in the house. But I am nothing if not a great bullshitter...*ahem*... improviser. I had a few reusable linen vegetable bags in my possession...so BADA-BING. I popped the white onion and caraway seeds in the bag and buried it in my mixture. (Side note: I now own actual cheesecloth). I left my little yeast pet to ferment covered overnight. Then, the next day I removed my ingenious linen bag and “fed” the hungry pet. I definitely could see the bubbling of the fermentation and smell the yeast, onion, and caraway seeds all mixed together. ONTO THE BREAD My practice Rye loaves. Again, I turned to my new friend, Crusts: The Ultimate Baker’s Book, for the recipe: Polish Light Rye. With my minimal knowledge of baking rye bread, I decided to follow the directions as best as I could, which is unusual because you know that is not always the case with me. To start this recipe, you activate the yeast in water with the rye flour, caraway seeds, and sugar. Ok, time for #bakefail number one: when trying out a recipe for the first time; make sure you read it correctly. Eye roll. After letting the yeast activate for about 25 minutes, I realized that I did not add the sugar to the mixture. At this point, I opted to the add the sugar to the mixture and let it activate for ANOTHER 20-25 minutes. Did I know that by doing this it would bring the demise of my first rye bread? No. Otherwise I wouldn’t have done it. But again, improvising. Now, after activating all the correct ingredients together. I realized this is basically the start of a sourdough starter. The recipe had not listed an option to “use a starter, if available,” so I didn’t use my little pet since I was being a good little baker and following all directions. But, I put that in my note to self for my actual #bakeoff bake to put my starter to good use.
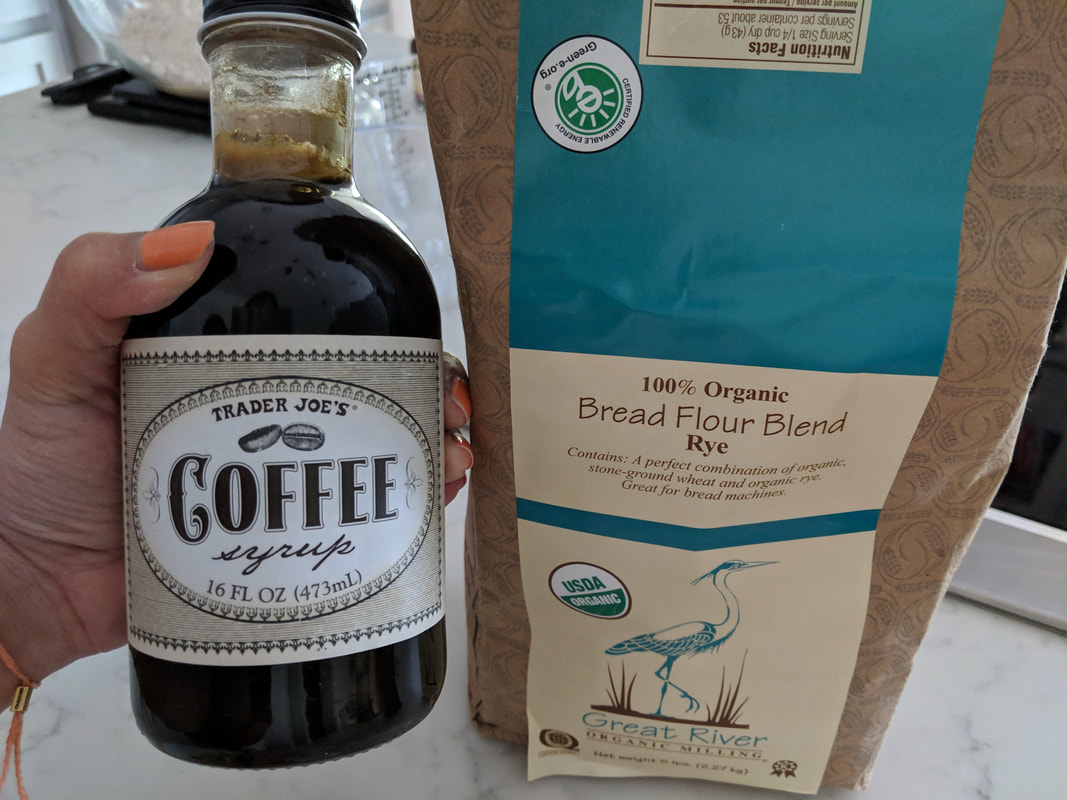
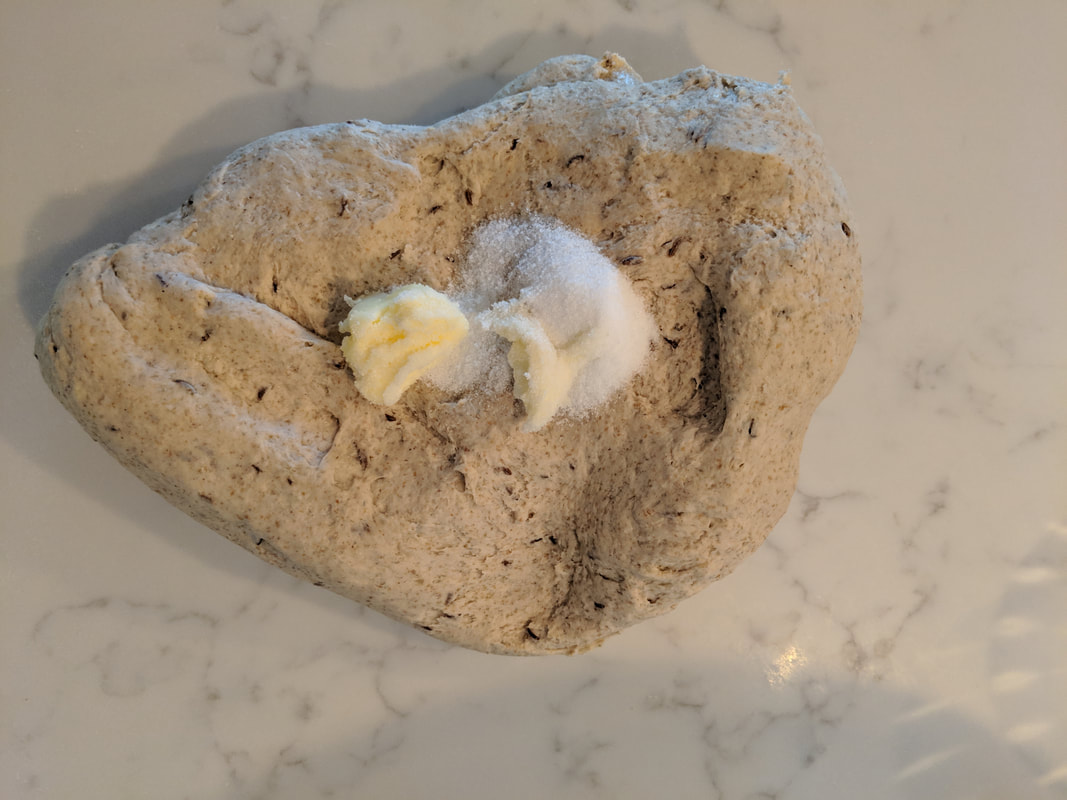
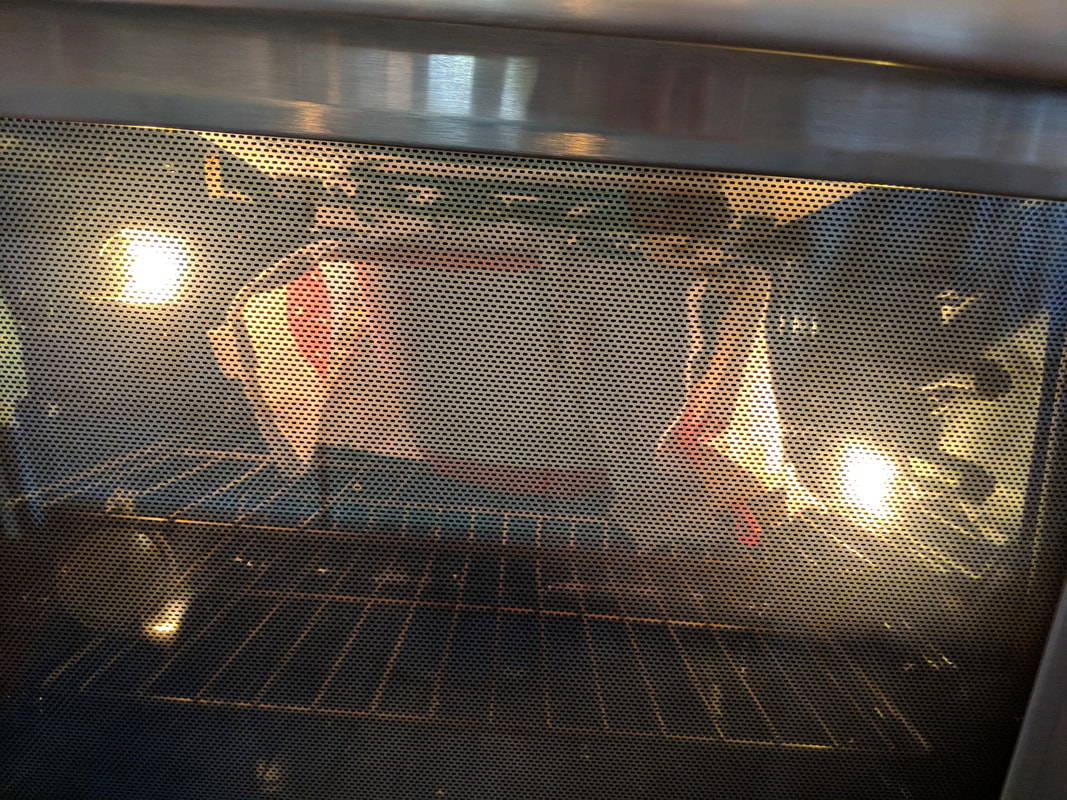
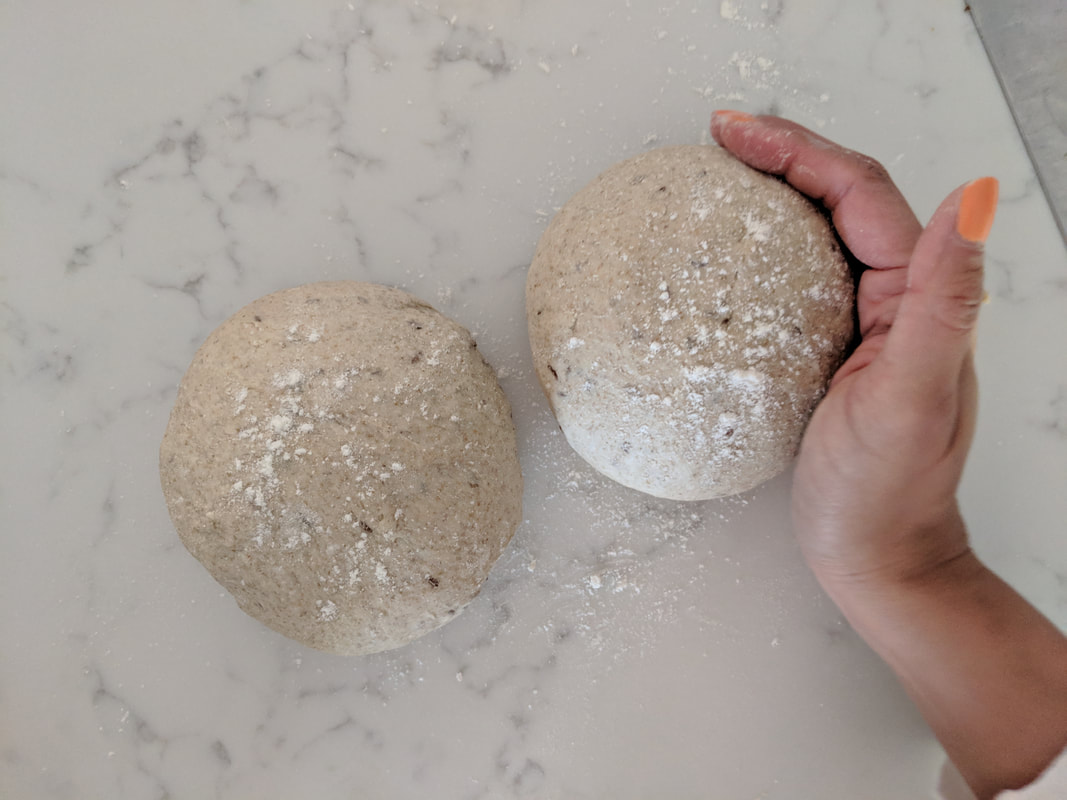
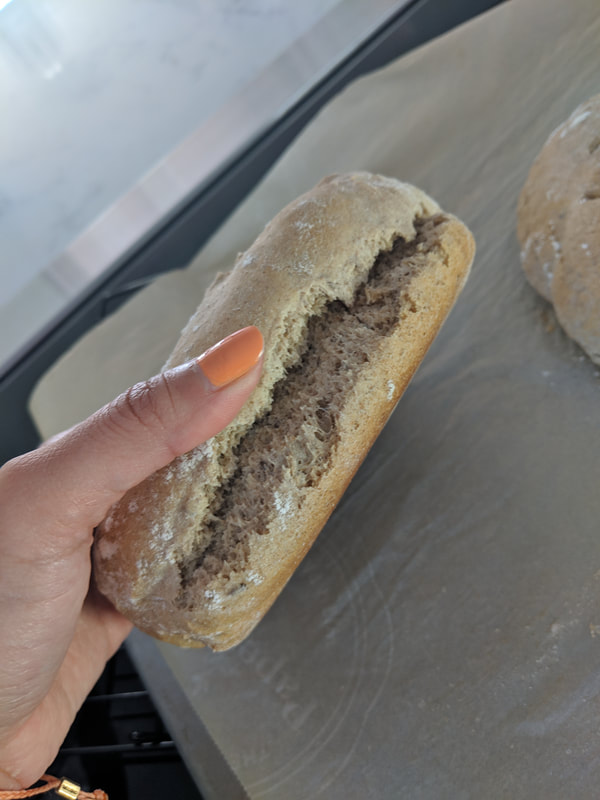
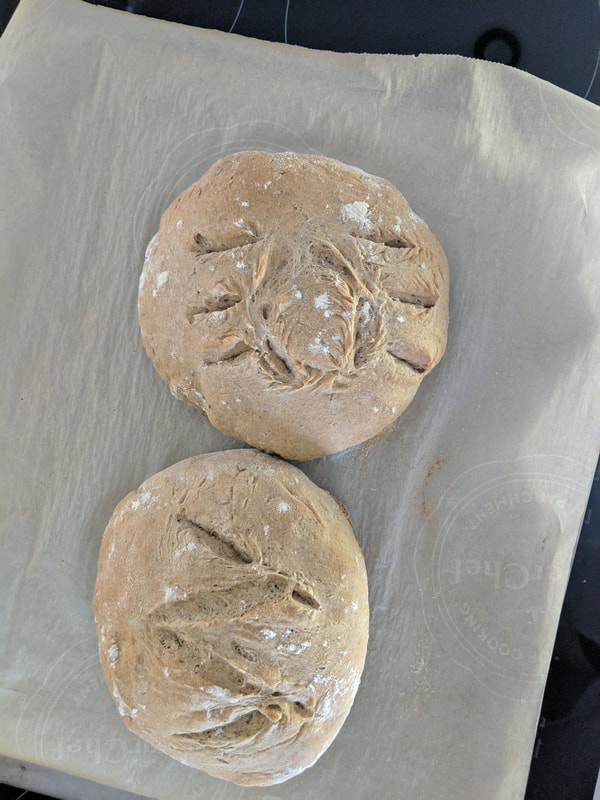
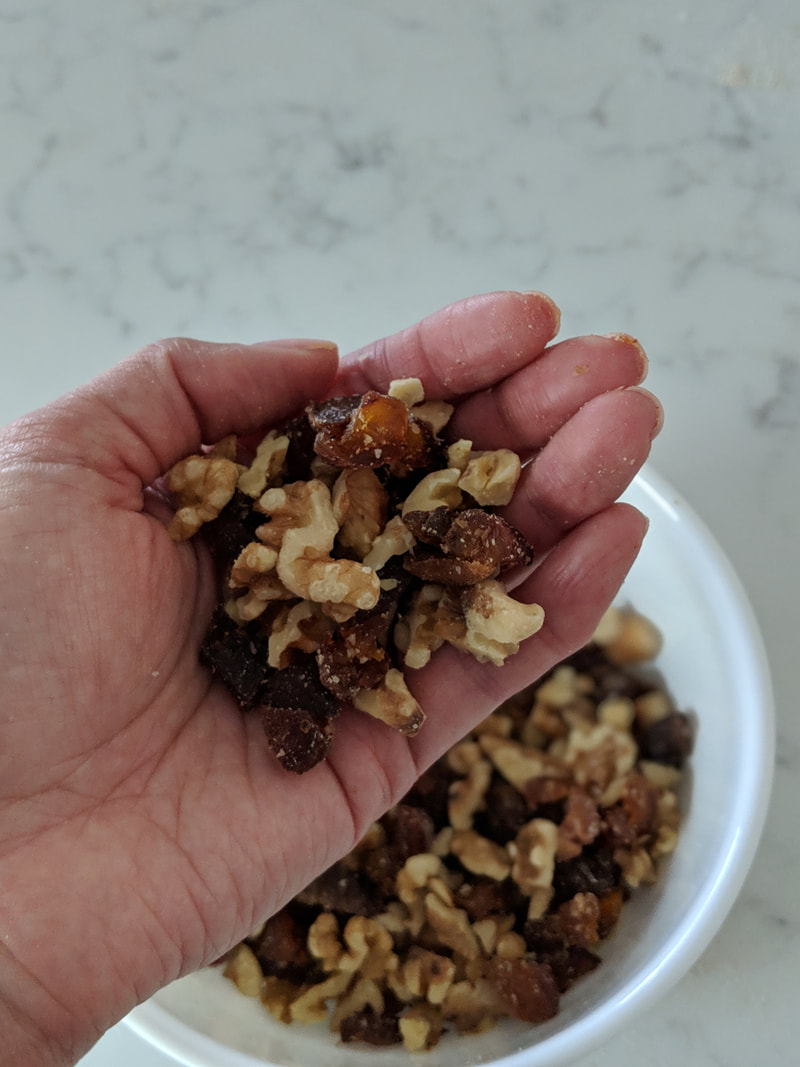
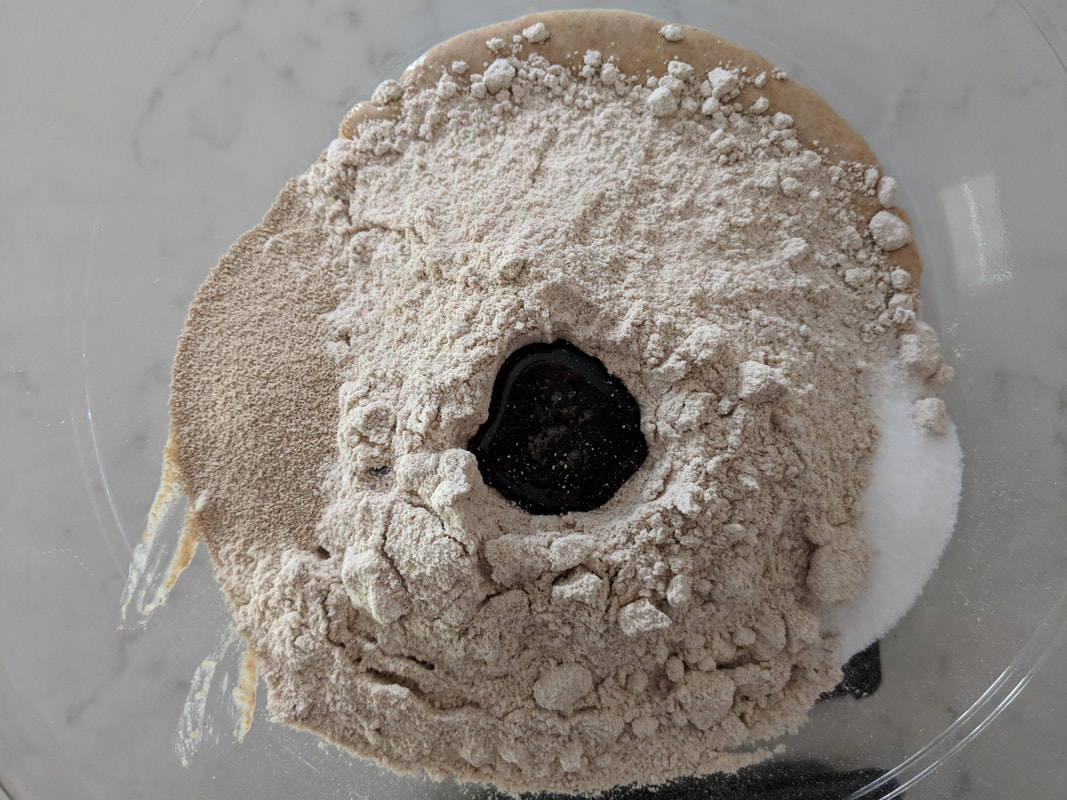
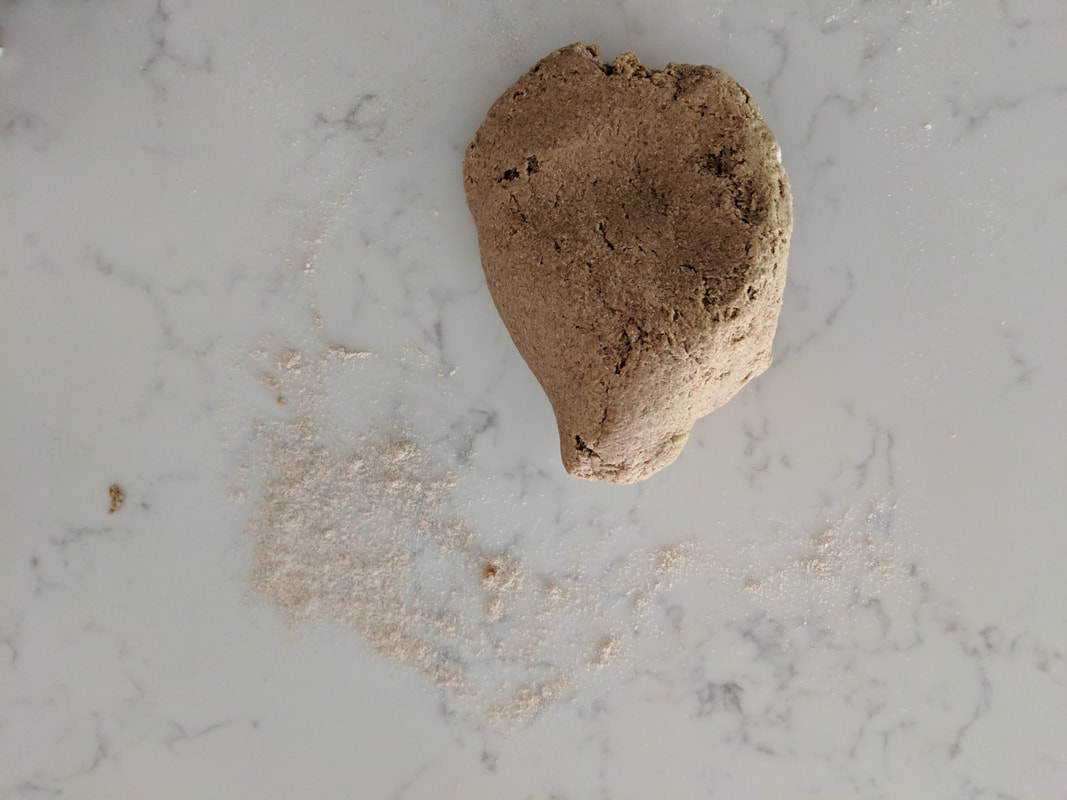
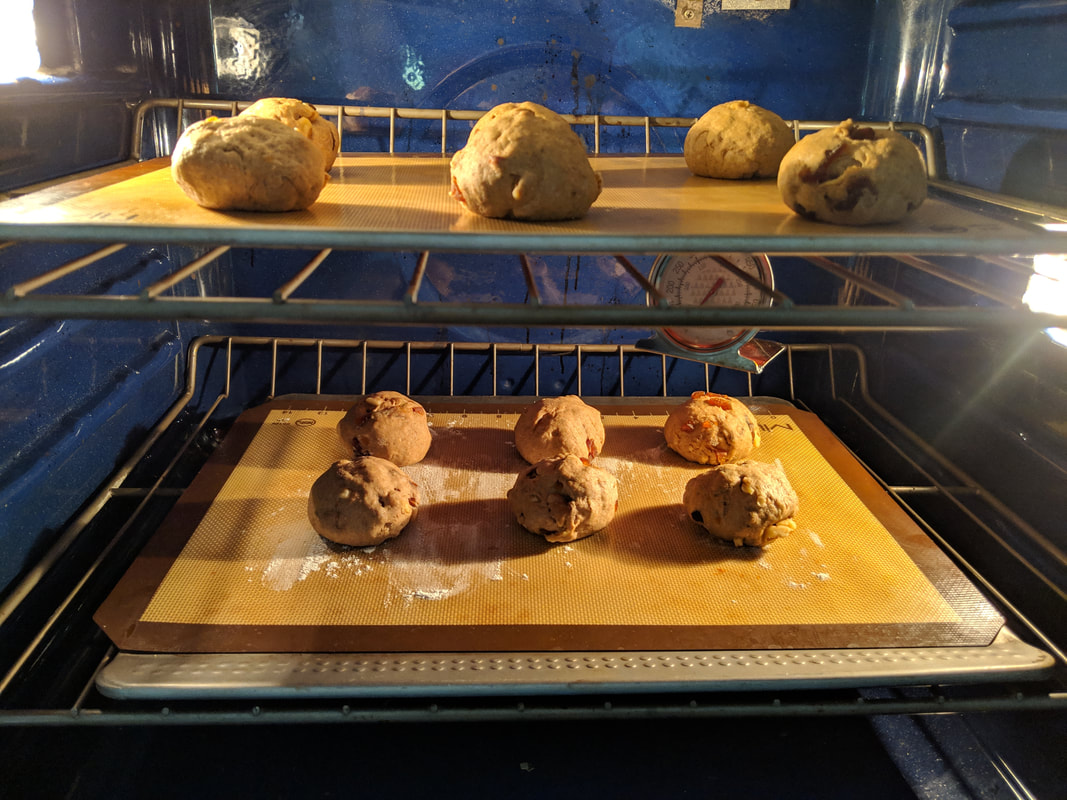
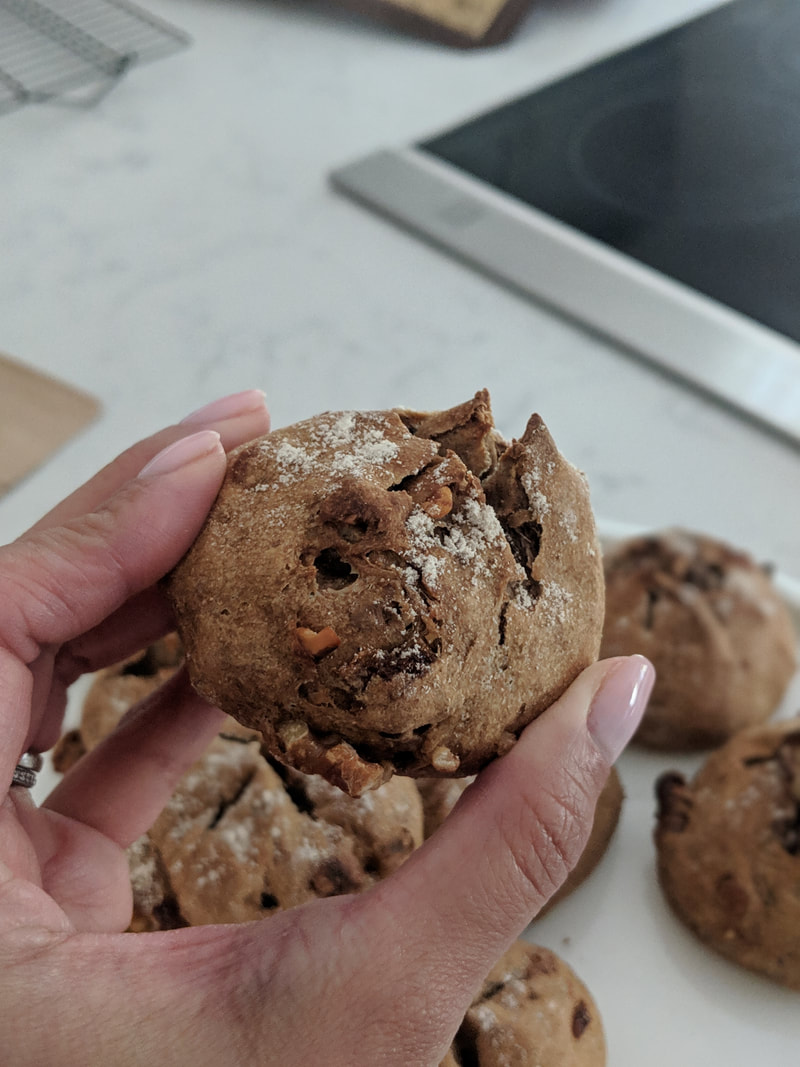
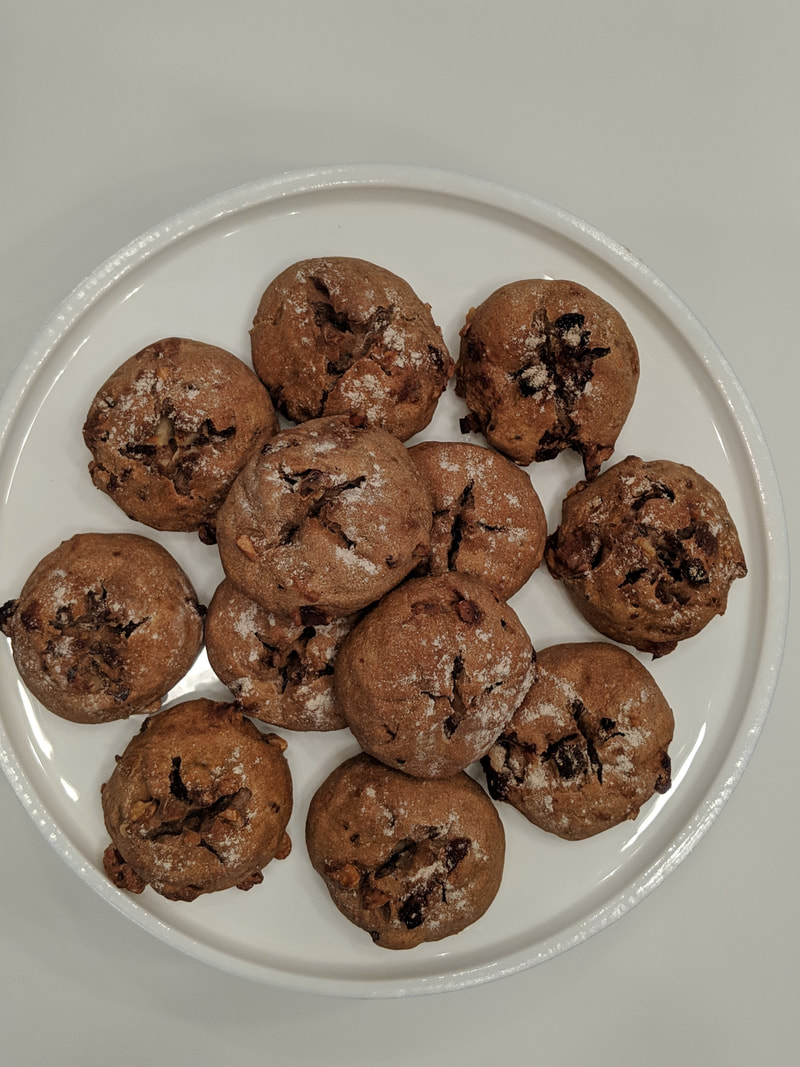
Let's get "ROLL"ingNow, that I had a practice rye under my belt it was time to make my dozen rye rolls. For this I turned to the king of bread himself, Paul Hollywood. In addition to baking my way through GBBO, I want to bake every single recipe in this book too. I might as well utilize any chance I get. #overambitious Unfortunately, I was not practicing baking rye rolls with different flavors because, well, a girl just didn’t have the time. In rewatching the Season 1 episode, I made sure to note the flavors that the bakers were using. I decided that my rolls would be walnut, apricot, and coffee. In researching rye bread recipes, I have found the addition of treacle or molasses is always an option, but not a must. So I figured this coffee syrup just sitting in the pantry that was begging to used, would be great. Mr. Hollywood’s recipe called for treacle (yummy, yummy treacle) and I felt that the coffee syrup would be a good substitute due to its dark color and the addition of some sweetness. This time I was sure to use my rye sour that I had made the week prior. I couldn’t just let it sit there and not use it! I decided to use 250g of the starter and then 250g of rye flour since the recipe called for 500g.
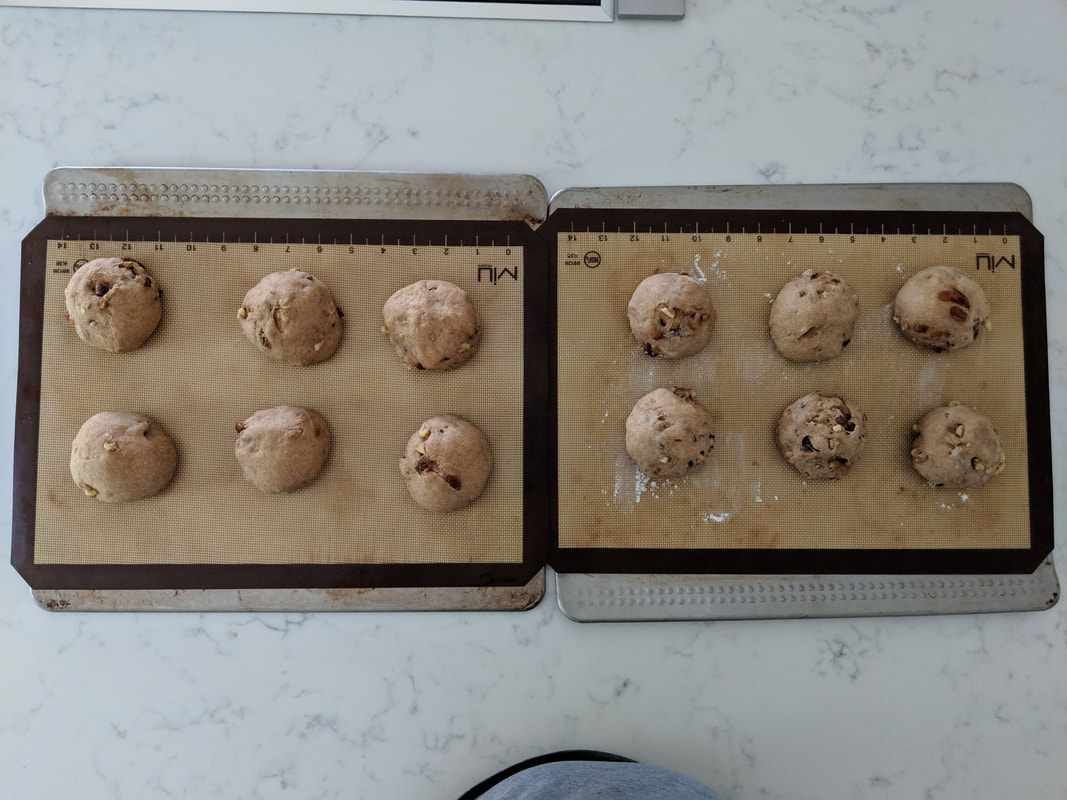
As far as flavor goes, my flavor combo works well, but I couldn’t really taste the coffee. And I love me some coffee. I could smell the coffee during the second proof, which gave me high hopes, but the flavor wasn’t there upon tasting. Just like judges in the tent always warn: if you say a flavor is in your bake, it better be IN YOUR BAKE. So next time, more coffee flavor. The texture of the walnuts (which I toasted before adding to the dough) and apricots, was really good. But, I should have chopped them just a teensy bit more… I had a couple of big chunks of both in bites, so it made it seem unbalanced. Could I really tell that I used a “starter?” No. But then again, I am not sure what I should be looking for in terms of taste. I felt that the rye flavor was abundant and I call that a good sign. My rolls seemed a little small so I think next time making a bigger mixture, and also adjusting proofing times. Also, the steam! While I had steam in the oven… I should have the steam going BEFORE adding the rolls. Darn! Next time. Always learning. As your reward for making it to the end of the blog... please enjoy a video of me eating a roll (below). Until then, Happy Baking. Happy Eating. Happy Repeating. 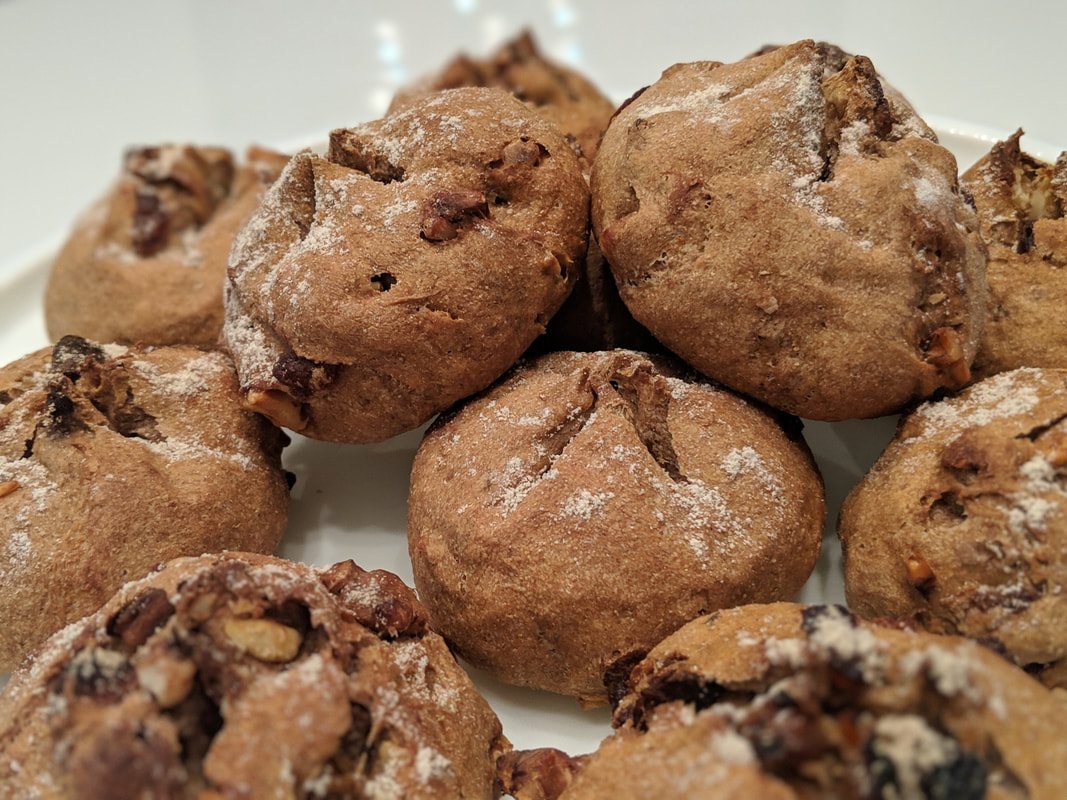
1 Comment
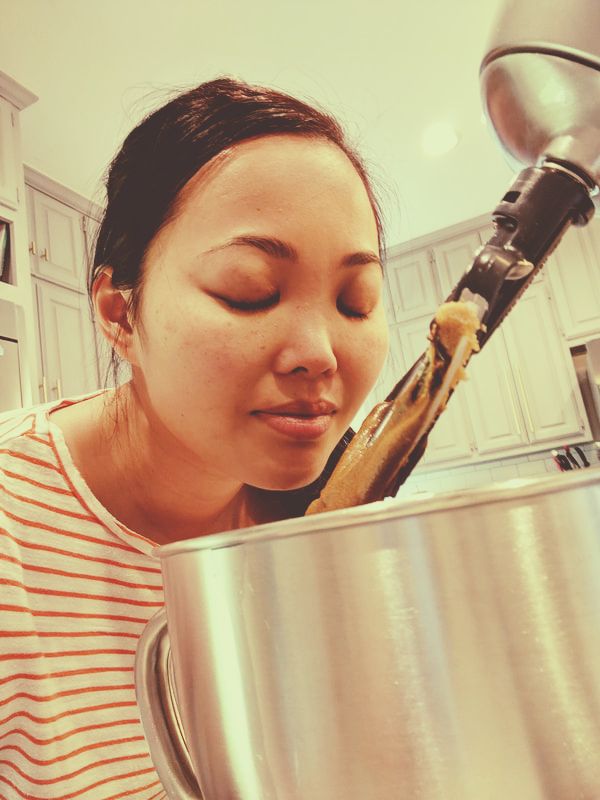
I feel so accomplished in FINALLY finishing my first biscuit showstopper. I am not going to lie, I was feeling a lot of resistance to doing this bake… even though I practiced this biscuit bake, which is not always the case. The reason I was feeling a lot of resistance to this, is that I am just not that kind of baker. You’ve heard me write about it before but I am not that strong at decorating in detail. And I think contributed to the anxiety of this showstopper. But the good news (!) is that I feel like I learned a lot by doing this bake. And I learned a lot about myself as a baker. Things I learned:

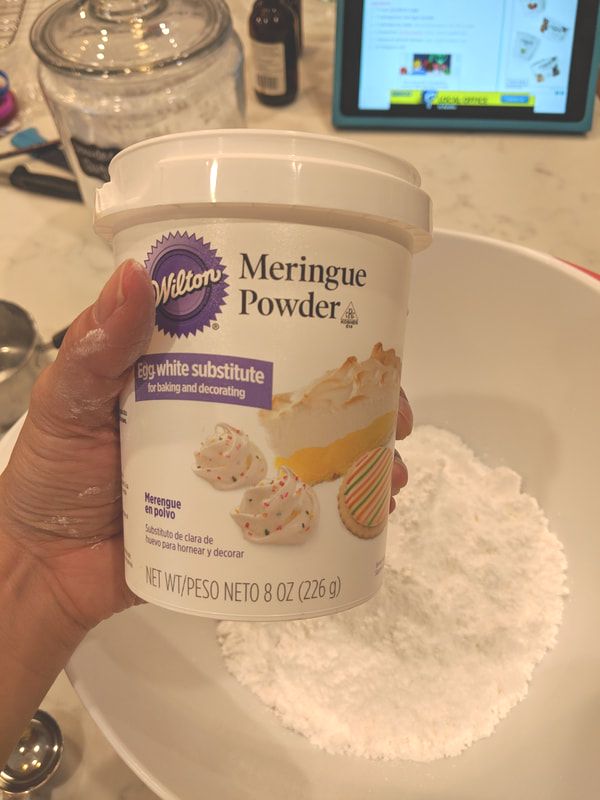
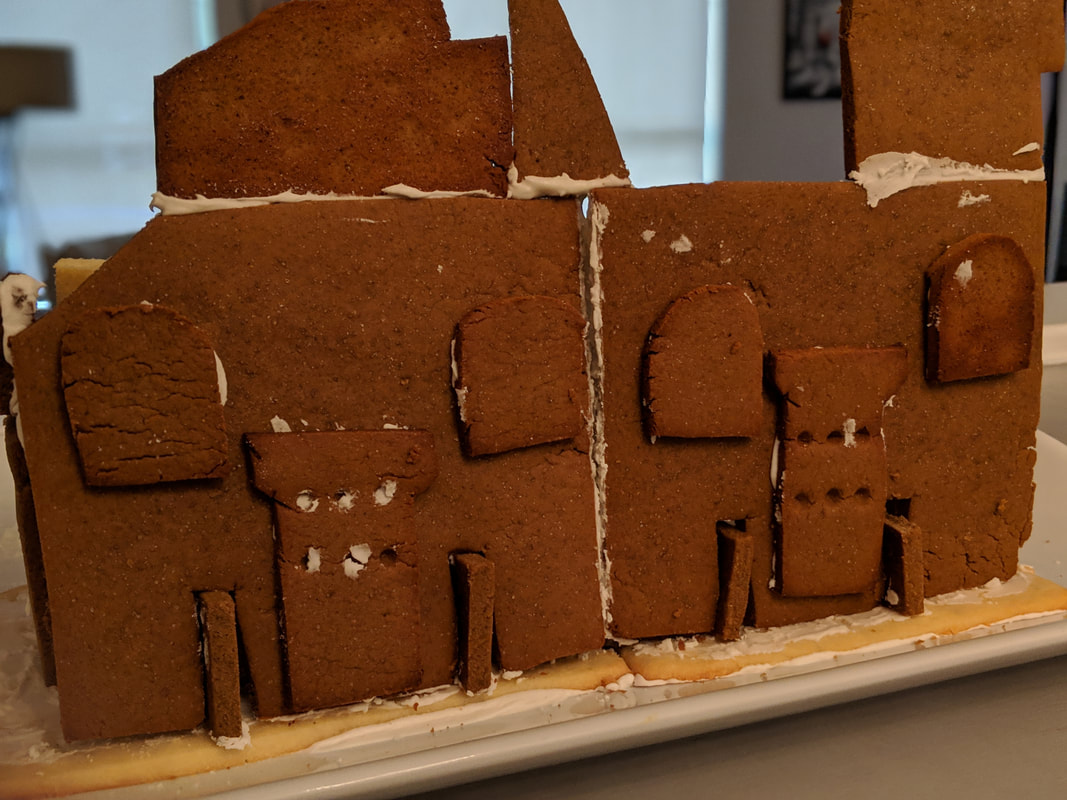
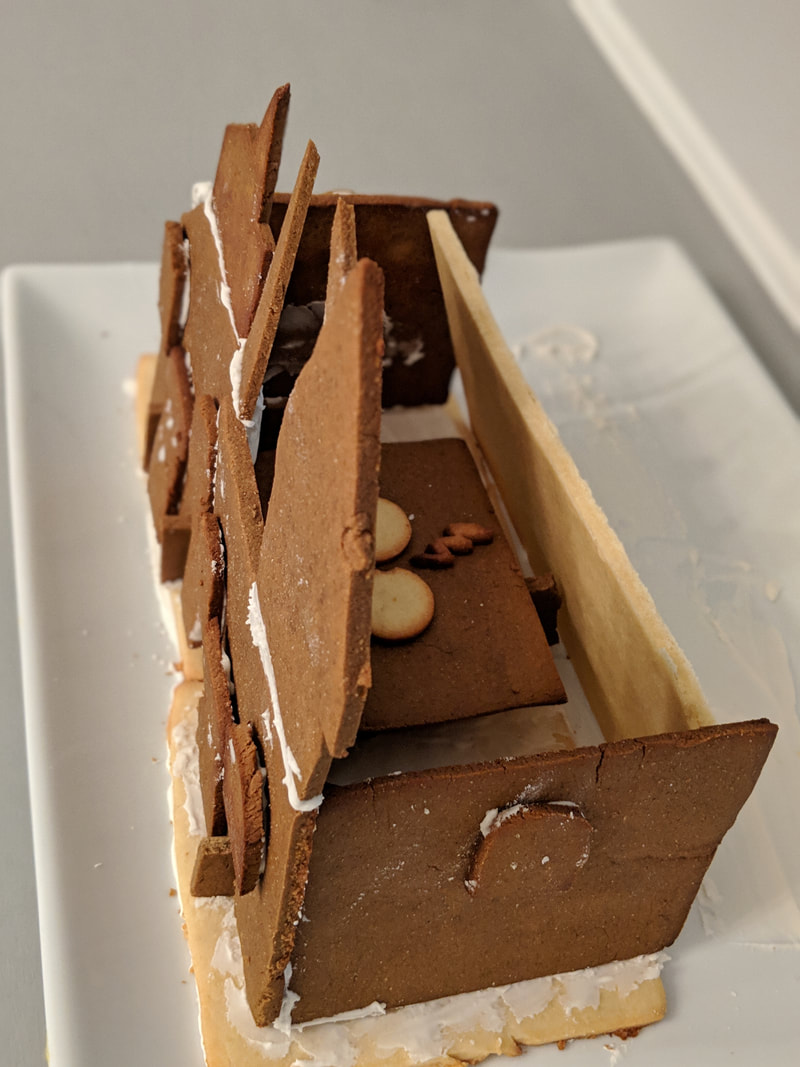
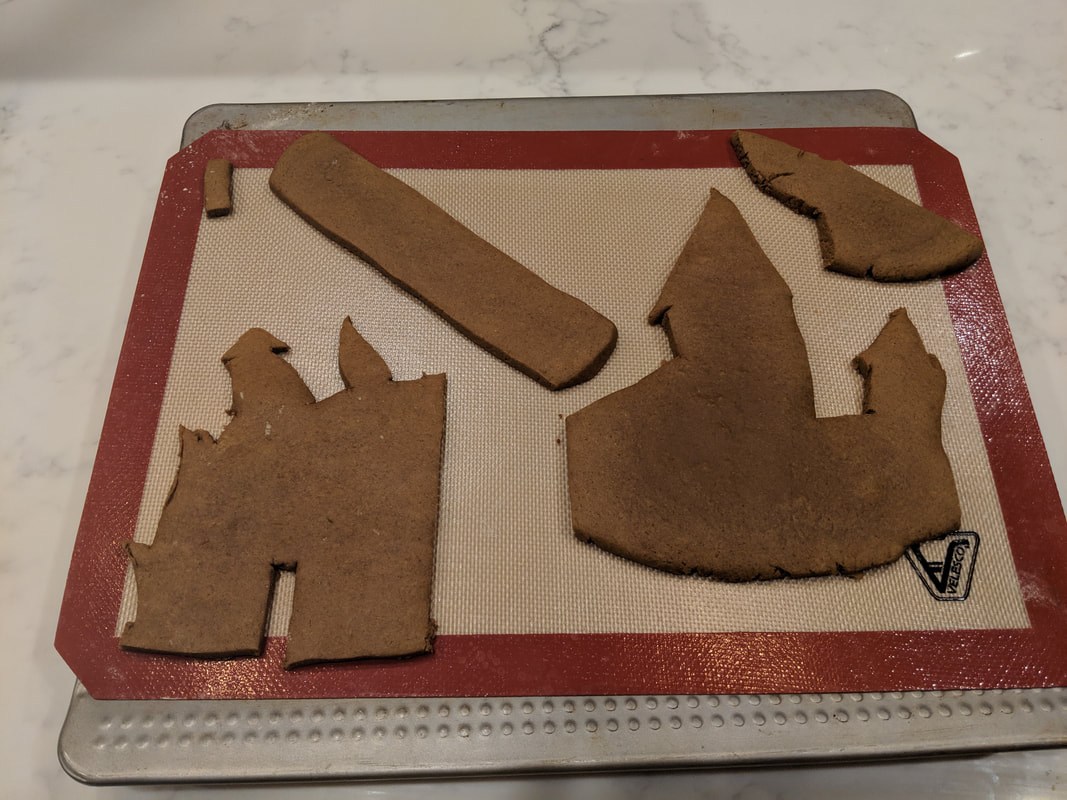
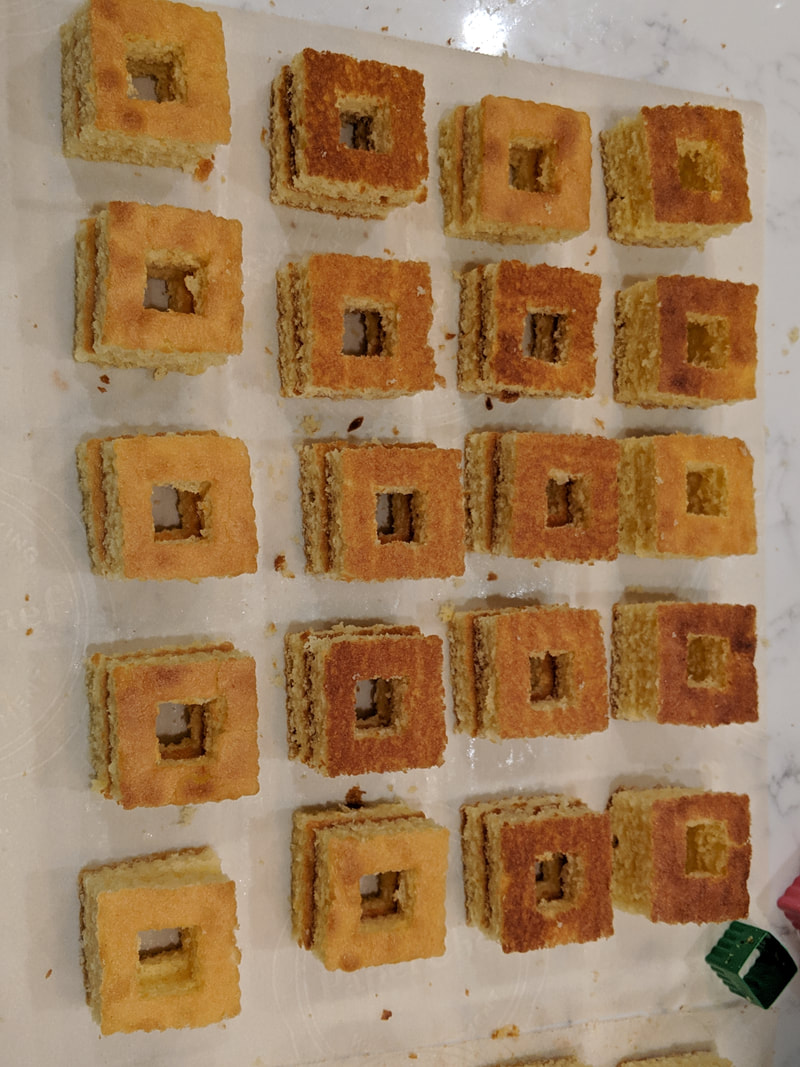
I knew that my constructing skills were going to be pretty rudimentary, so I decided to take some pressure off of myself and do A SECTION of Hogwarts, instead of trying to do a whole silhouette. I even thought at one point I would do the same section on the front and back so you would see it either way… but I realized that I wouldn’t have enough biscuit dough to do that. And honestly, I didn’t want to make more (and I didn't have the time). I decided that I would fake some relief work and cut out windows and such and paste them on the sides of the sculpture so it would add a little extra somethin-somethin to it. Confused by the syntax of "relief work?" This is what I mean: Relief is a sculptural technique where the sculpted elements remain attached to a solid background of the same material. The term relief is from the Latin verb relevo, to raise. To create asculpture in relief is to give the impression that the sculpted material has been raised above the background plane. (Brought to you by: Wikipedia). Can I just tell you how cool meringue powder is?! Totally awesome to use as a edible and delicious (and highly sugared) glue. Helping my “relief work” to stay in place.
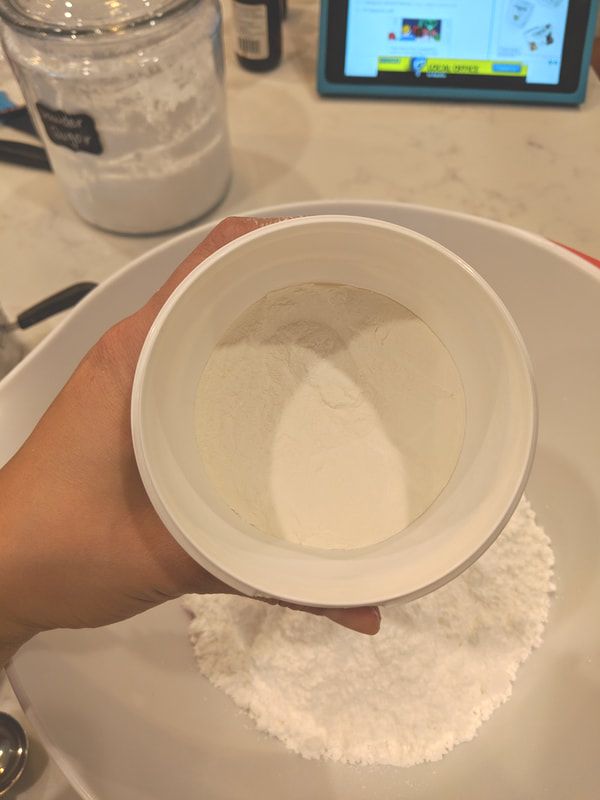
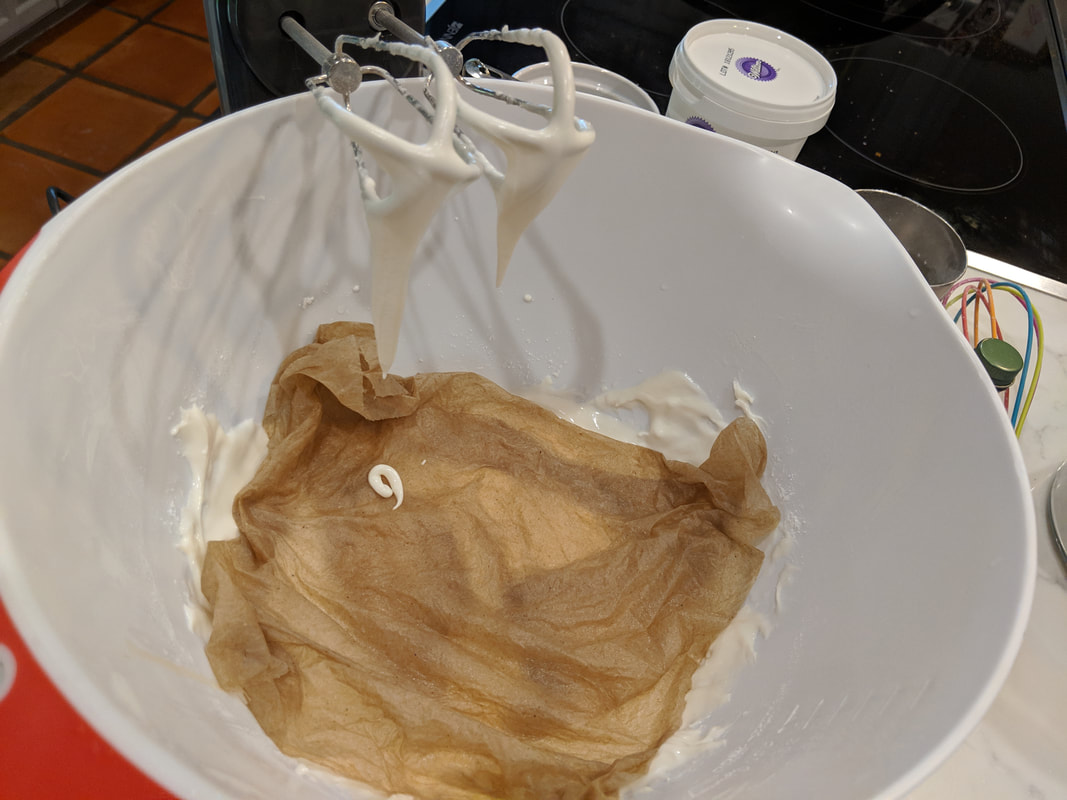
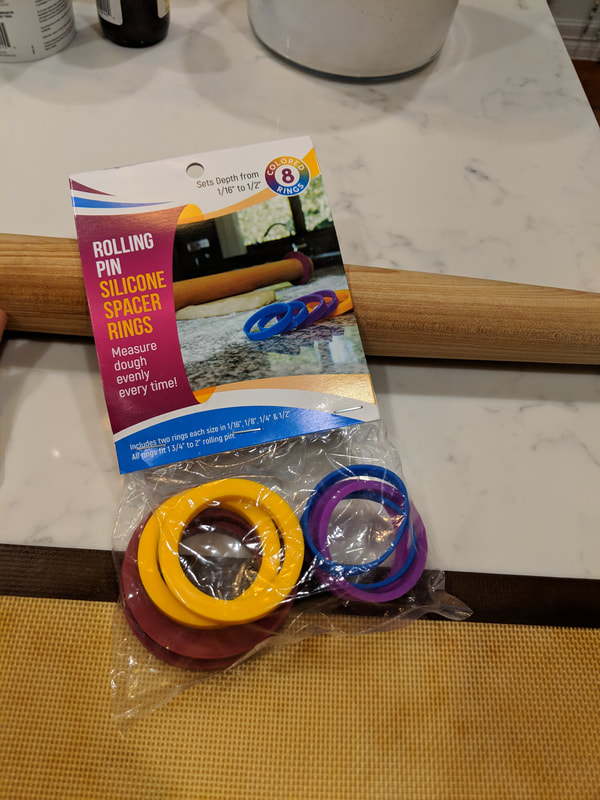
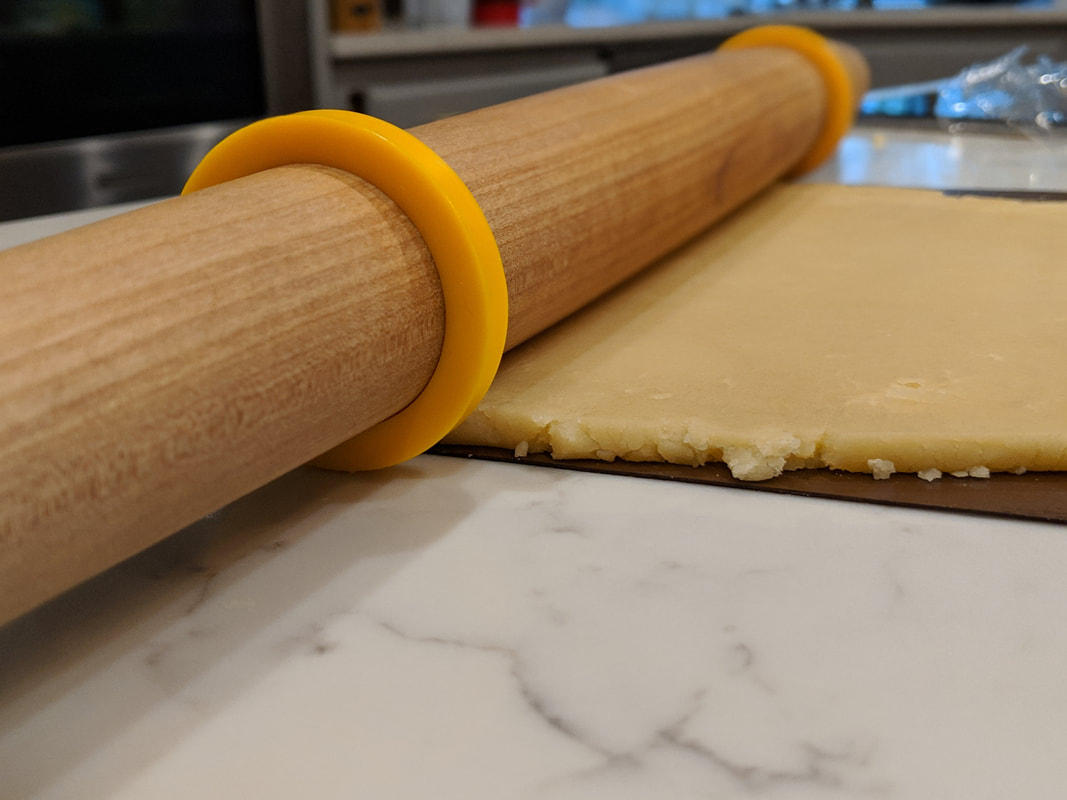
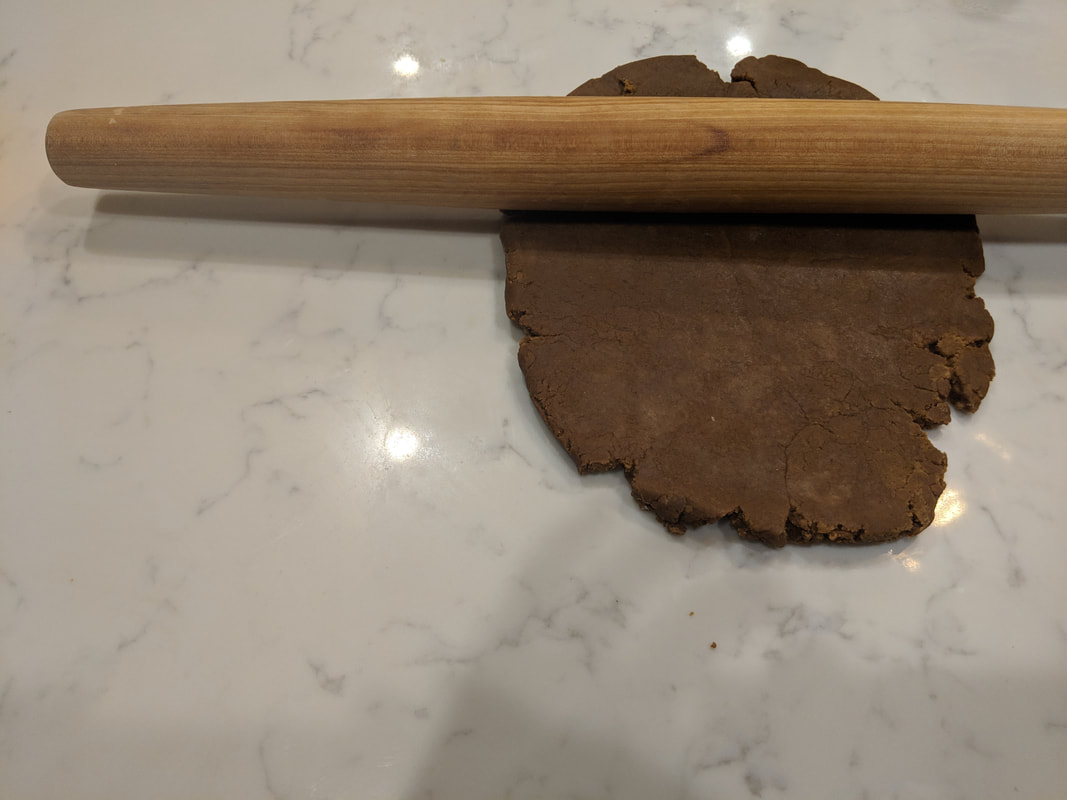
You can find the recipe I used for the royal icing below as well. I opted for a recipe that did NOT use corn syrup because... gross. And I did not have any corn syrup in my pantry (I definitely did not have time for another Pantry Caper). As I was doing research about royal icing, because that is what one does when embarking on making a 3D sculpture scene, I learned a trick to keep royal icing from drying out: place a damp paper towel on top of the icing when not in use and (!) add coloring before thinning out to decorate so that you don’t over-thin the icing. Love learning #bakehacks. I kept my royal icing pretty thick as I was using it to paste together biscuits. I had enough left over for any decorating that I would need to do. In theory I would have then added a tablespoon of water at a time to thin the royal icing out, but... I didn’t need it for further decorating (keep reading). But I stored the rest of the icing in a mason jar so I can use it on some cookies (that I WILL NOT be making a sculpture out of) later. Not only did I get to learn some #bakehacks but I also got to use my new baking toys: my rolling spacers! These are the ones that I got and I think they worked great! I felt that my biscuit thickness came out really even… I am super excited to use it while rolling pastry. More excuses to bake. #bakerproblems
You can see in my video documenting my construction, the moments when I was trying to figure it out on the fly. There are a lot of those moments. Also, see if you can pinpoint the actual moment when I just decided to say "good enough" to figuring out what to do with the inside of the structure. If you don't blink you can see when I pop a little biscuit in my mouth too. :)
Confession time. By the time I was done with constructing it… I honestly was like, “I’m good” and I didn’t even bother with making cream cheese frosting to do some decorations. I had a notion to make it Hogwarts in winter because who doesn’t love Hogwarts in winter?! Instead, the end product is a little more like a vague representation of a castle made out of edible things. To paraphrase a classic movie: "It's a little like a Monet...looks good from afar, but up close it's a bit of a mess. #clueless. BUT I AM STILL PROUD. Remember all the anxiety I had about doing this bake. Well, I did it! Do I wish that I had the follow through to make it as pretty as it could be? A little. Do I feel bad about it? Not really. I know that I have grown as a baker and I know that I don’t ever want to do a 3D biscuit anything again… but I am excited to have the holidays roll around again so I can make awesome gingerbread cookies with treacle and the cream cheese frosting...mmmmm.  My Monet, according to Cher. In case you are wondering...the biscuit structure is STILL standing 24+ hours later. It didn’t collapse! No, I am still not going to eat it. But I do feel like making more shortbread biscuits (perhaps, blueberry shortbread?!) and those I WILL eat. Bread Week is next. Until then, Happy Baking. Happy Eating. Happy Repeating. RECIPE LINKS Gingerbread Biscuits:
https://thekitchenpaper.com/gingerbread-cookies-wont-spread/ 3D Biscuits https://www.bbc.com/food/recipes/3d_biscuits_29555 Royal Icing https://www.designeatrepeat.com/royal-icing-for-sugar-cookies/
Above is an accurate depiction of me. I have eaten many BISCUITS as of late. Then, I got hit with a stomach virus which put me waaaaay behind in my baking game. Apologies for the lateness of this post. But, I am back to being a baking and eating monster.
This is one is going to be pretty short and sweet (like pastry… get it?!). I wanted to show my process and progress of my way to the #showstopper to close out my first biscuit week. Truth be told, initially when I thought about this showstopper (back during Thanksgiving), I got really nervous. Then, a light bulb went off in my nerdy mind: (Ding!) HOGWARTS. I can make a Hogwarts 3D biscuit scene. Fast forward to February 2019…. Me: FACE PALM.
What was I thinking!? I’ve never made a 3D biscuit scene. Hell, I haven’t even made true English biscuits. But since I am of a stubborn stock, once I get something in my mind… I can’t let it go.
When I was young and innocent, back during Thanksgiving 2018 (yeah, ok, I know it was only a few months ago), I gleefully googled “Hogwarts images” and sent them via email to myself. As I opened these images up this week… I was like "#accio time machine"… to take me back to when I thought making a 3D biscuit scene of Hogwarts was a good idea, so I could slap myself. But I haven’t graduated from witchcraft and wizardry school yet, so I am stuck with my stubbornness and trying to figure out to craft Hogwarts because this badger won’t quit (#Hufflepuff, baby!).
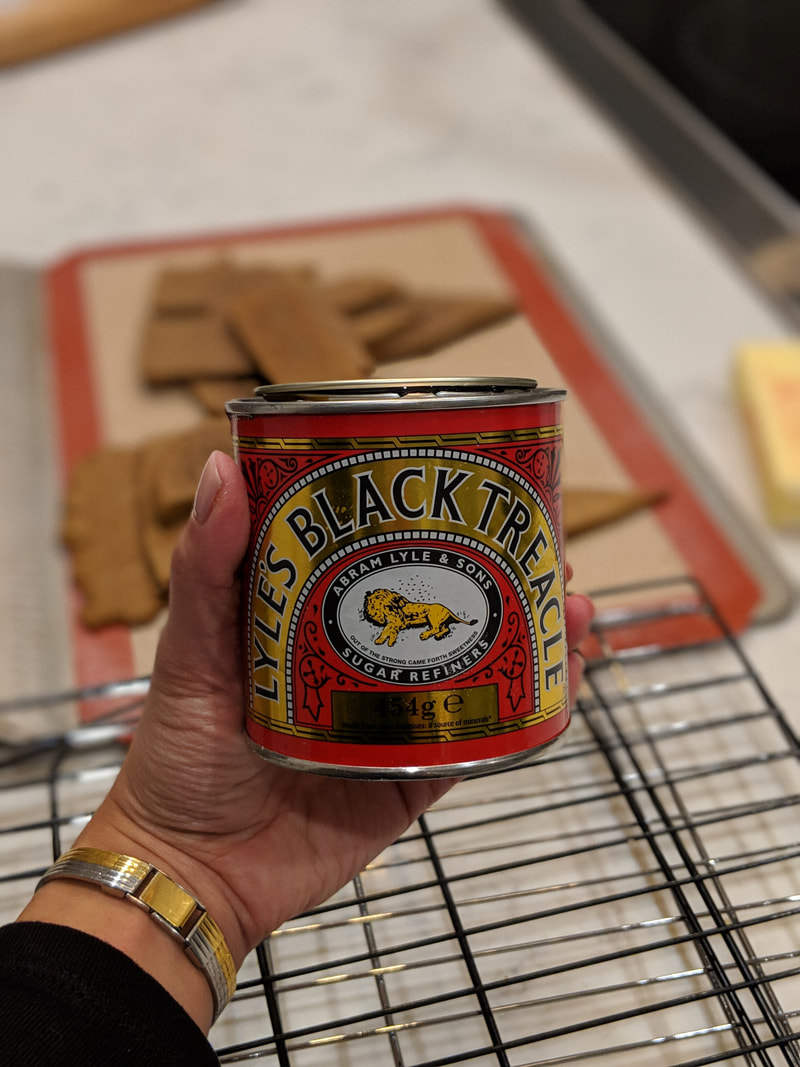
Treacle, again, something that I have never tasted or used. But now I must use in as many recipes as I can. I remember that I ordered this from the Amazon box during the summer and it took FOR-EH-VER to get her from across the pond … I didn’t have prime option for that apparently. It was a nice little surprise that showed up on my doorstep when it got here. Anywho, the flavor is a very rich, deep syrup. A little woody and earthy...in the best way possible! Definitely an umami booster. (According to Dictionary.com - Umami: a category of taste in food (besides sweet, sour, salt, and bitter), corresponding to the flavor of glutamates, especially monosodium glutamate.) Cue brain: trying to find excuses to use treacle.
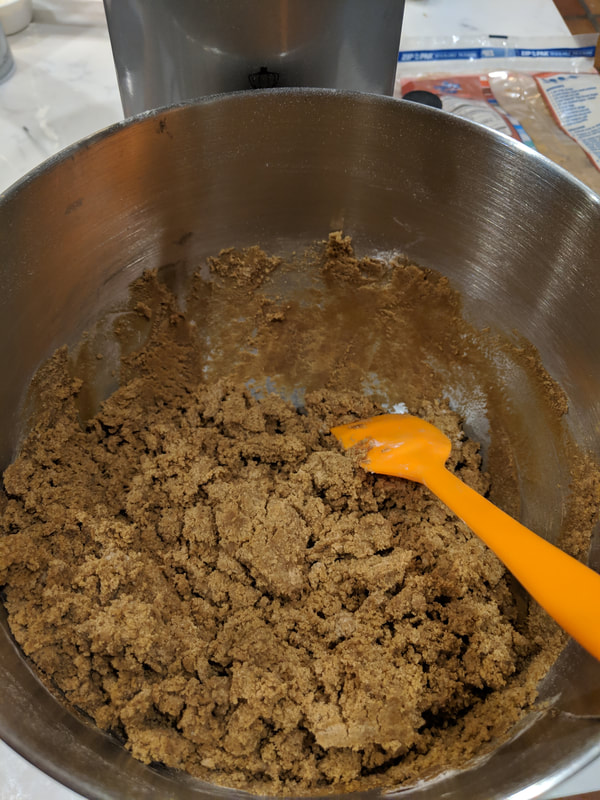
The flavor of the dough was packed full for flavor and warmth from the spices. Next time, I might try messing around with the recipe and adding fresh ginger… hmmmm. 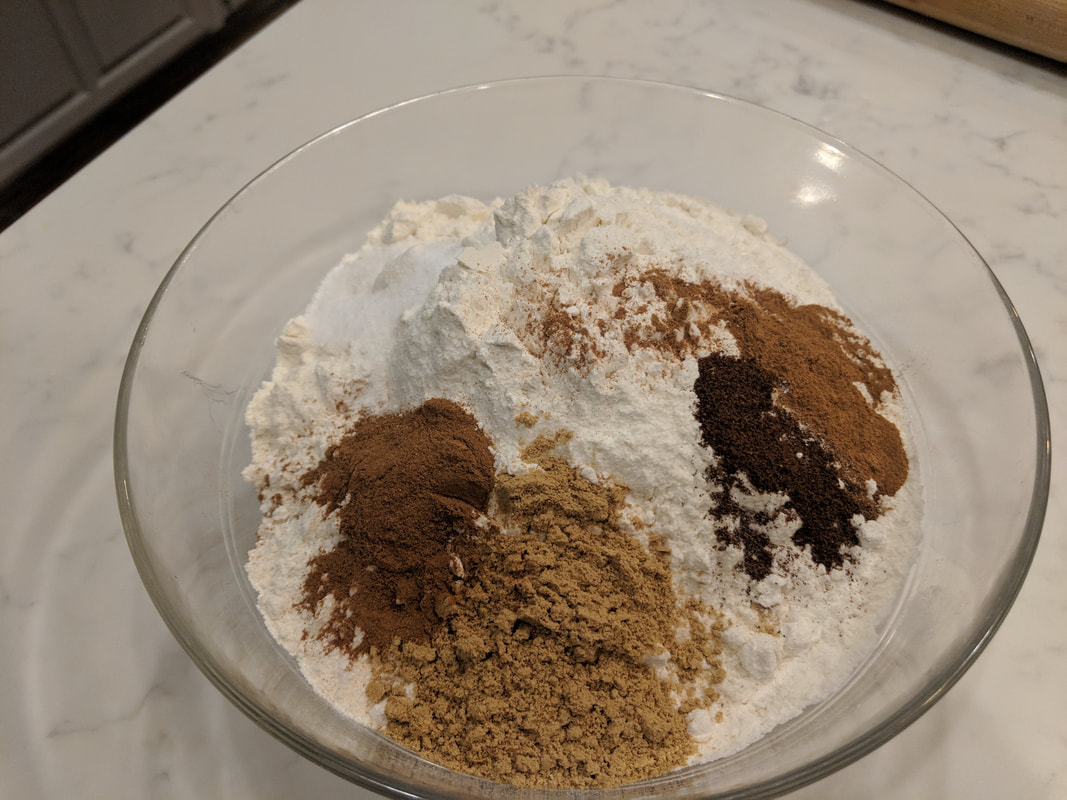
Look at those beautiful colors in a bowl. Like a good eyeshadow palette.
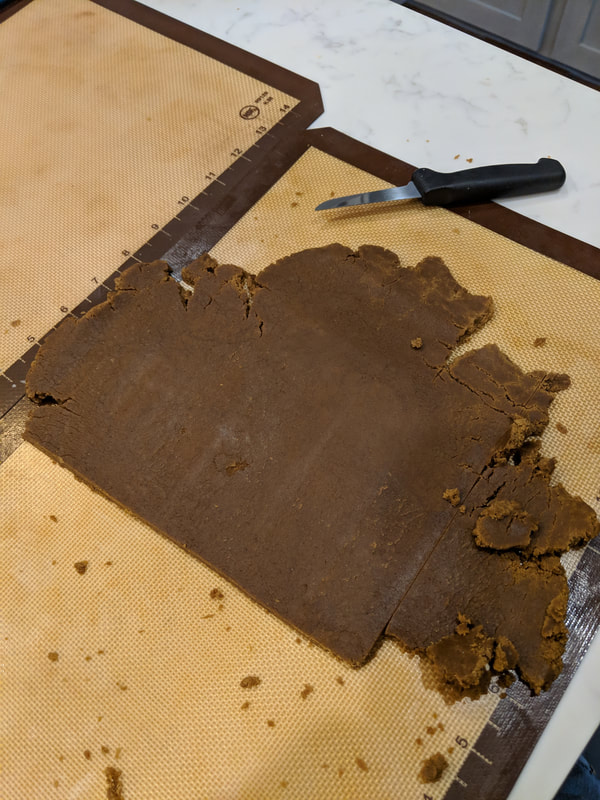
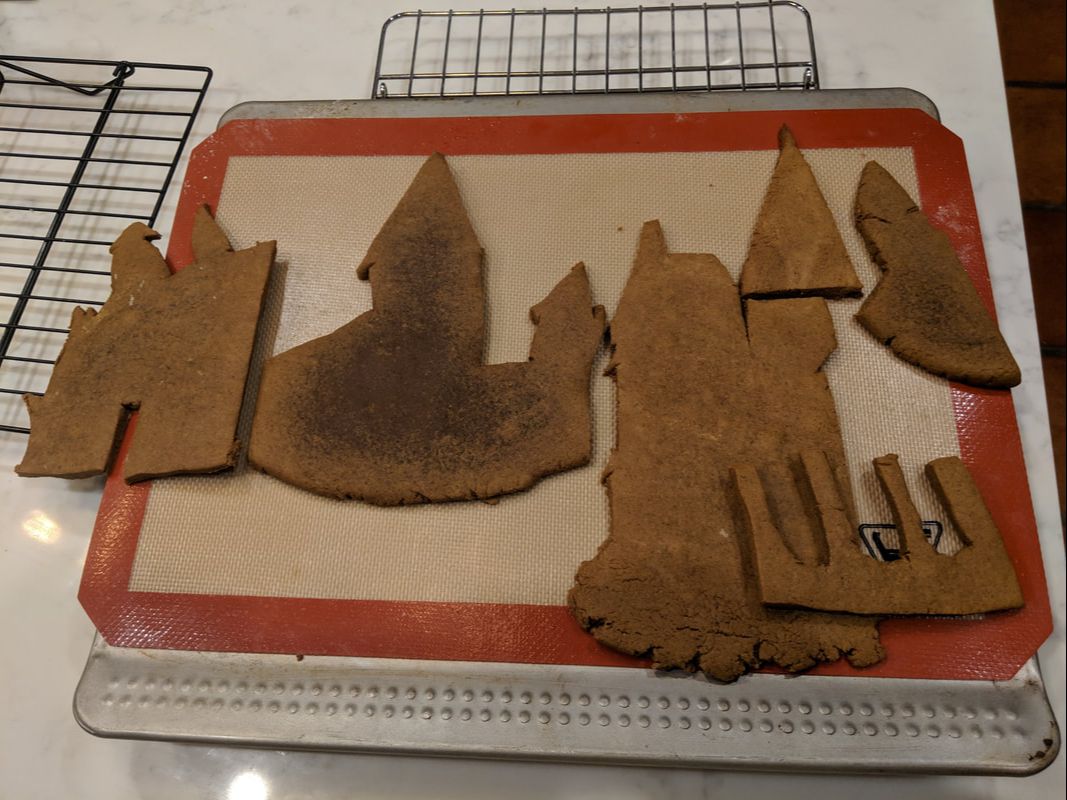
Once again, I want to make sure that you know that I have no clue what I am doing. So I let the dough rest in the fridge. I figured I would just roll out the dough and then use a sharp knife and cut the outline of Hogwarts. And that is exactly what I did. BTW, I do not have any drawing or crafting skill. I can see how this might seem super rudimentary to some of you who may be advanced in this part of the art world.
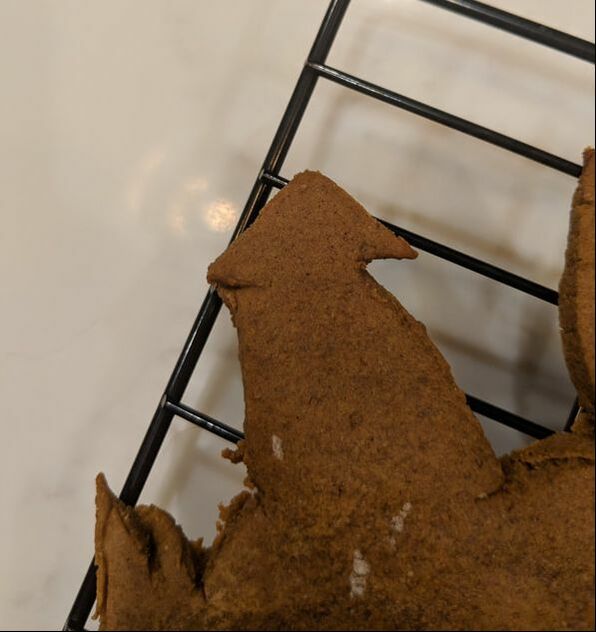
I baked the biscuits for about 10 minutes. The larger pieces I had to throw back into the oven because I thought that they were a little soft in the middle...but the small pieces were pretty hard… and that may have changed the flavor a little bit. The flavor seemed to be muddled in the harder pieces. Which is to say less of the all around warm, spiced goodness. Since I am not really sure if these cookie/biscuits are supposed to have a “snap” or be some place in between, I will have to think about that before baking my true #showstopper. I don’t want to be sacrificing flavor in order to have firm construction, because the 3D biscuit scene should be edible. Also, maybe don’t choose to construct Hogwarts for your first 3D BISCUIT SCENE! Sorry, slight anxiety panic.
Since I didn’t actually have time to “construct” a practice 3D scene… I will pray to the baking gods that something will turn out for the real thing. I actually have a couple of other biscuit/cookie recipes that I want to bake to see if I can incorporate for construction and flavor. I found a couple of recipes on the online wonder that is Pinterest. This particular recipe is not a ginger biscuit but at this point I am not too big a stickler on the flavor as long as it tastes yummy.
All in all, I figured out a couple of ways to get it to stand up but I have to be a little more exact on measurements of cutting and not just #wingingit - (insert: cool name pun here (sorry, I couldn’t figure one out, Lindy)). Oh! I almost forgot to tell you that I finally got some rolling pin spacers so I feel confident that these will help me in my construction… maybe the baking gods ARE on my side! I plan to use a mixture of royal icing to “glue” and cream cheese frosting...because cream cheese frosting and delicious ginger cookies - duh. 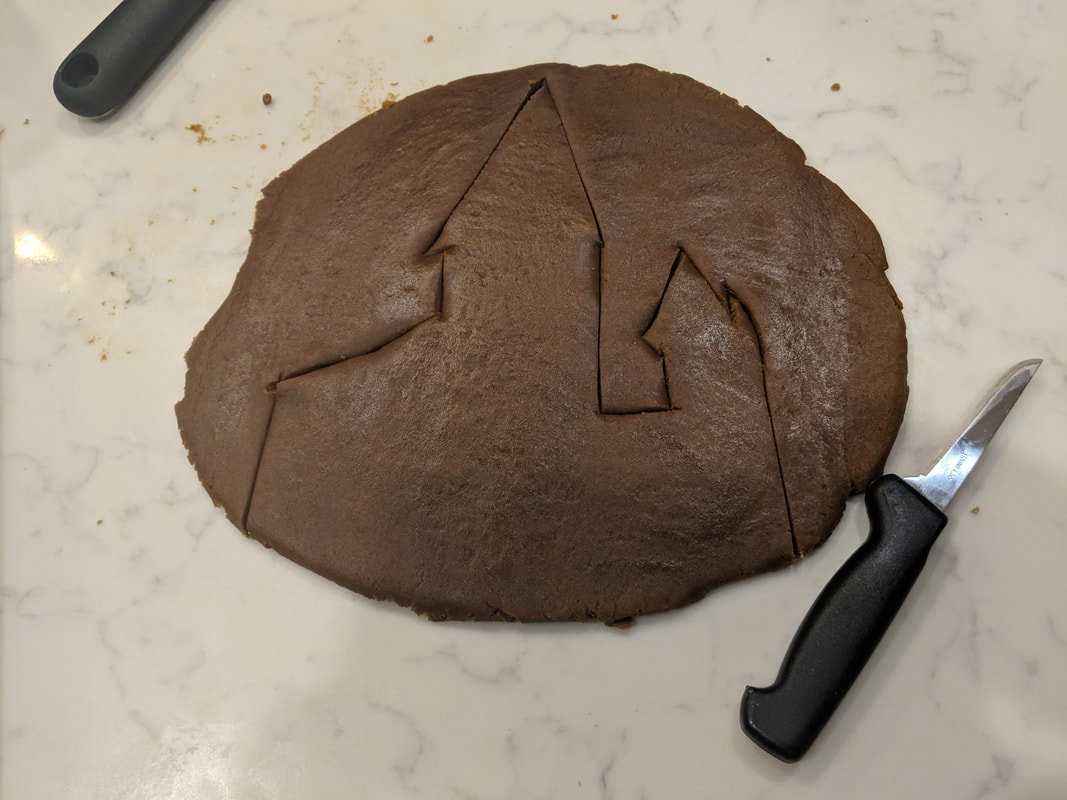
I mean, it's Hogwarts like...right??
For your viewing pleasure… some cute yoga pig sugar cookies. My tribute to Lunar New Year. Just had one for breakfast. See you for the #showstopper.
Until then, Happy Baking. Happy Eating. Happy Repeating. 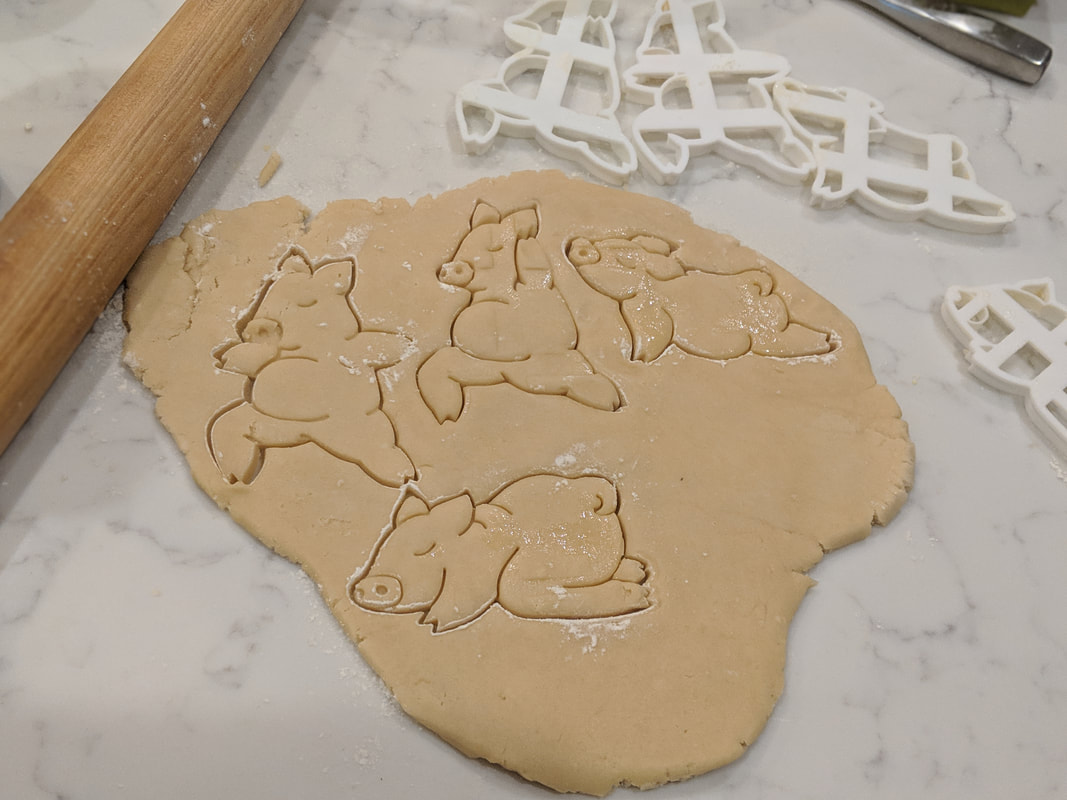
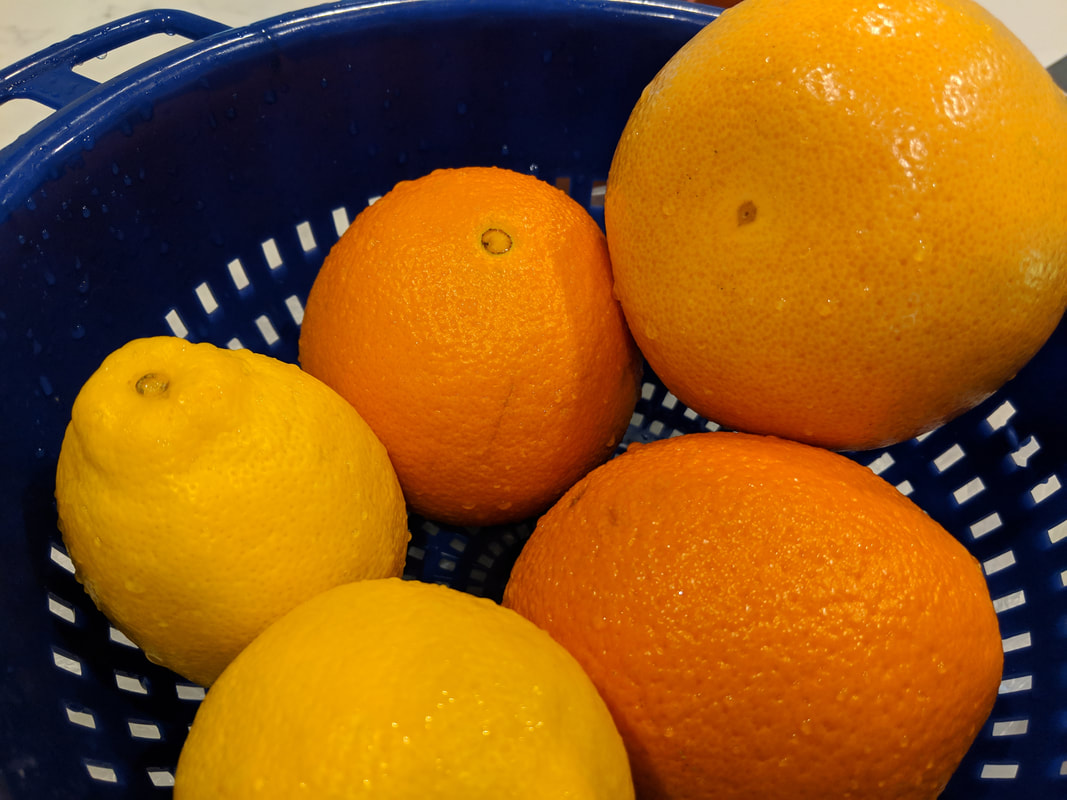
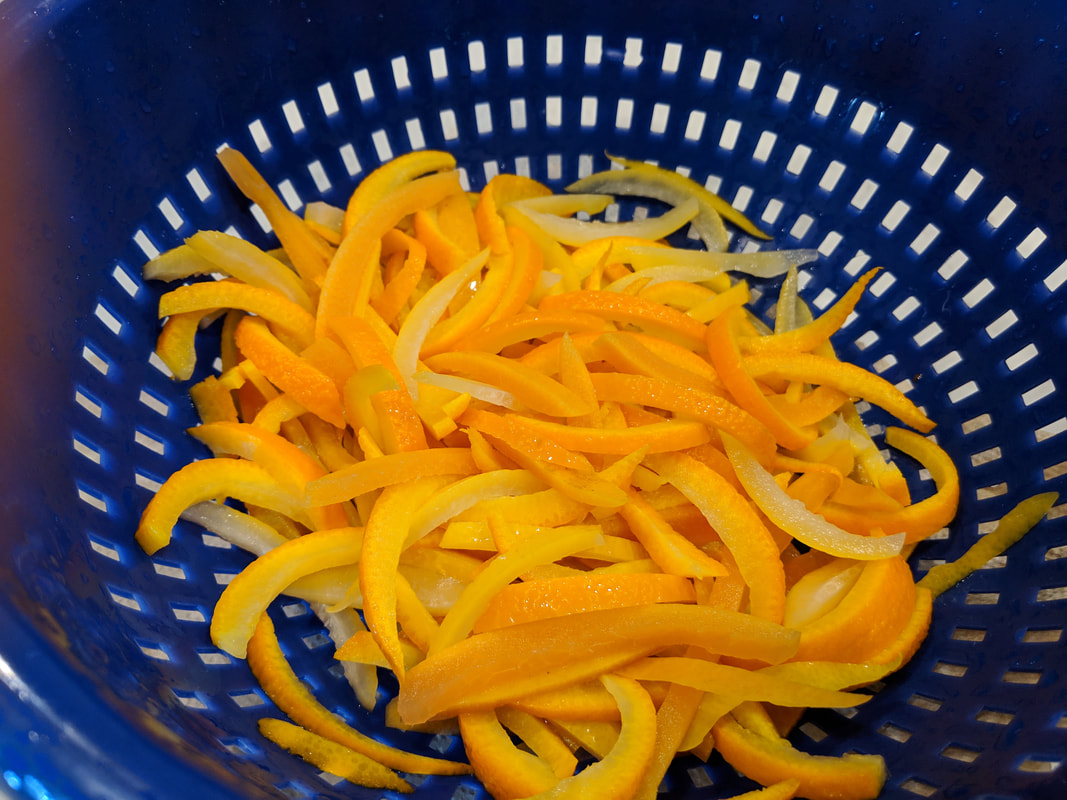
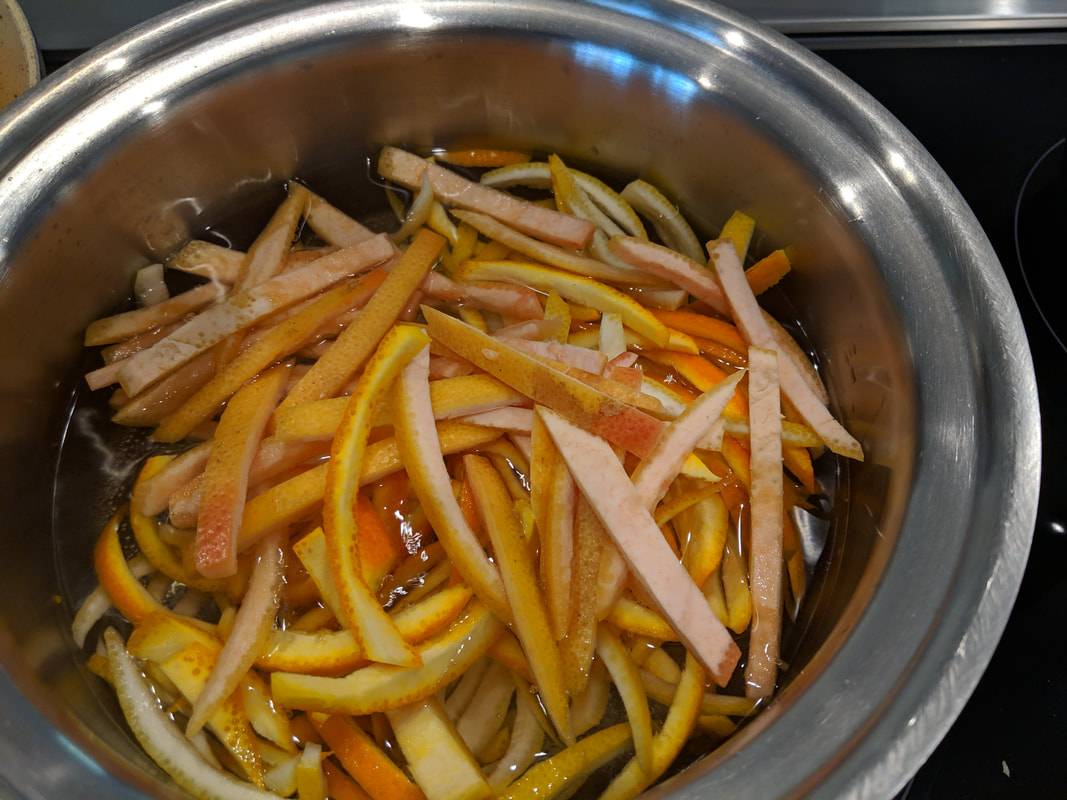
Florentines. Had I ever heard of florentines before watching this show? Of course... I’ve made them… LIES. I am totally messing with you. No, of course NOT. I have never heard of florentines before watching this show. I mean, let’s be real, there are many, many recipes that I have never heard of before watching this show. I can’t be the only one! But once I learned about them… it’s like I see them everywhere! It’s already happening with Babka. I just watched that episode of #seinfeld with the chocolate babka. But I digress. We’ll talk about Babka later (Because Mr. Hollywood will make me bake it). Right now, it’s on to the technical for my very first #biscuitweek. Florentines. A Mary Berry recipe. There are definitely more than few recipes out there, but I decided to go with the one I found on BBC, titled “Mary’s Florentines Recipe.” Some of the other recipes I read through seemed to have less ingredients, but I wanted to make sure I was getting the full effect. Also, I thought this would be the perfect opportunity to make my own candied citrus peel for the first time. So let’s start there.
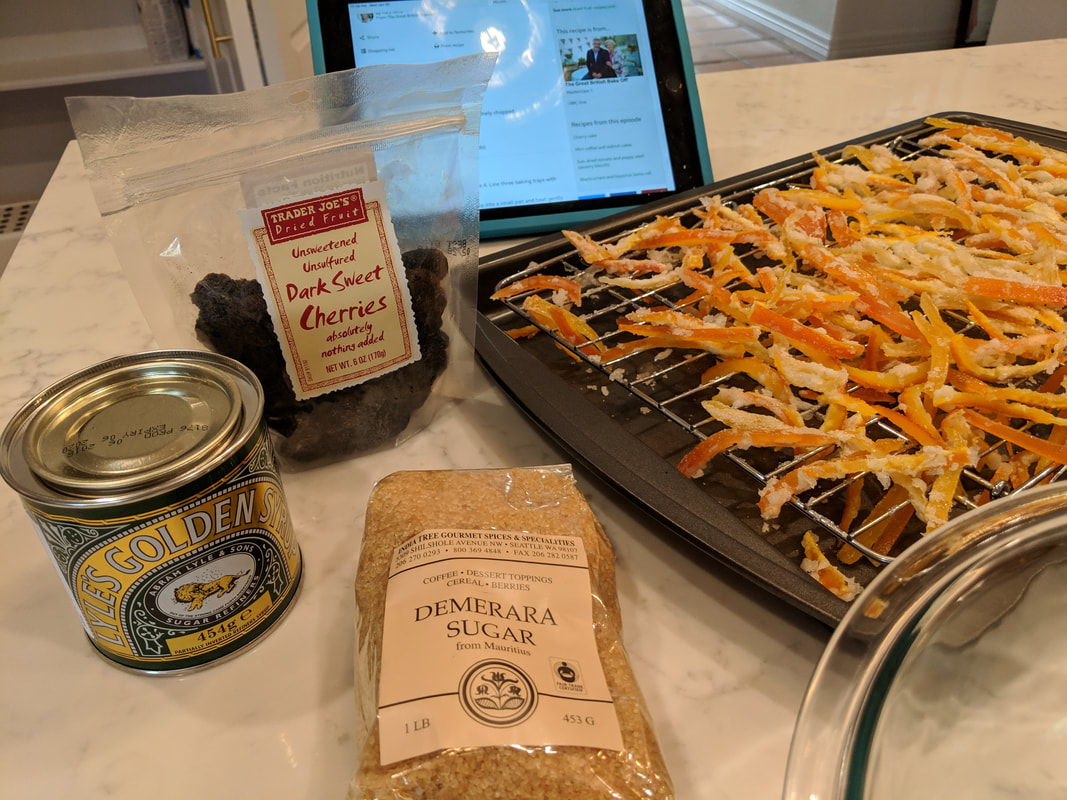
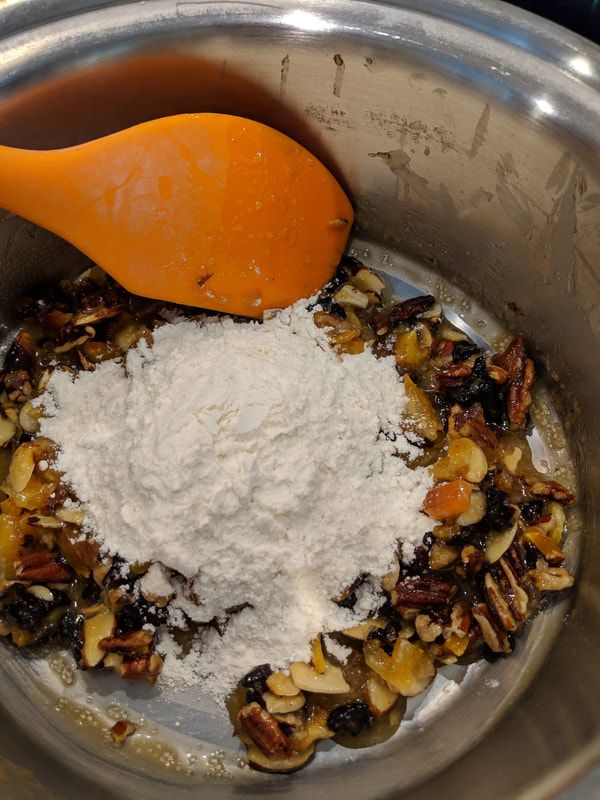
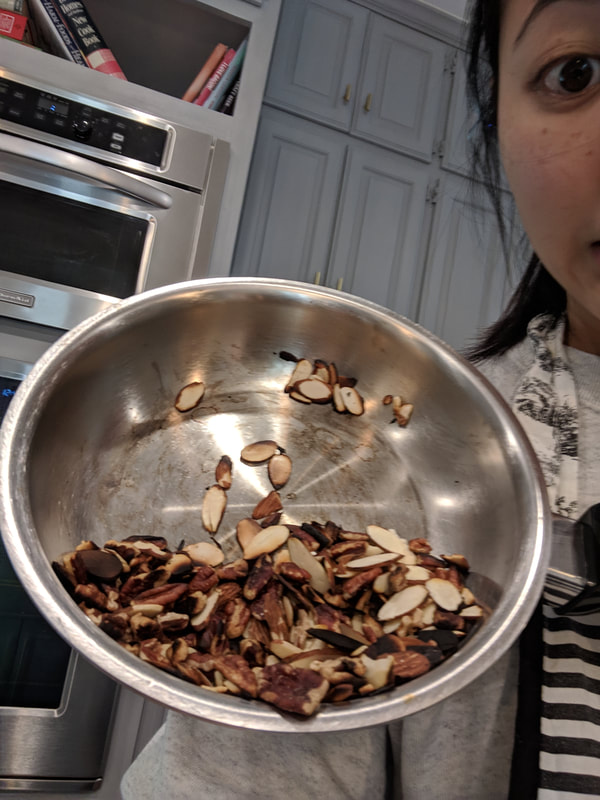
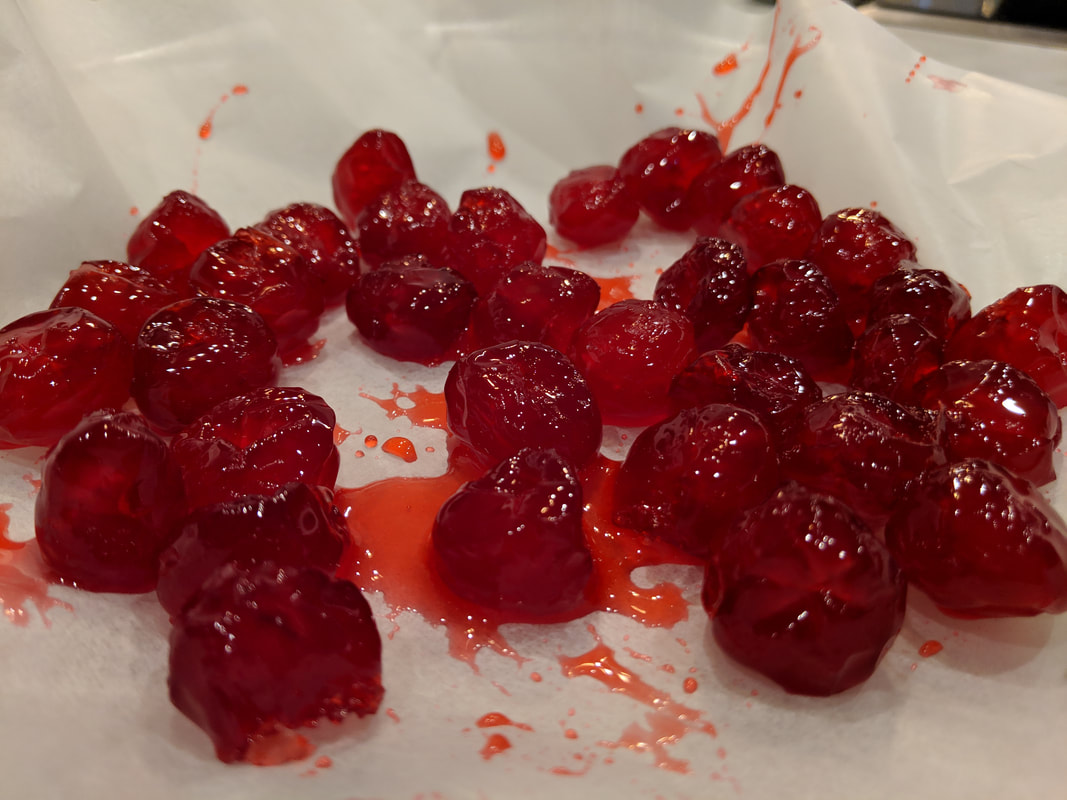
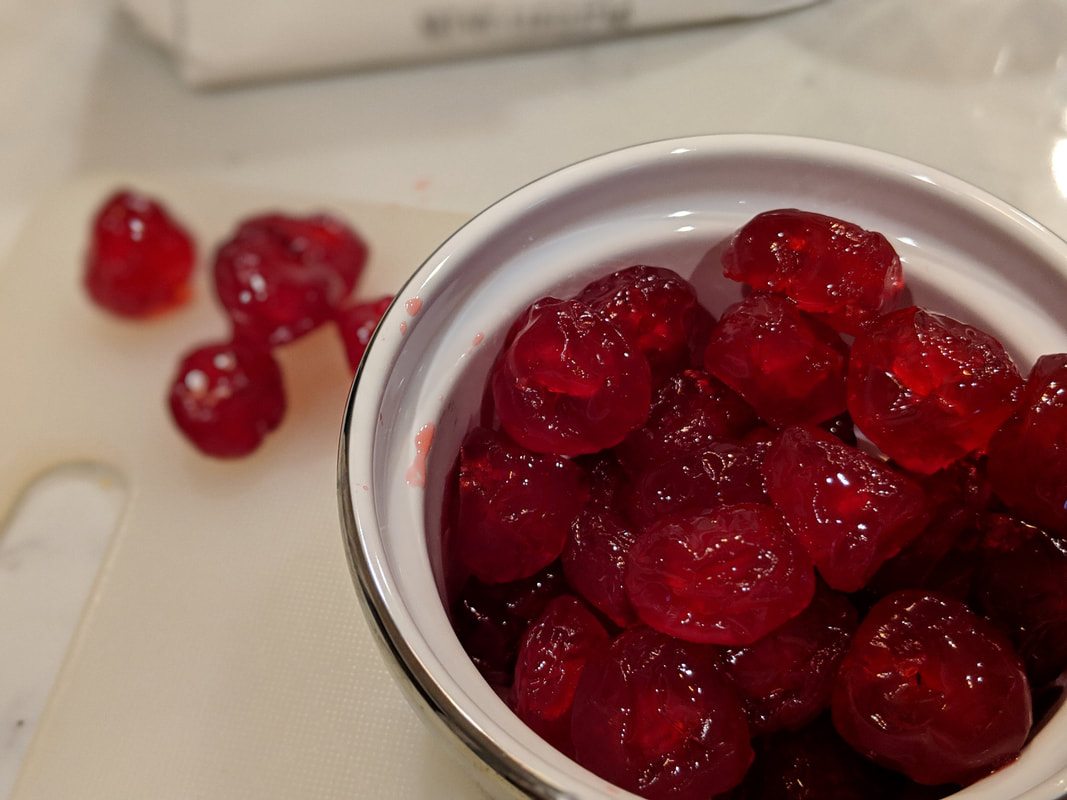
Perusing the rest of the ingredients, those dang glacé cherries pop up in my life again! I first became acquainted with them during my #classiccherrycake bake. Exciting that I get to use them again. As an actor IRL, I like to make everything super dramatic. So I would like to give you a glimpse into my baking life. Please take your seats, for: The Glacé Cherry Caper. Dana: Glacé Cherries! Good thing I already have some ready to go in my pantry. (rushes to pantry and throws open doors) Seriously, there is some in my pantry, remember?! When I made them for that cherry cake (keeps scanning pantry) Oh. I used them ALL in that cherry cake. Hmmm. Dana (continued): (Rushes to fridge and throws open doors) I’ll use those Amarena cherries that I never used in that cherry cake. Ok, cool. I’ll make it work. (Rereads ingredients in recipe) “...dried cranberries OR glacé cherries.” Maybe I won’t use the Amarena cherries because... (rushes to pantry and throws open doors once again) I know! I have dried sweet cherries! (grabs bag of dried sweet cherries, in sweet sweet victory!) Dried, sweet cherries seem like the best of both worlds… (Dana pumps fist in air and smiles.) END SCENE. *readers cheer relentlessly* I am sure you already guessed it. Instead of glace cherries OR dried cranberries, I am using dried sweet cherries from my pantry. I also didn’t have any walnuts and substituted pecans. But you will have to wait for “The Walnut Caper,” another day. It’s not that I don’t want to follow the recipe EX-ACT-LY, but listen, during the technicals on the show they have a whole team of people, behind the scenes, prepping their ingredients for them. I wish that I had that whole team too...but it’s just me driving around to different stores and/or ordering things off the Amazon box. So I am big supporter of use what you have. Which is exactly what I did. With the candied citrus peel out of the way...I was able to jump right into chopping everything up according to the recipe. This one was interesting because essentially everything is done in a pot over the stove. I’ve never made a cookie like that. EXCUSE ME - biscuit. 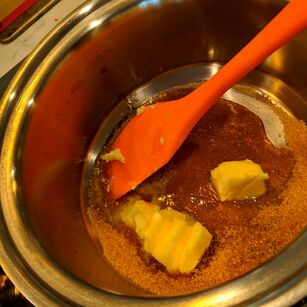 Sugar, Butter, ...
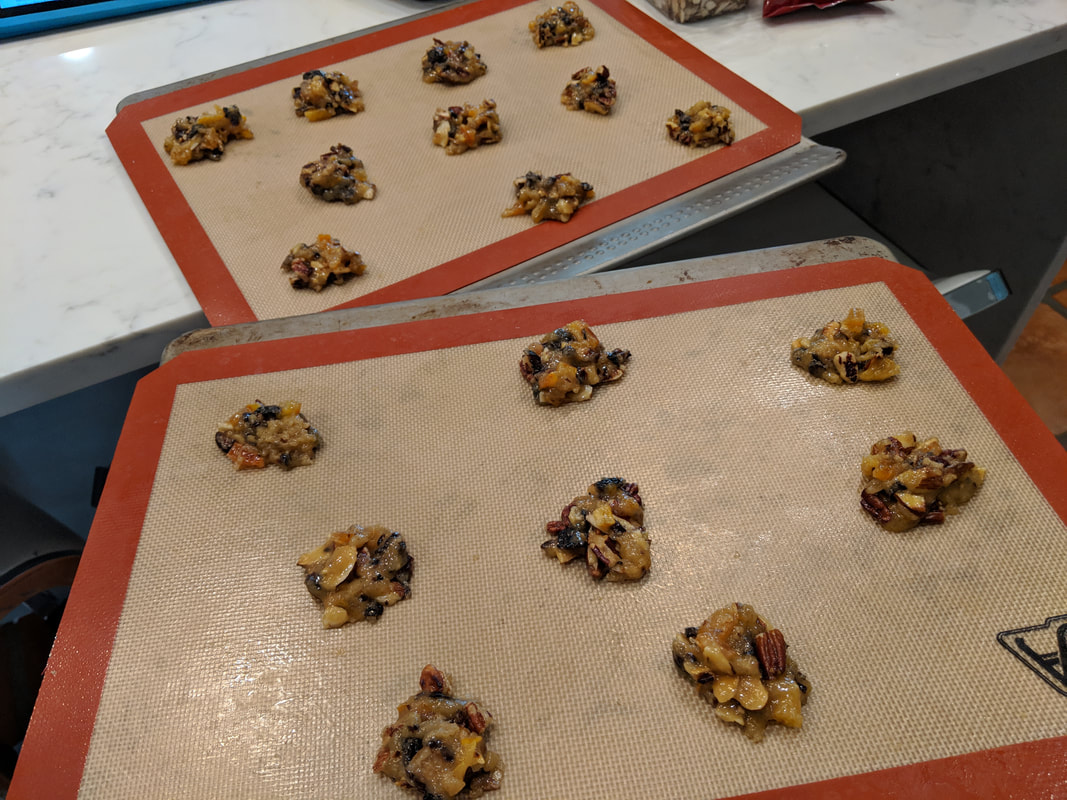
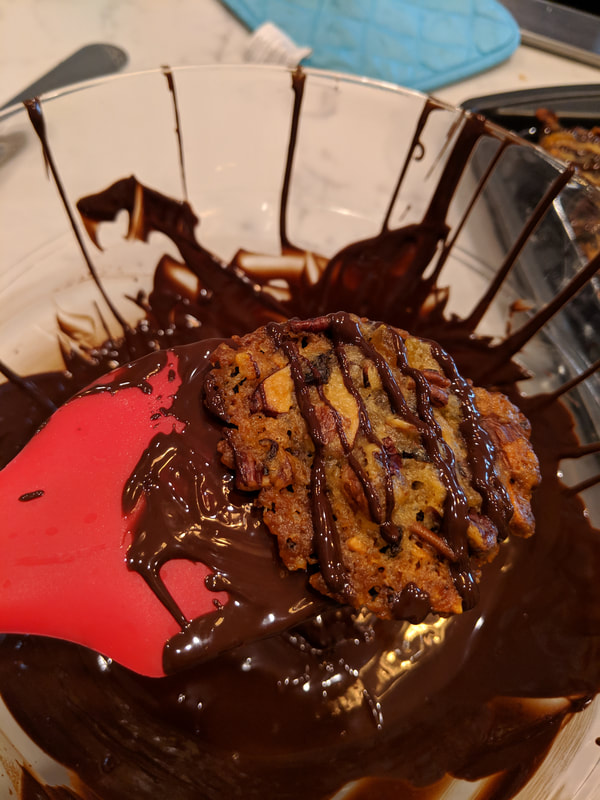
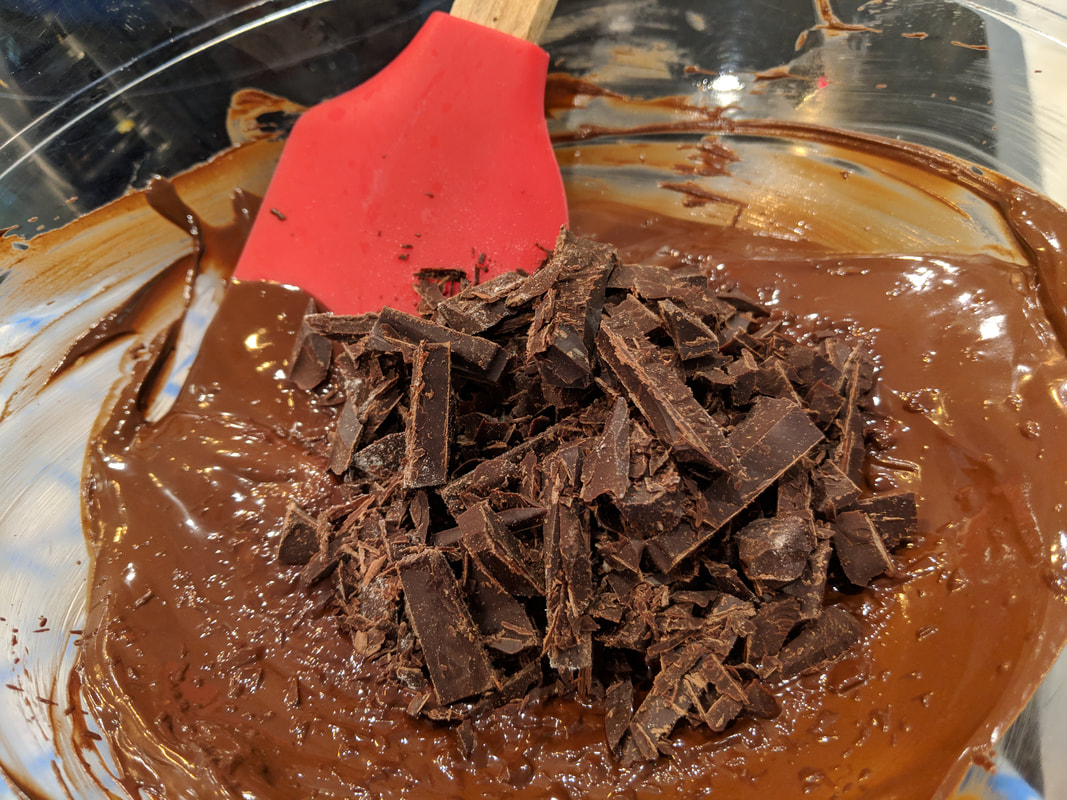
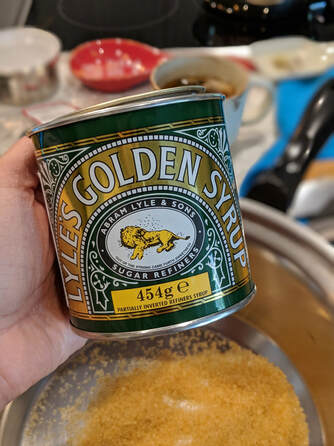 But before I go on… I need to talk about golden syrup. I was not acquainted with golden syrup before GBBO. And lo and behold, golden syrup is used in this Mary Berry recipe. I thought about just forgetting about using golden syrup because I had read that other things could be substituted… but I decided that since the Amazon box could get it to me same day (!) (Note: it did not get to my house same day… but within the 2 days), I splurged and ordered some golden syrup- the same brand as my treacle (which I do have future plans for :)). And honestly, I am glad that I decided to get actual golden syrup because I think it is So. Damn. Tasty. It’s not quite syrup you put on American pancakes or agave or even corn syrup (which I try to stay away from)... but it has this richness without being cloyingly sweet. The color is truly “GOLDEN” and it it’s like a rich, carmel-y, butterscotch-y, toffee-y, taste to it and I am thinking it would be delicious with some cornbread (another example of my fat genius). So thumbs up for my first foray with golden syrup. Back to spooning the melty blobs of stuff on the cookie sheet. It said to spoon out 1 teaspoon and shape for each Florentine. I thought that looked rather small and I wasn’t really sure how big these were going to be, even though I know that they will spread in the oven. So I decided to count out 18 of them and double up blobs on the cookie sheet...and cross my fingers for baker’s luck. There was spreading in the oven. And I don’t know how they do in photos, but mine did not come out perfectly round. Well, I think ONE did. I let them firm up a little bit after taking them out of the oven since I baked on a silpat. Transferred them to a wire rack to cool and went about my business to temper some chocolate. Now, if you read the full recipe - it does say to temper the chocolate using a candy thermometer… I don’t own a candy thermometer… since I haven’t needed one, yet. I thought that this might be great excuse to get one, but alas, I forgot to order it with the delicious golden syrup. Instead, I just did my thing. Melted chocolate (dark) using the Bain Marie method. Using a fork to drizzle the chocolate onto the biscuits, which I thought worked surprisingly well. Then, I discovered I committed BAKE FAIL #2.5 (I really don’t think it deserves WHOLE number step up) I was supposed to chocolate the bottoms of the biscuits first, let THAT set, and THEN drizzle the tops with chocolate. Well. I didn’t.
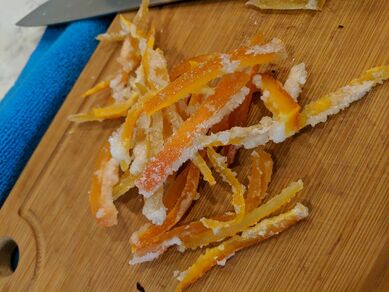
I did discover a nice way to chocolate my biscuit bottoms though— by using a spatula and loading some melted chocolate on there and then “dipping” the biscuit bottoms to get an even coating. Since I already had drizzled chocolate on the tops of the biscuits… I had some indentations of the wire rack on the bottoms. Whoops. All in all, I felt that these florentines were tasty. I feel like I still had a decent shine to my melted chocolate, even though I didn’t have a candy thermometer to temper it to the correct temperature. But I did melt half the chocolate, removed the bowl from heat, and then added the rest of the chocolate in order to avoid any burning. I was pleasantly surprised how much citrus flavor came through in the biscuit...and I am excited to think of other recipes to use the candied peel in. I’m planning to revisit the Lemon Drizzle Cake and make a recipe for a vegan one, so I think the citrus peel will have a place in my oven soon. 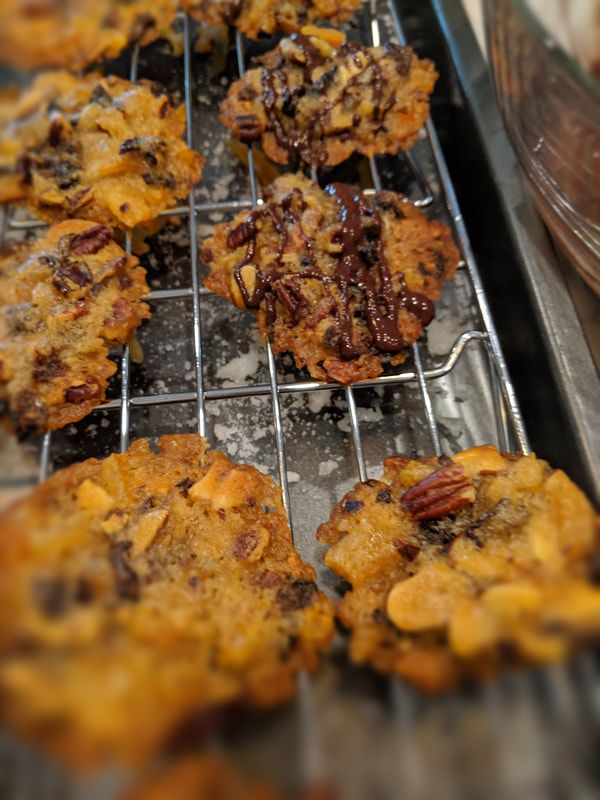 See drizzling on IG @dana.does.things These biscuits (cookies, if you prefer) would definitely NOT be a go-to for me. Even though I think they are tasty, I can think of many other different cookies and biscuits that I would gorge myself on. But they are simple enough to come together to whip them up quickly, with whatever candied/dried fruit and nuts you have on hand in your pantry, to take to a brunch or have with your own tea at home. I think next time I might take my husband’s suggestion and use white chocolate for the drizzle. Seems like a great flavor combo AND would look very nicely on the biscuit themselves. Thanks for the suggestion, honey. Next up… #showstopper. Yep, that is a 3D biscuit sculpture. Still trying to wrap my mind around how I’m going to do it AND bake up some yummy things for Chinese New Year. I’m thinking Chinese sausage pastries are in my future and yoga piggies. I’ll get pics and all that good stuff up on here and on my IG @dana.does.things Until then, Happy Baking. Happy Eating. Happy Repeating. P.S Thanks to Lindy (#lindybakes) for taking on the endeavor of editing :) 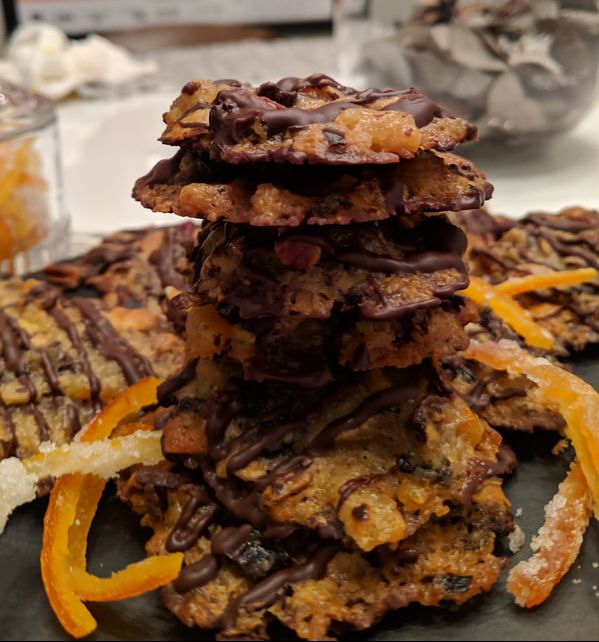 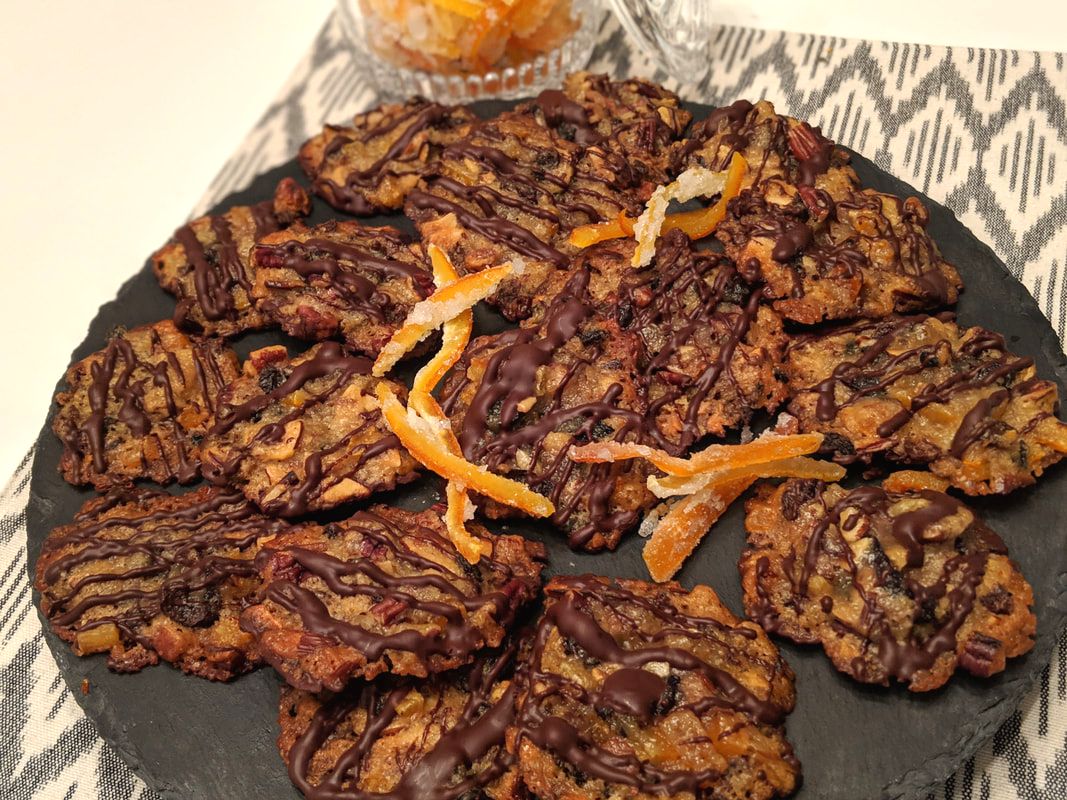 Candied Citrus Peel:
https://www.daringgourmet.com/how-to-make-candied-orange-and-lemon-peel/ Florentine Recipe: https://www.bbc.com/food/recipes/marys_florentines_49833 Ingredients
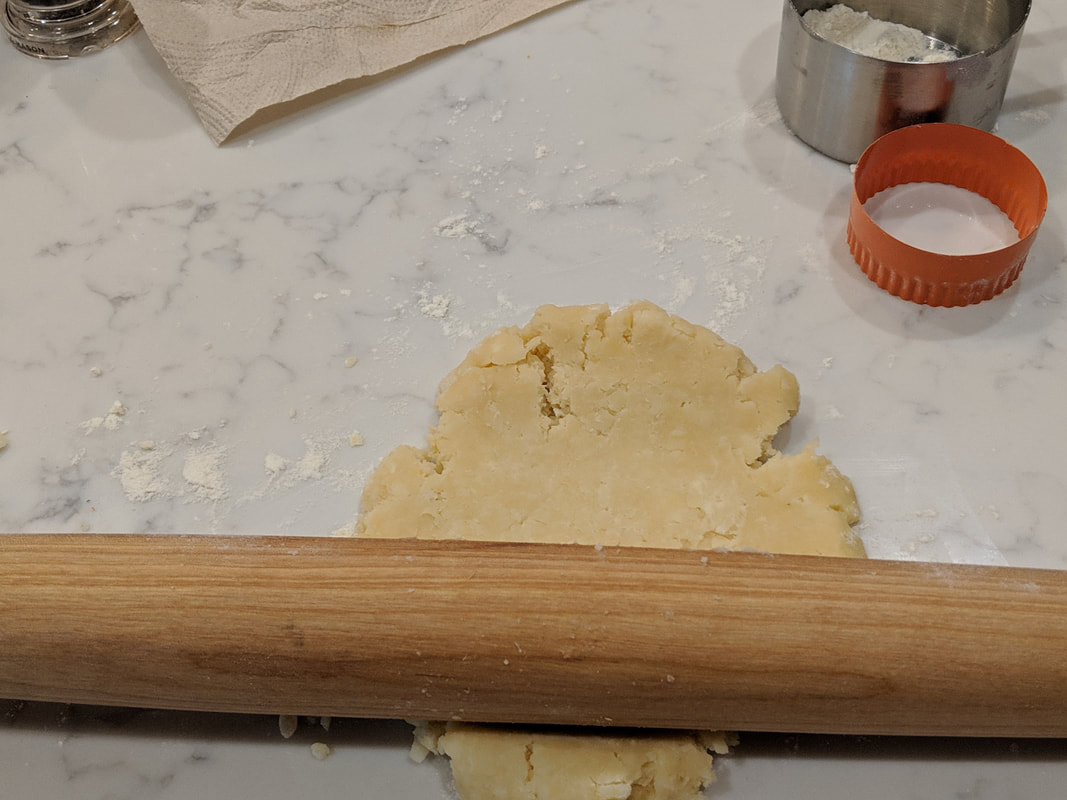
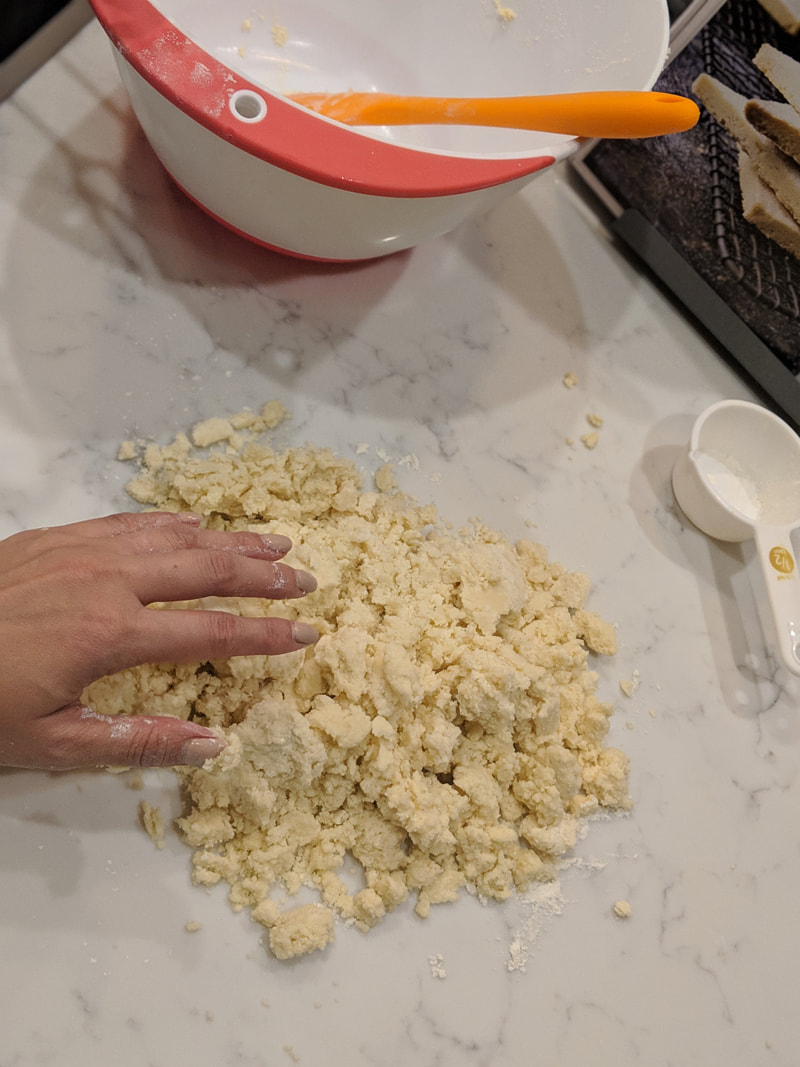
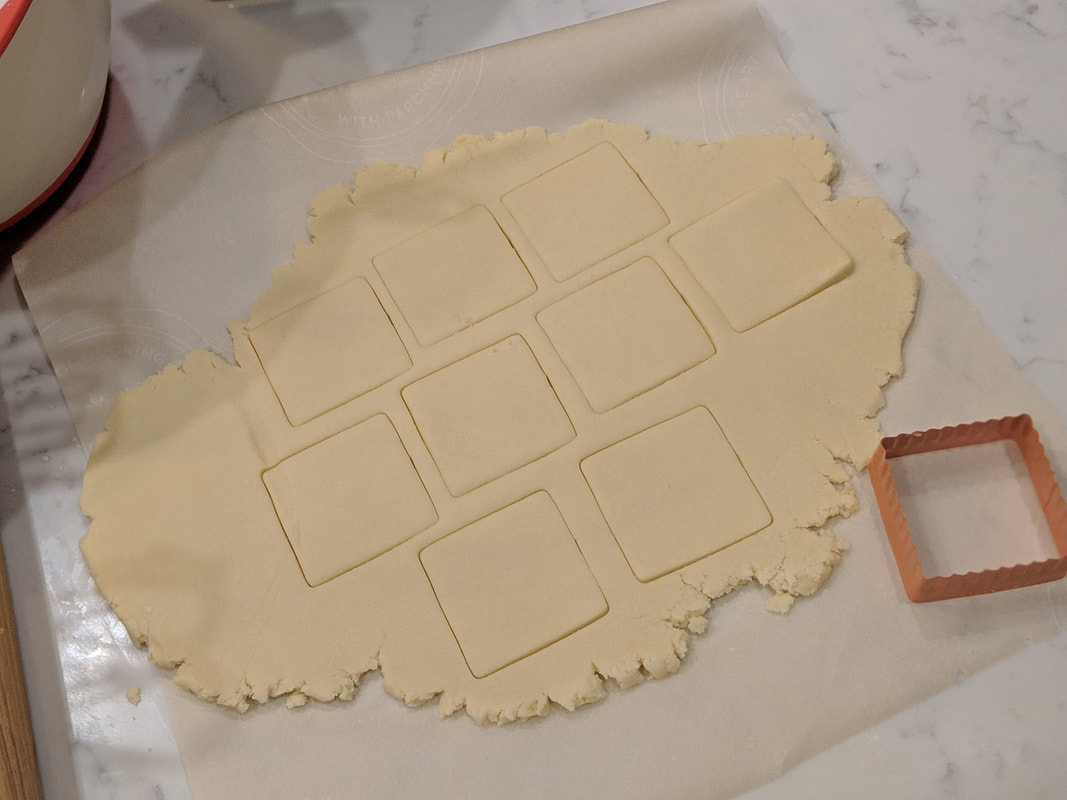
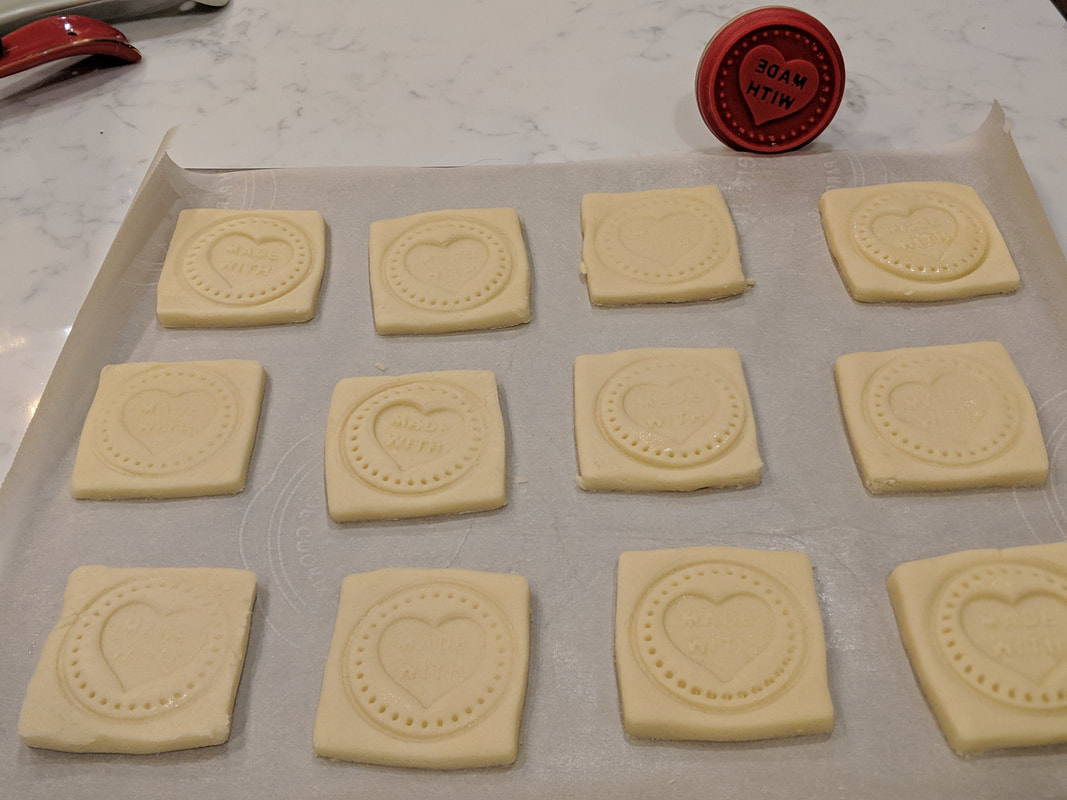
Let’s start today’s blog post with a confession: This personal bake off challenge has been exhausting and STRESS-FUL, BUT it also has filled me with so much joy (Marie Kondo, anyone?). I get excited at the prospect of all the techniques that I will learn, the new recipes that I will have in my repertoire, and also all the things I get to taste (as if I don't eat enough things...) I am trying to focus on all the positives of this bake off and not worry about all the behind the scenes things-- keeping up with posts, content, and the bake themselves…. But I am trying to get it down in a routine so I bring you better-than-awesome things :) With better proofreading and edits, so please excuse typos in the previous posts. It warms my little baker’s heart when my friends reach out to help me out with this blog endeavor (here’s looking at you, #lindybakes (yes, you have been mentioned twice, super famous)). Also, I can’t wait to connect with more of you! Emails and comments are welcome, just make sure you continue to #spreadjoy...all the while baking and eating. Yummy! 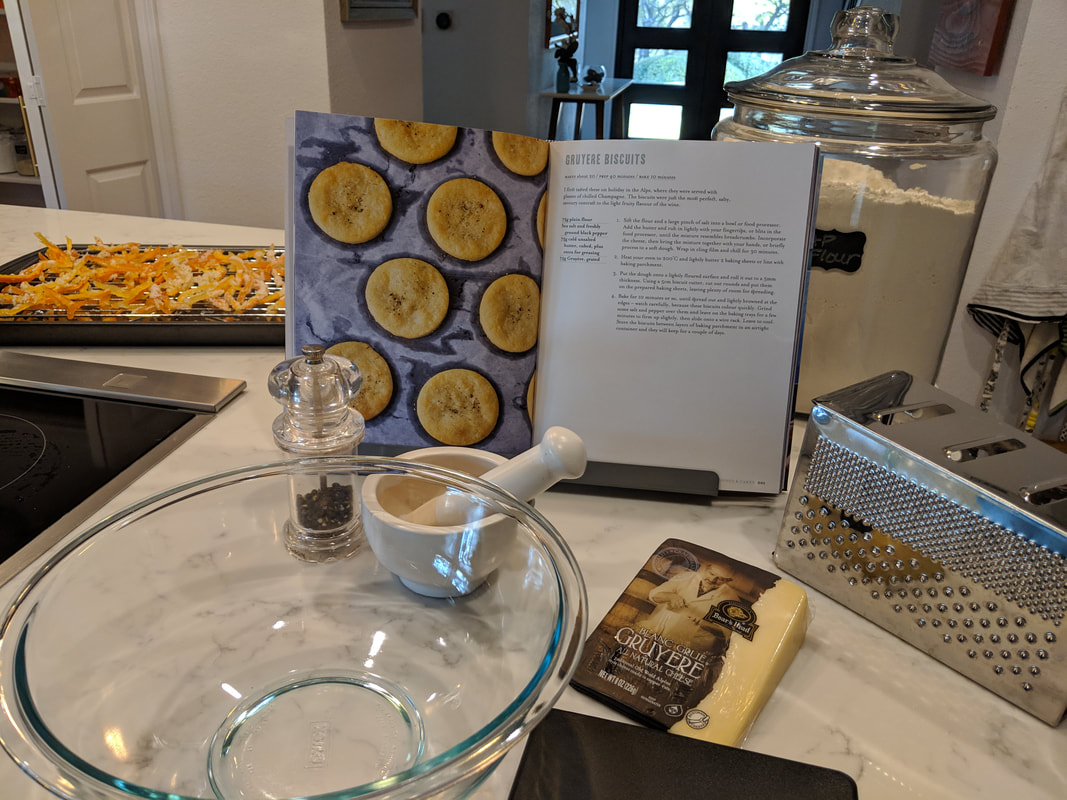 A little sneak peak of the Florentines to come... see the candied citrus hanging back there? A little sneak peak of the Florentines to come... see the candied citrus hanging back there? Okay, I feel better after that little confession! Whew. But I do hope that this inspires you too! Whether it's to dust off that cookie sheet or start watching the show or even doing some writing of your own… I would love to hear about your own personal bake-off-of -sorts. But the task at hand is biscuit week. If you remember from my last post - I actually didn’t exactly keep to the brief. I made some shortbread (delicious, if I do say so myself) but they weren’t savory. I promised that I would make sure that I got those savory biscuits made. Since I have a growing obsession with Paul Hollywood’s “How to Bake,” I decided to do another recipe out of the book. I mean, the shortbread turned out pretty well, so I figured “why not.” Therefore, I decided to go ahead with Gruyere Biscuits. After all, cheese is my best friend. 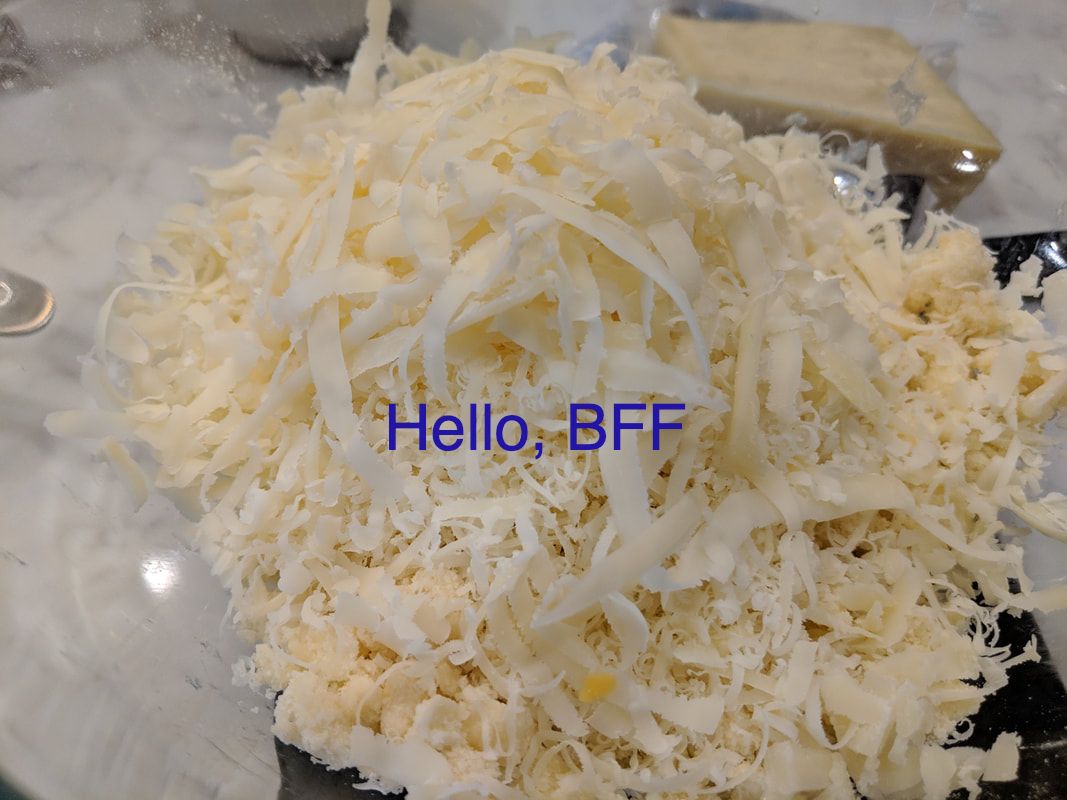
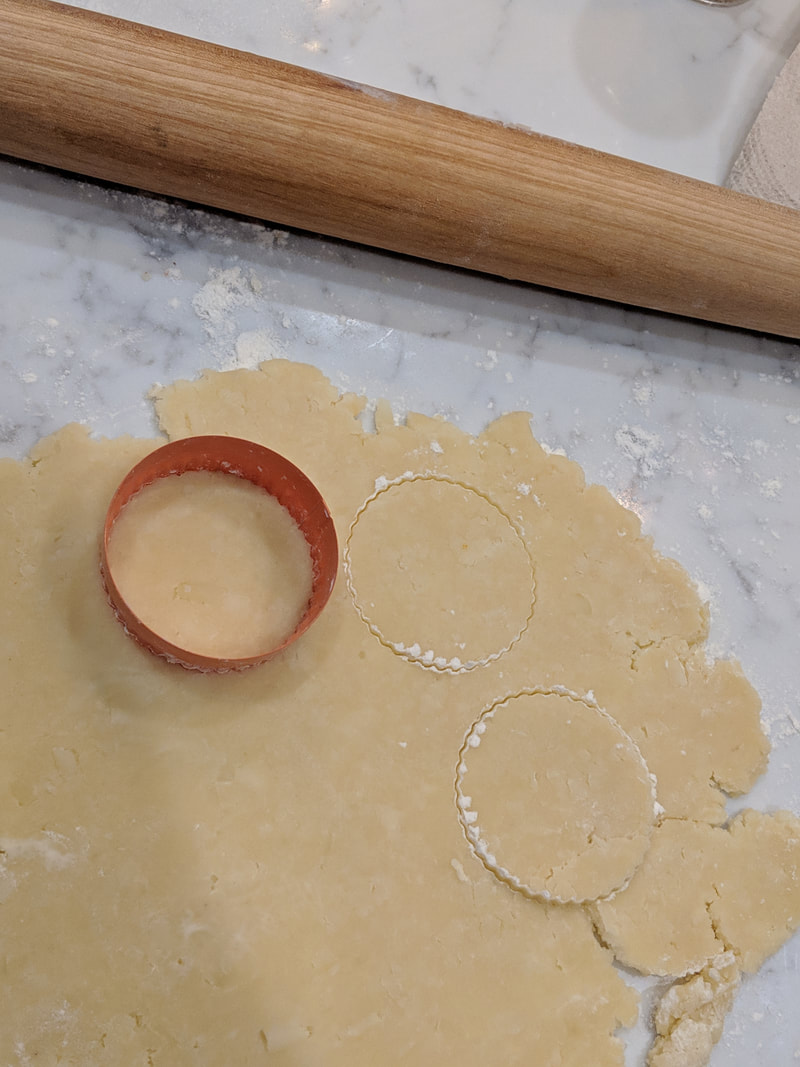
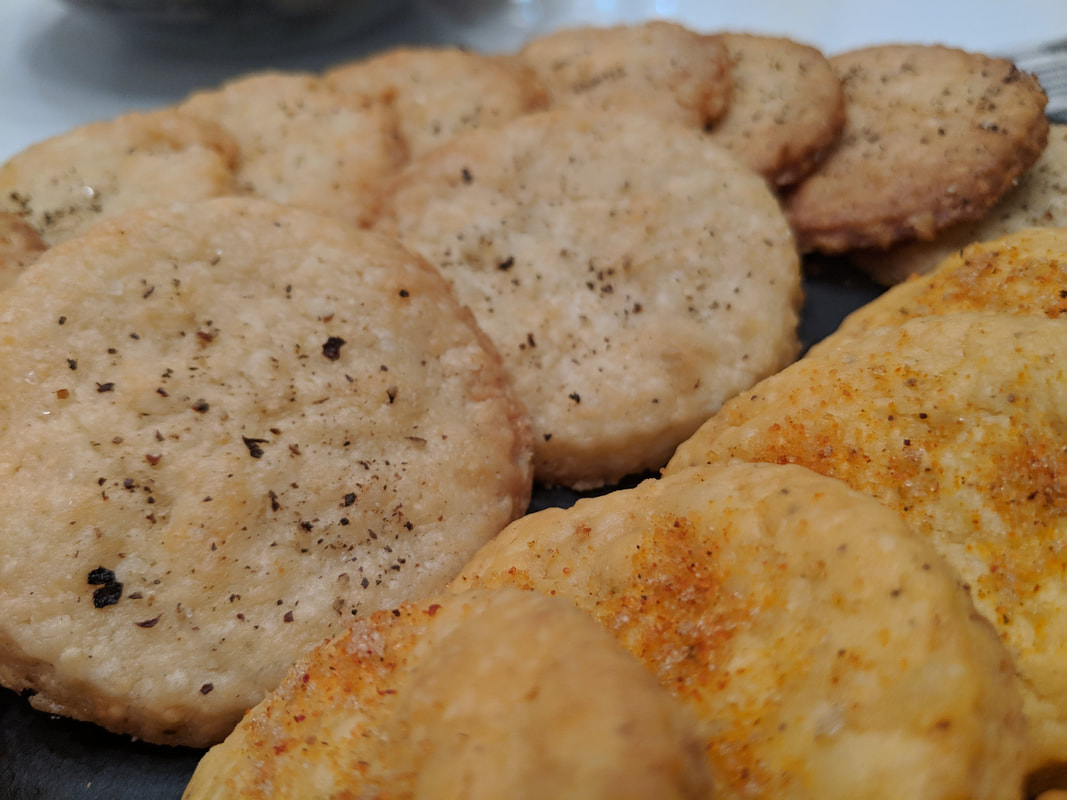
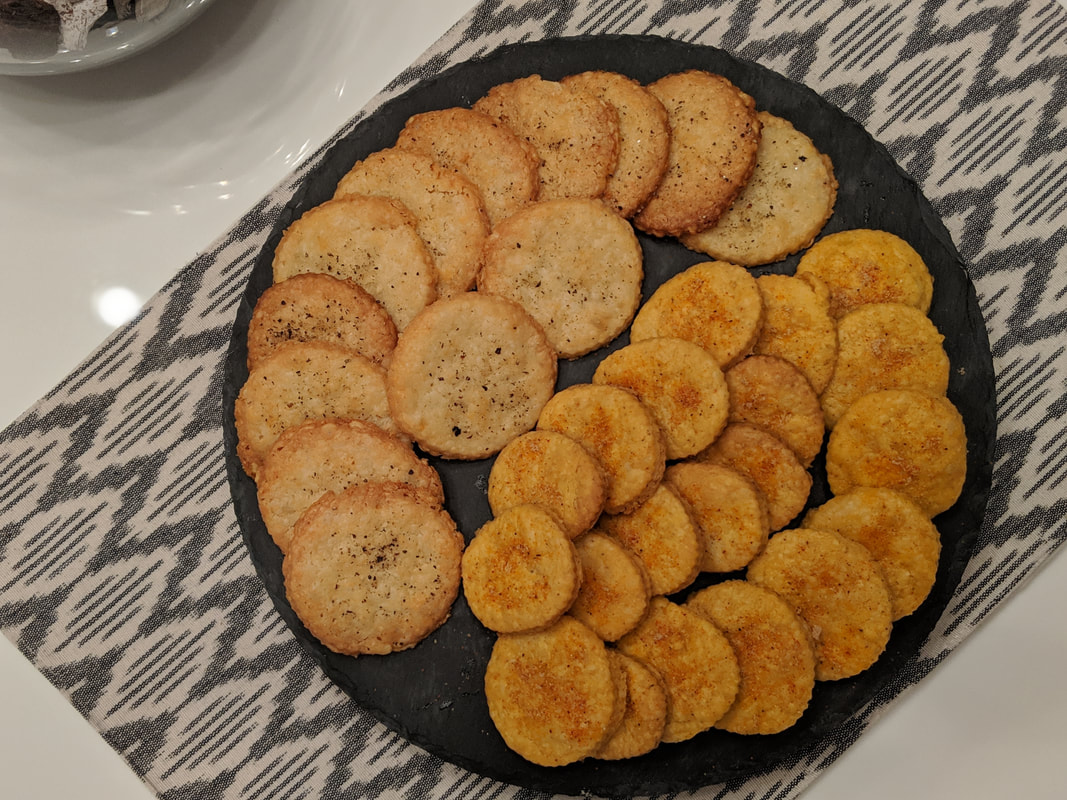
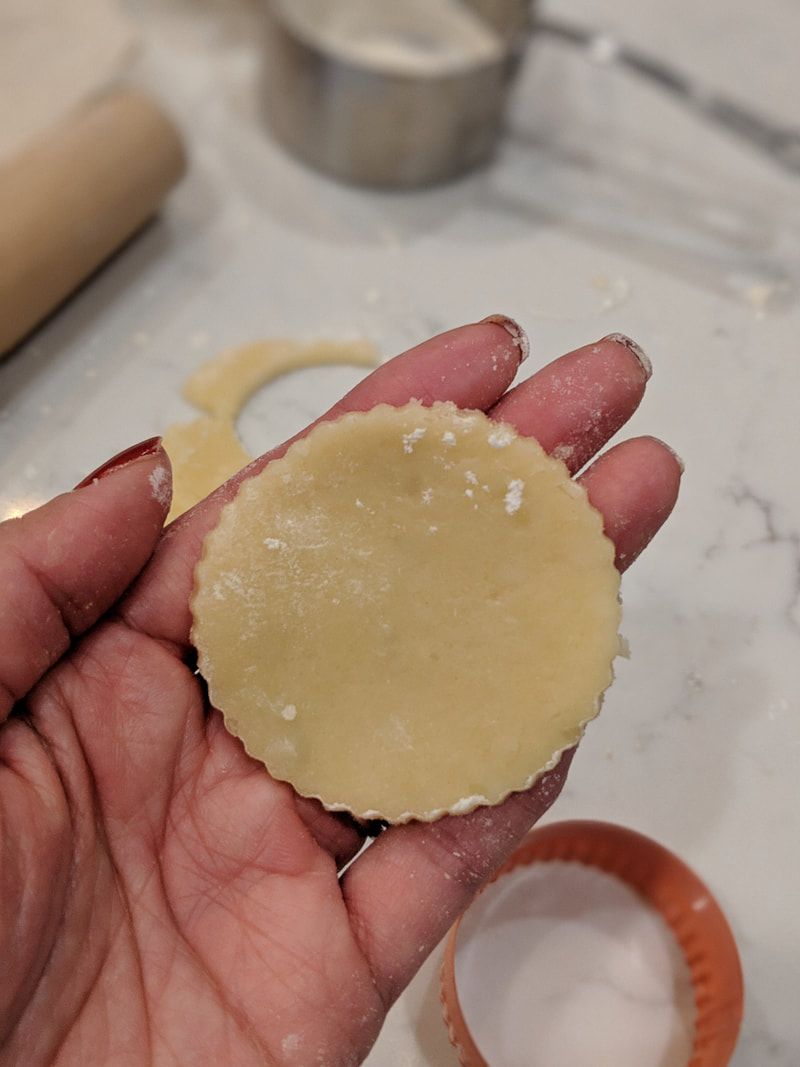 Look, how cute! Look, how cute! I baked these little delights for a little longer than it called for in the recipe (10 minutes). I kept an eye on them and watched for the gentle brown color to appear around the edges. Now, I did notice as they were in the oven, there was a fair amount of spreading - but only SOME of the biscuits. I suspect that this was not from refrigerating again after rolling and cutting. There should be a LITTLE spreading but I wanted to make those nice, crisp edges that Mr. Hollywood and Ms. Berry are looking for. Sprinkled with salt and fresh cracked pepper after taking them out of the oven...and they smelled SO GOOD! I love how my house smells when baking. But, wait! There's more. (BONUS)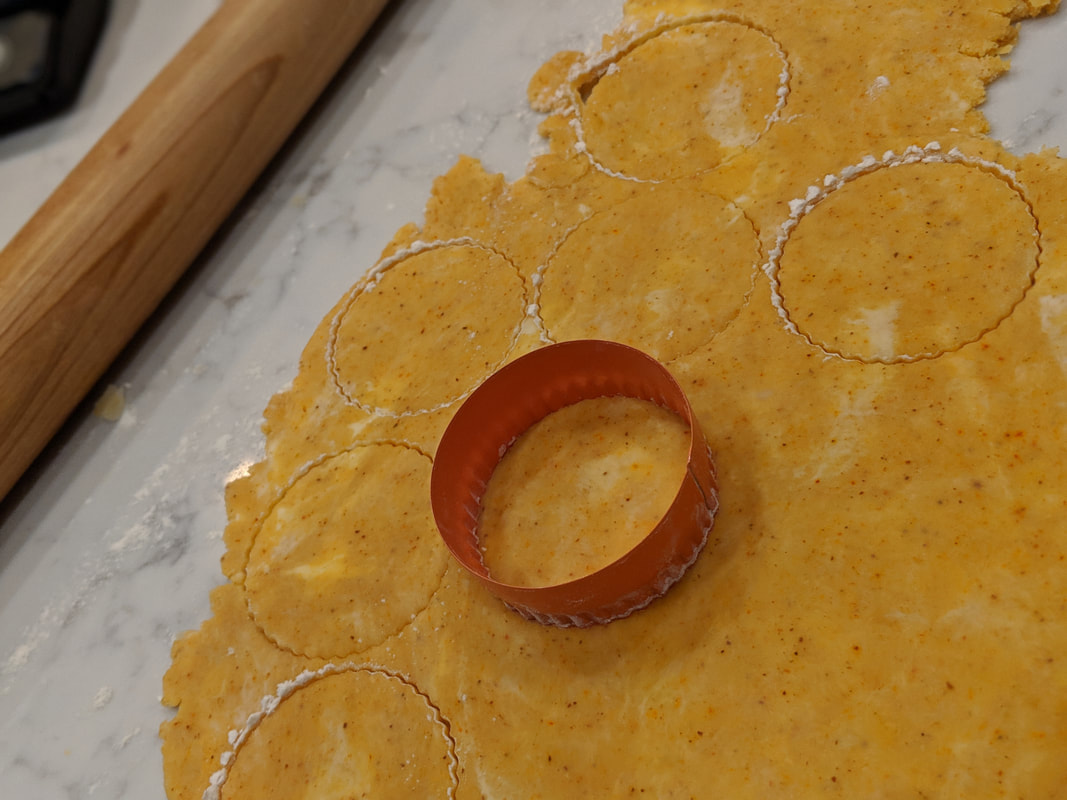 Orange is my favorite color :) Orange is my favorite color :) I decided to give myself a bonus challenge since these little biscuits don’t take a lot of time and to challenge my skills in the flavor department. My own personal twist on the English biscuit - I decided to make an “American” version- and since I recently moved to Texas (#atx)- I figured a BBQ flavor would be appropriate. And that’s how it was born… My very own: ENGLISH AMERICAN BBQ BISCUITS. I used the same base recipe for the Gruyere biscuits, but omitted the gruyere. I added a mixture of spices: Garlic Powder, New Mexico Chili, Cayenne, Mustard Seed, Paprika, Onion Powder, and BBQ Seasoning to the flour and sifted into a bowl. I added cubed butter per the recipe and worked through with my hands… but in order to bring together the dough I added a few splashes of milk - I debated about using mascarpone cheese in order to bind the dough and another flavor element… but decided that on my first trial that I would stick with the added spices only. So with the splashes of milk in the bowl, I then brought the dough together and put in the fridge to rest. 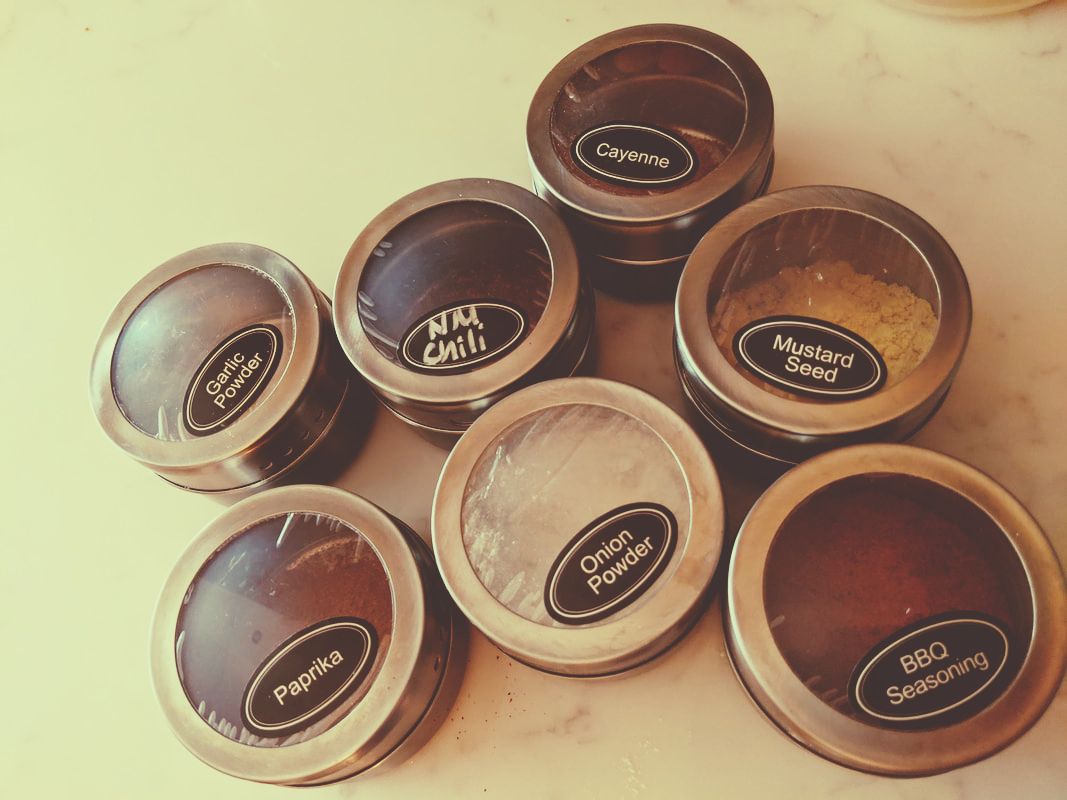 I love my little spice containers... definitely spent an afternoon organizing all of them. Worth it!
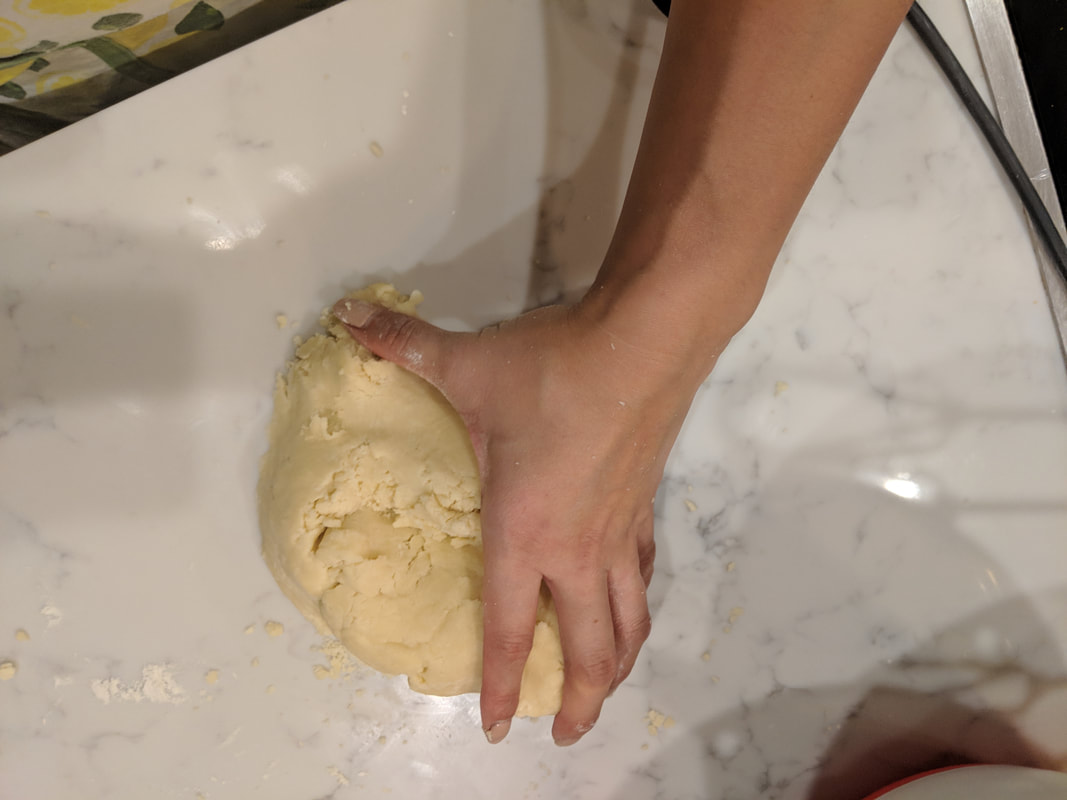
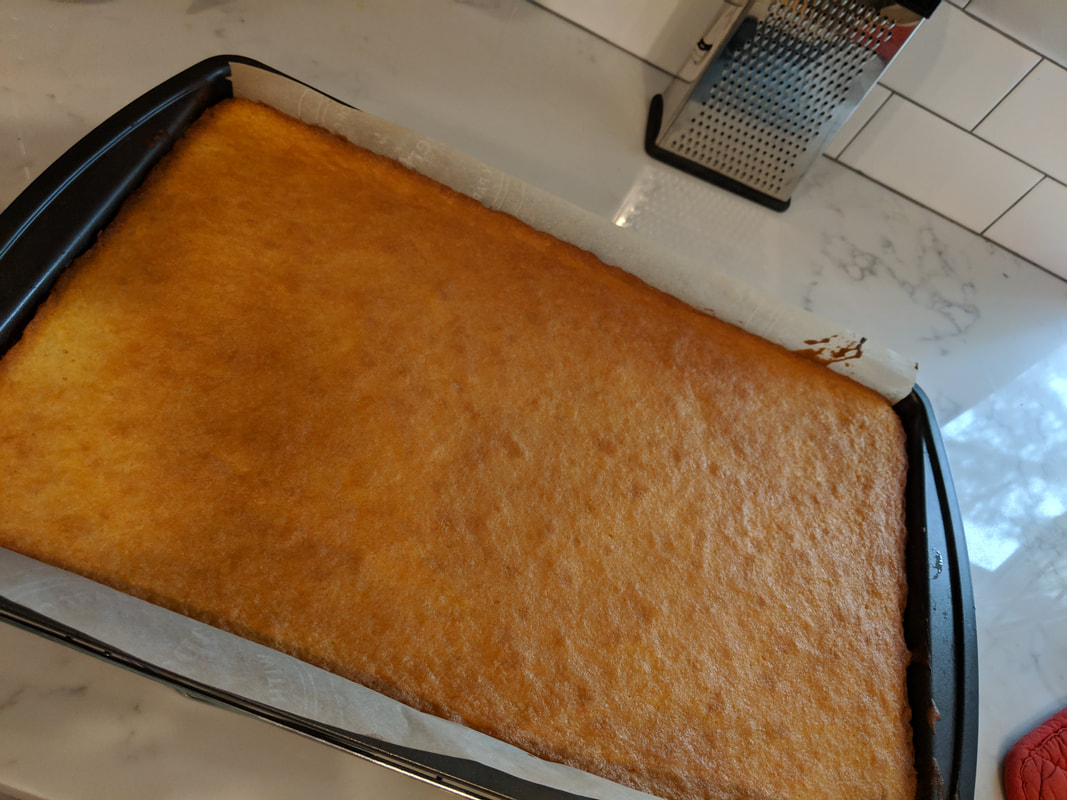
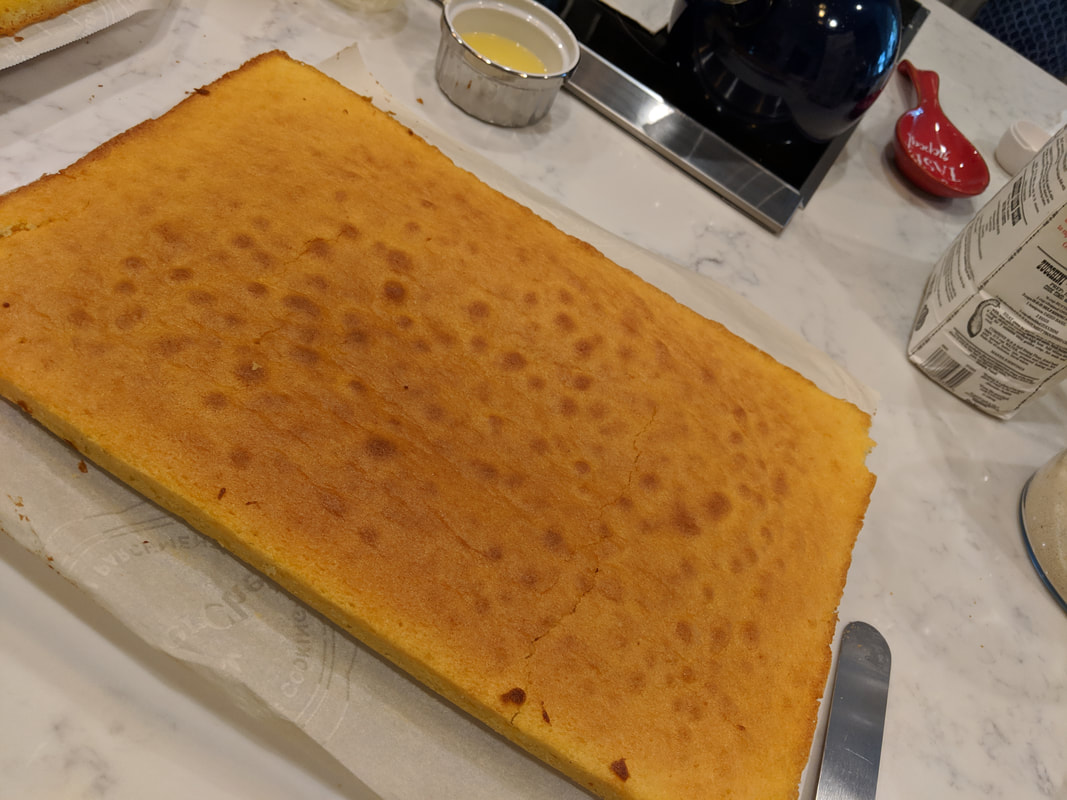
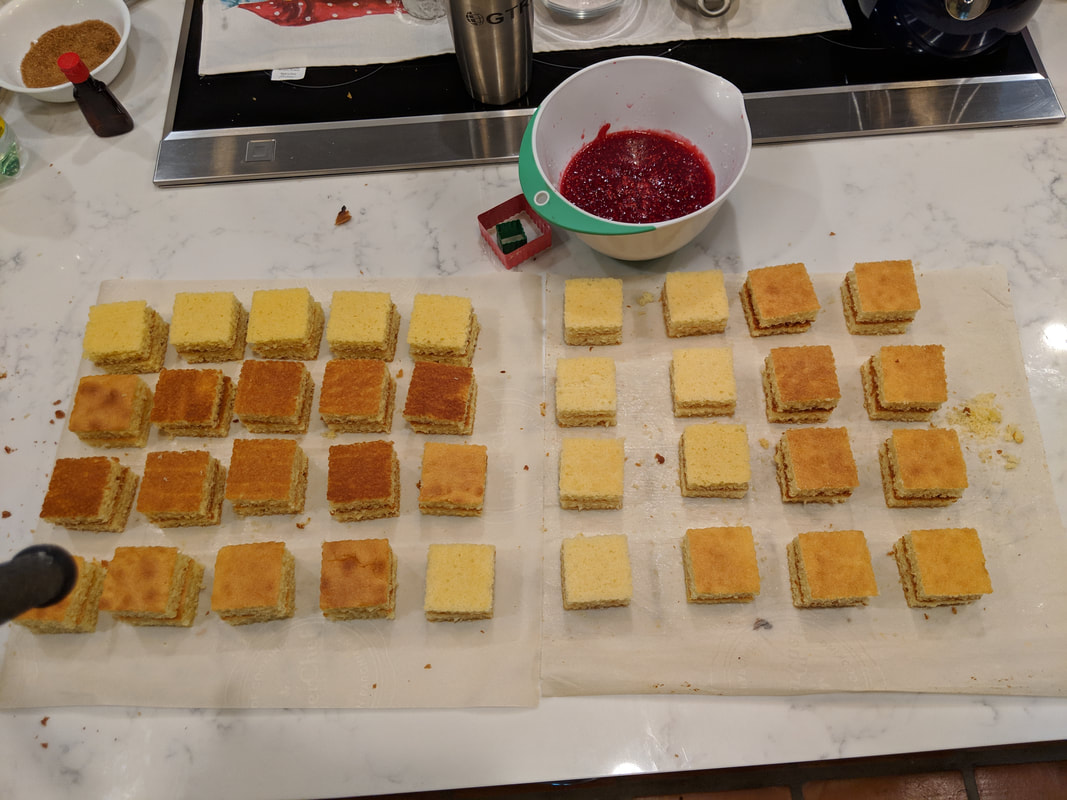
I have to say, I am pretty proud of myself and my English American BBQ Biscuits. I actually feel like that I could have gone stronger/bolder with the flavors of the “BBQ”- of course the #homechef part of me didn’t measure out the spices. I mixed and tasted. Next time, I might add a couple of drops of liquid smoke and make sure that there is a little extra pop of heat in there. A little extra garlic and onion as well. Mascarpone cheese might not be a bad addition - for a little acidity. Like Samin Nosrat says, “Salt, Fat, Acid, Heat.” Of course if you have any tips or if you come up with a mixture of your own, let me know in the comments. The Superbowl is right around the corner (Go #sportsball) so maybe English American BBQ biscuits can sit right next to the seven layer dip. (In case you are wondering my sportsball is Soccer and eating). As you can see from the pics - the 2 different kinds of the biscuits held their shapes differently, even though I used the same cutter. The different shapes and some of the extra spreading in the fridge got me to thinking that I need to try refrigerating the dough after rolling/cutting AND I think I will add a couple of minutes of light kneading to incorporate the butter a little bit more. 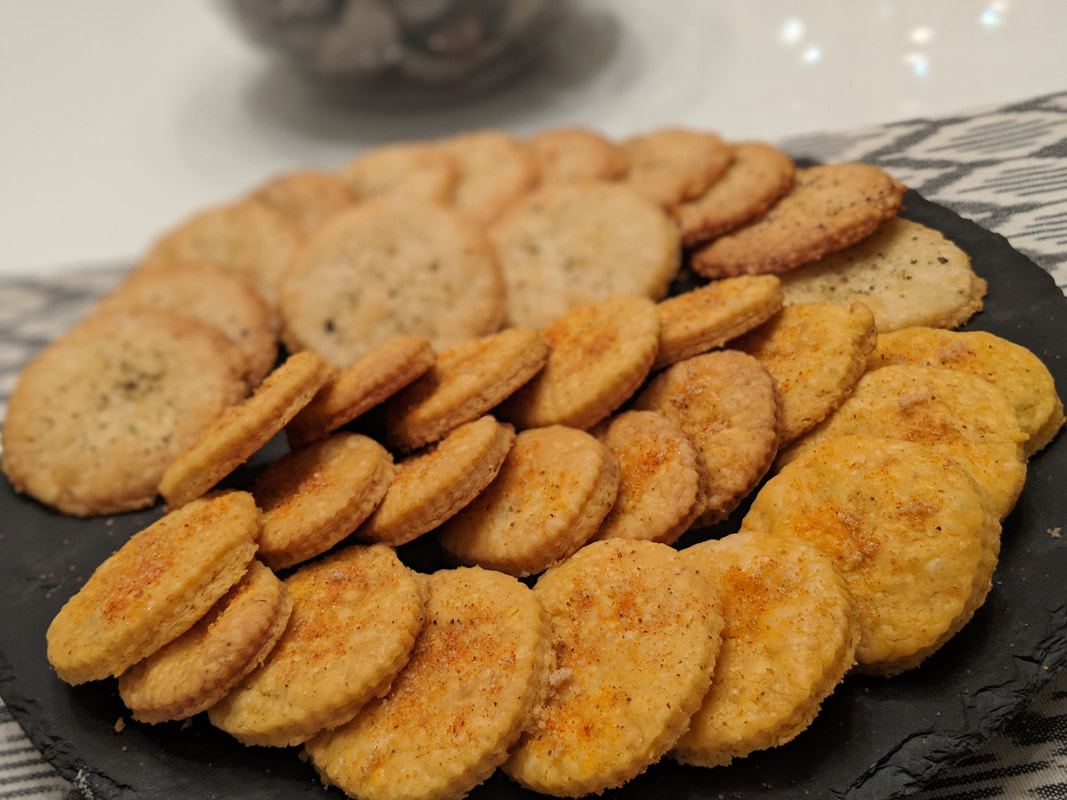 You may be thinking that I am crazy, but hear me out! I know that biscuits need to be “short” but I saw that there were big blobs of butter in the dough as I rolled it out. These little guys are small and I think having smaller butter blobs will definitely help with the spreading (I don’t want all the butter to seep out!) and a little bit of the uneven coloring that I noticed. I definitely won't want to take out ALL the butter blobs...because it did have a delightful flaky texture...but not necessarily that nice snap… So I guess I got an excuse to bake a few more batches to perfect it! 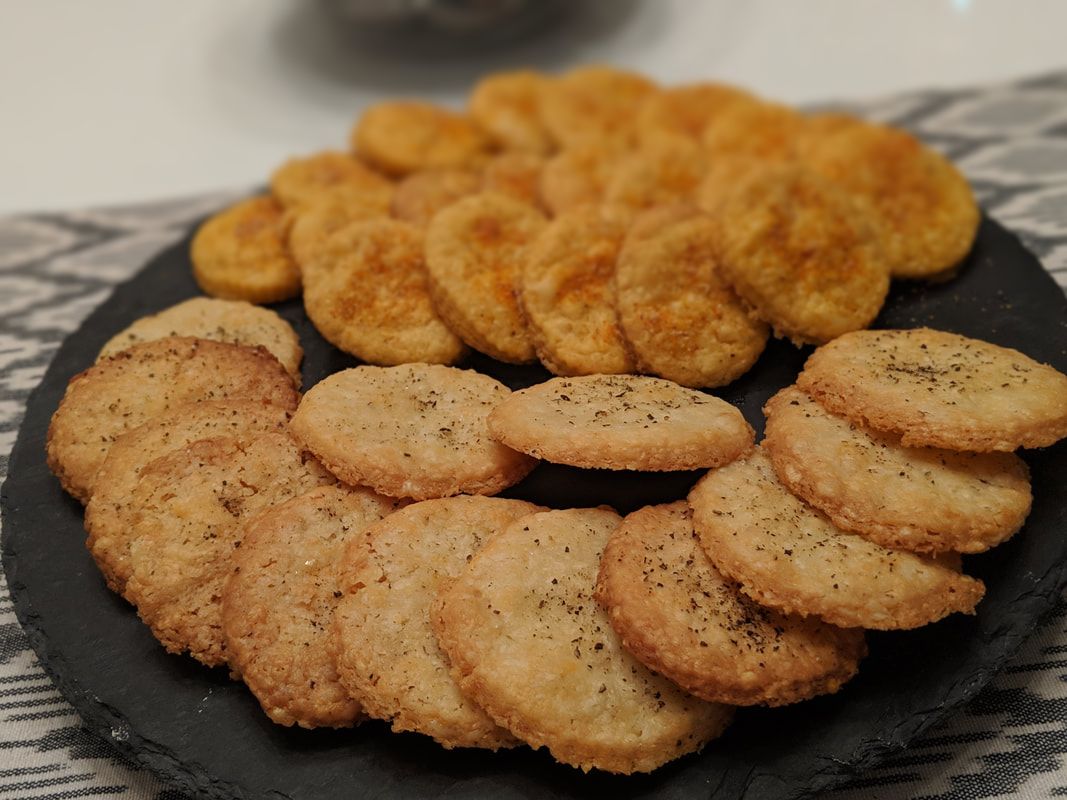 Up next is the technical, which consists of Florentines. One of Mary Berry recipes. My first time using Golden Syrup and making my own candied peel. Stay tuned. Until then, check out some life inspirations on my home page. Happy Baking. Happy Eating. Happy Repeating. Don't look at my like that Paul Hollywood... Don't JUDGE ME! Oh wait... judge me. :) Happy NEW YEAR! As Lil' Kim says: "I've been gone for minute, now I am back at the jump off." I know that anyone that stumbles across this blog- is a HUGE Lil' Kim fan. Anyways, that's all to say that I know I have taken a short break (those 36 mini British cakes, were TIRING) and now I am BAAAAAACK. But for reals, Christmas to the beginning of the 2019, I needed a little rest... I mean, who doesn't? That doesn't mean I stopped baking/cooking (or eating, for that matter). Fresh Posts on the IG will be up soon. But let's get back to the main event that you all came for- the first #biscuitweek. Okay, so I had some trepidation of biscuit week because, well, I have eaten many tasty fluffy American biscuits but I don't think I have ever had a true "English Biscuit." In the past few months I have run into a couple of people from the UK... and of course, I ask them very annoying questions, such as: what is a biscuit? But really-- what is a biscuit- what are the fundamentals of a good biscuit? It comes down to a nice "snap" -- So a "SNAP" or that crunch when you take that bite. It should have great flavor and if you are making shortbread... it should be short (it's not always about length, yep I went there)... a nice and crumbly texture. And because the ingredients are pretty straightforward-- if you are going to put flavor in there... it better be good. Biscuits started as a no fuss way for sailors and soldiers to get calories - just flour and water. (Read a short fun article "Crunch Time..." here). And now biscuits are a food that is consumed most everyday for Brits. I love these Brits. Dedicated biscuit (cookie) time. I'll take it! Ok, I know that challenge was to make savory biscuits. Well, I wanted to make some basic biscuits first to feel it out... and since I have taken such a long break - I will also be making savory biscuits as well. (Extra baking things, just for you.) I decided to start with some shortbread - why not go with one of the most iconic biscuits first? Very smart of me...or very dumb. Maybe I felt more courage since I was baking a recipe from the one and only, Mr. Paul Hollywood, himself. "How to Bake" by Paul Hollywood - I was so stoked to have purchased it right before starting this #bakeoff challenge and it is definitely coming in handy. I sat down and read the whole thing (nerd alert)... ok I didn't read every single recipe all the way through but I already know that I am going to bake EVERY SINGLE RECIPE in the book-- starting with the biscuits (scroll to the end and get a little bonus on some Cheddar Bacon loaves...told you I have been baking). Anywho, I figured go to the man himself to get the best recipe. These are Buttery Shortbread Biscuits - I decided to leave them as is before I start adding extra flavors and all that. I have to say all and in all it was pretty easy...and definitely delicious. As I write this blog post. I have eaten two and have one more sitting right beside me. Don't believe me....look below. 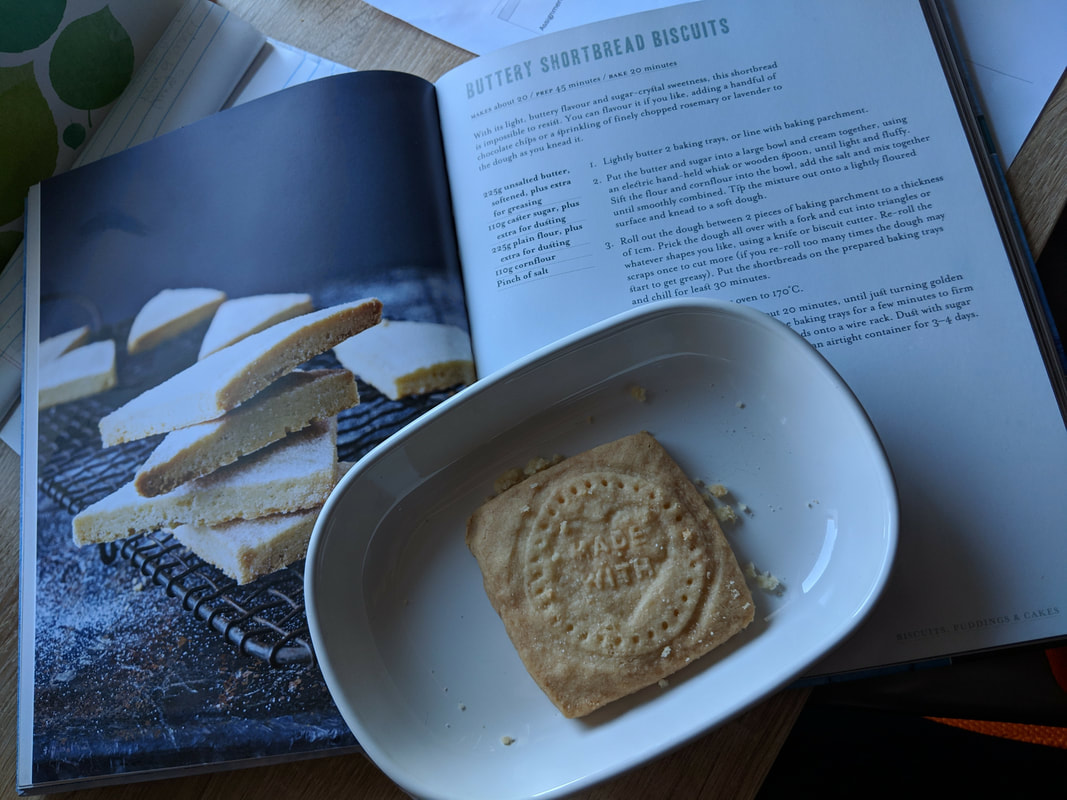 The dough was very easy to come together. No extra flour or liquid needed to help it form. Simple enough to roll out. I didn't cut them into triangles or any other shapes free hand... I used a cutter. I decided to also experiment with my "Made-with-love" stamper -- still getting the hang of it. It takes a certain amount of pressure to get the design but then too much pressure splayed out the biscuit dough a little bit. I refrigerated the dough to hold the shape before using the stamp and I should have refrigerated afterwards as well. I didn't get super crisp, even, straight edges.... but I did get that nice snap AND that light, delicate, buttery, flavor. BTW- these are DELICIOUS with ice cream-- I FINALLY had Amy's ice cream since moving to #ATX 9 months ago and made my own flavor of Guinness and Coffee- basically, I am genius. A fat genius. I think the next kitchen tool I get will be something to measure the thickness of the dough. I have read mixed reviews about the measure mats and the bands on the rolling pins alike...but if anyone has any favorites or go-tos...please let me know in the comments. As you can see some of my stamps didn't turn out as clear as I would have liked. I am going to keep playing around with the refrigeration time and different doughs to see how to yield the best results. The recipe calls for baking for 20 minutes... I definitely had to leave my biscuits in the oven between 23-25 minutes in order to get the browning at the edges and I did rotate trays between top and middle to get even coloring. This bake came in under 2 hours so I made the "tent time." I will be doing an extra biscuit bake this week to get those savory biscuits in--- Mr. Paul Hollywood's Gruyere Biscuits. Stay tuned. Until then Happy Baking. Happy Eating. Happy Repeating. (P.S. If you hear a lot of Gilmore Guys podcast in the videos... you are welcome...that's how I roll when I am baking) INGREDIENTS: 225g unslated butter, plus a little extra for greasing 110g caster sugar, plus extra for dusting 225g plain flour, plus a little extra for dusing 110g cornflour Pinch of salt. BONUS: CHEDDAR BACON LOAVESThis recipe is also from Paul Hollywood's: How to Bake. I found these loaves to be pretty simple. Short double rise time. Anything filled with cheese...I can't resist. I used some grass-fed sharp cheddar, no nitrate bacon, and added spinach to two of the loaves...because, well, I had it in my fridge. The recipe does call for strong wholemeal bread flour- which I thought that I did have in my pantry... and it turns out I had whole wheat flour...which I used with the bread flour. Probably a more nutty earthy flavor than Mr. Hollywood's. But cheddar and bacon go great with any type of flour :) INGREDIENTS: 400g strong white bread flour, extra for dusting 100g strong wholemeal bread flour 10g salt 10g instant yeast 30g unsalted butter, softened 330 ml cool water FOR FILLING: Olive oil for cooking and finish 8 rashers of smoked bak bacon, rind removed 150g Cheddar, grated. DRUM ROLL, PLEASE! Anyone? Bueller? I started this crazy journey with an announcement on Thanksgiving 2018 and the actual "baking off" began on December 1, 2018. I had a vague idea of the perils of the journey and these past few weeks have been filled with anxiety and worry. Mostly, a mantra of " I. Do. Not. Know. What. I. Am. Doing." But, despite a few #bakefails or, maybe, #bakemistakes - all has been fairly well in Bake-Land. And maybe this is how the bakers in the tent feel after they make it through week one (Please...just let me get through week one, everyone prays). Relief, mixed with a little exhaustion, mixed in with a little, "where has the rum gone?!" (which in my case would be whiskey, if anybody is asking). Somehow I do feel a better after completing my first #showstopper and as I sit here reflecting upon my experience, while listening to GBBO soundtrack by Tom Howe (no joke), I feel little more confident. So, let me start this off by saying I did not "practice" my initial showstopper and, honestly, I don't know how many of the showstoppers I can practice-- I mean how many hundreds of mini British cakes can I store in my house ...not to mention give to people... Please, sir, eat some more cake. EAT IT! What I DID know was WHAT I was going to bake. I figured that I have limited knowledge of British cakes, so I should go with what I know... or what I kind of know. I chose a Victoria Sandwich sponge, since my practice bake with that cake turned out well and I genuinely enjoyed the texture, flavor, etc. I rewatched Season 1, episode 1 - the Showstopper portion just to get my creative juices flowing and to see if there was any new ideas that came to my mind. I solidified my choice of baking a twist of the Victoria Sandwich cake. I debated between a 2 or 3 tiered cake but just for my own sanity as well as keeping to the brief, I decided to go with 2 tiers. Paul is a stickler about the brief. Decoration. Ahhh. The decoration. Ok. So the 36 British cakes have to be Mini. They have to be identical and they have to look pretty and taste yummy. Well, you know by now that my achilles heel is decoration. I decided that instead of piping buttercream in between the mini tiers that I would put the buttercream on the top with an extra flourish. I flavored the buttercream with lemon. Fresh as well as extra for an extra zip. I felt that it would complement the raspberry jam and sponge well. Why stop there... bake big or go home! Wait, I am at home... never mind. I decided to add a filling of almond cream, simply, because I love almond cream and it's delicious and it's almondy and yeah. I figured that I should try to do that fancy filling in the cake thing so when you cut through it, the middle looks cool. Again, bake big or ... So I have my flavors: Raspberry, Lemon and Almond. Now I have to figure how to make it all. Cue: flop sweat. The sponge. I figured since the recipe worked so well last time, I would use Mary Berry's recipe again. I mean you can't go wrong, right? I decided to use my jelly roll tins in order to get some good height, but not too tall since these are mini. Since I have 2 jelly roll tins that are different... I did get a little discrepancy on the colors of the bakes, but I did what I could in the moment. I had to double up the recipe and then double it up again. All in all, I baked 5 (!), count 'em 5 sponges. I baked 2 out of the 5 sponges together and then 3 separately... since I only have 2 jelly roll tins I had to improvise with some cooling and transferring and I focused on getting an even bake as much as possible across all 5 sponges. That probably ate up a lot of time... but when Paul Hollywood comes to my house to judge me then I will be more worried about the time. Do you hear me, Mr. Hollywood??? I baked the sponges for about 10-12 min depending. Honestly, I kind of did it by eye and feel. Good golden color, slightly pulling away from the edges, and springy to the touch, and clean "toothpick" insert. And if I am being double honest, this bakes feels like such a blur, even though it was just the other day. #bakerissues I learned from my #swissroll bake and made my fillings first. Raspberry jam (with added lemon juice) and almond cream and then they went into the fridge to set. I will say I had a very beautiful set jam afterwards. Success! Oh wait, I still need to put these things together. *WORK* ASSEMBLAGEI debated about serving square or round cakes. Round cakes or square cakes. Round or square?! Round is more "traditional," and I felt that square might add some extra aesthetic. Plus, my husband said "square," so I went with my gut. Square like that sponge-guy-pants-thing! As you can see in the pics above, the different colors are from the bakes of the 2 different pans... but I ended flipping over the extra pale ones and the colors matched up a bit better. To keep to the brief- I made sure that these would be a good couple of bites. I used a 5"x5" square cutter and a 2"x2" cutter to core out the middle. I am not that cool as some of the bakers in the tent, who have their own "cake guillotine." If I get a couple points docked from my scoresheet because I used store bought tools... so be it. I just wanted some semblance of evenness and uniformity. I "cored" out the middles, then slathered my beautiful raspberry jam in between the sponges and then piped almond cream into the center. I made some traditional buttercream and flavored it with lemon juice and lemon extract and mixed in a yellow food coloring to give a pop of color... And then! I used my new Russian Piping tips from K&S Artisan. (I ordered mine from the Amazon, like my whole life). And then I piped lemon buttercream flowers on 36 mini cakes. Here's what your kitchen looks like afterwards: 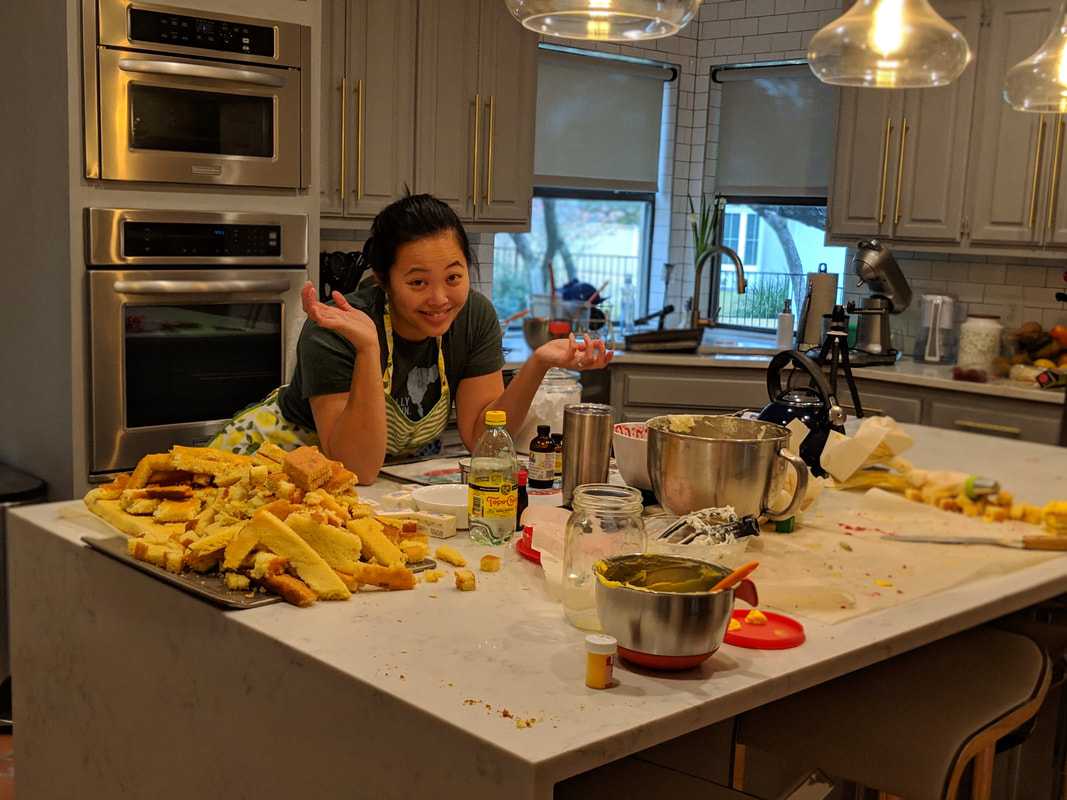 WHAT DID DANA LEARN?This bake clocked in at 4 hours and 52 minutes. I would have not made it in the tent. This bake was supposed to clock in at 3.5 hours. I think about a couple of hours in I knew I wasn't going to make it at the "tent" time but I decided to enjoy the process, instead of getting even more stressed out. Thank goodness for my Wellness mat to keep me from cramping up. This is like baking olympics. So, hmmmm, what did Dana learn? (In no particular order) Having a plan. I generally have a plan when I bake but I can see how much more important it will be for this challenge. Especially, on these long bakes. I need to work on my preparation a little more... just a technical thing. I distinctly remember during my bake, I thought about how much this reminded me of acting and being in rehearsal for a show (apparently #actorbrain), but just having a script is like having a recipe and adjusting for whatever may come up during a live stage show is like having a bake not rise or collapse. Also, I need another damn mixing bowl for my stand up mixer... (update: ordered today). The practice bakes did help me! Just knowing what to expect from the cake and the batter and all that goodness. So even if practice doesn't make perfect...it makes for less screw ups. The more techniques I know or learn about, are only going to serve me as I travel through this journey. So I guess, I have keep doing food research (ie. eating). :) I am still figuring out how my oven bakes. There seems to be a big discrepancy between the middle and bottom racks. But I feel like I am navigating it well. I should have divided the almond cream in the pastry bags so I could have kept part of it cool in the fridge -- so when I cut into the cake, it would have help better. Some of my bake time is cut into by capturing content and cleaning in between... Kudos to all of those PAs on the set of GBBO that help cart of dirty bowls. I mean, I wouldn't have been able to do this all in 3.5 hours, regardless but I am sure it would help to have some cleaning fairies. Also, WHERE DO THE CONTESTANTS PEE during a baking challenge???? Thoughts? Ok until #biscuitweek (Yeah- I am not sure exactly what an English biscuit is either)- Reach out with thoughts, opinions, or help right here. Follow me on IG for more behind the scenes things @dana.does.things -- Until then... Happy Baking. Happy Eating. Happy Repeating. RECIPE FOR ALMOND CREAM:
https://letthebakingbegin.com/french-almond-cream/
RECIPE for MARY BERRY'S VICTORIA SANDWICH: https://www.pinterest.com/pin/402227810467661288/ Ingredients Produce
Refrigerated
Baking & Spices
Dairy
Ok, I am going to be real with you. I have had some serious doubts about doing this WHOLE challenge this week. Part of the time, I doubt my own abilities to be good enough to do any of these bakes and the other part of the time, I am thinking...who is crazy enough to self-inflict these many man hours in their kitchen, not to mention writing and documenting this...face palm... But then I see new recipes and make like 23 pounds of different cookie dough for fun, So I guess, I am just a crazy B. Ok so this technical. Again, I will say it I am not a Brit and I hope that I am not doing these cakes a disservice. I have taken it upon my find some Brits in the #atx area to be voluntary taste testers... or maybe I just shove baked goods down their mouth hole... either way, I want to make sure that I am doing these cakes right. Now, this is my first technical bake and it's kind of tricky because the contestants don't know what they are baking ahead of time AND they get a stripped down version of the recipe. It's going to be the exact opposite for me. But for this I did not read through the whole recipe ahead of time and concentrated on just the ingredients and a wing and a prayer (where did that saying come from anyway???), Since this is a Mary Berry's recipe and I did find "her" recipe from bbc.com (recipe below), I decided to start off with what I know and did her infamous "all-in-one-method." Meaning, I didn't start by creaming the sugar and butter and whisk together the dry ingredients separately. Nope. I just put all that goodness together from the start. 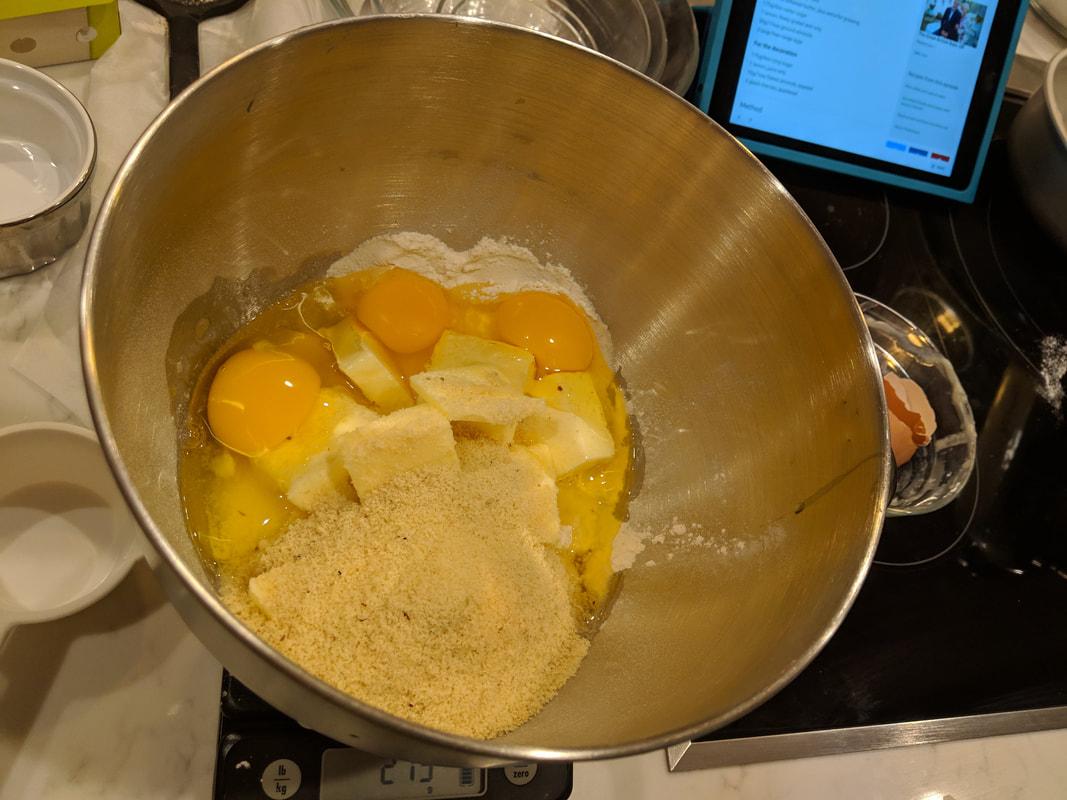 All in one method, in my trusty Breville stand up mixer bowl and on my food scale my sis got me for birthday! Let's talk about those little things called glace´ cherries. Well, first off I could not find any at my local supermarkets. Cut to my aggravated to my face. Granted, I did not go to every single grocery store in the Austin area and, hopefully, I will stumble upon an awesome British goods store around here soon (fingers crossed). This is where you are asking if I know about the interwebs. Yes, I know about technology....sometimes. But I honestly didn't want to have to wait for shipping or pay extra (yes, I have Prime) for goods to be shipped across the pond. Then, through all the Google research I did... I kept running across candied cherries, which many websites listed them the same as glace´ cherries. I then found a recipe to make my own (below) which is essentially just taking maraschino cherries and simmering them in their juice cocktail with sugar for awhile. Does this make a good fake glace´ cherry? I do not know. But they looked similar to the cherries that I have seen on the show and "candied" feel to them. I stored them in an airtight container until I was ready to use them. Ok, lady... just tell us about the bake already.I'm getting there! All in all, I felt like it was pretty straight forward bake. Now, would I have thought this about 5 years ago, before I was consistently pre-heating my oven? I might not have. But if you make cakes... you will be able to tackle this one. And I can see why the Brits call this a classic, because when I first bit into it... I thought it tasted yummy and would be extra DELICIOUS with a good cup of tea. Cutting through my cake I felt that texture was good and springy to the touch. There was nice color due to the butter greased in my tin (a new one! I ordered just for this challenge). And... the greatest part is that my cherries were evenly disbursed (yay! #bakewin). Full disclosure, I accidentally saw that part of the directions as I was making sure I had all my ingredients: RINSE AND FLOUR THE CHERRIES... not gonna lie, I would have totally forgotten to do that and who knows what my cake would have looked like. I have a feeling I am going to get good at baking cakes with fruit in it during this #bakeoff! I will be vigilant about the size of my fruit and to make sure that it is not too wet, large, small, and properly floured to get that disbursement juuuuuuust right. Alright, I do have one (another) confession. I forgot to buy SLICED ALMONDS! The garnish.... But I did have whole almonds...so I improvised (as one should), I rough chopped them up, toasted them for a few minutes and added them in for my garnish. Still had a great crunch. I'm glad I got that off my chest though. Whew. The entire bake took about 1:35 to 1:40 min -- IRL, I had to leave and do adult life things while the cake was cooling but otherwise I timed the bake from start to finish (weighing the ingredients to finishing the last drizzle). You be the judge on how my technical challenge turned out, below. If...a big IF...if there is one thing that I might change from this recipe- Don't look at me like that! I know it's a Mary Berry recipe... Stop. Looking. At. Me. Like. That. I would add a little bit more lemon juice to the icing to give it a tad more tartness and acidity... I think it would punch it beautifully. (See, that wasn't that bad... Mary Berry still likes me.... sigh... I wish). That's it for now... I have been planning my showstopper in my brain all day. My 36 mini-cake showstopper. Yikes. If you listen very closely, you can hear my heart pounding (and maybe some nervous farting). Until then... Happy baking. Happy eating. Happy repeating. (yes, that's me trying to record a drizzle and hold my phone....yes, that's the Gilmore Guys podcast playing in the background...#gilmoregirls for life, baby!) The Recipes, like I promised.If you want to see all the recipes I am interested in...follow me on Pinterest at https://www.pinterest.com/danadoesthings/ Make your own GLACÉ CHERRY INGREDIENTS: All you need for this is a 16 oz jar of maraschino cherries and 3/4 cup of sugar. And about 20-30 min of your time. Seriously. https://www.kingarthurflour.com/recipes/diy-candied-cherries-recipe CLASSIC CHERRY CAKE INGREDIENTS: Produce
Refrigerated
Condiments
Baking & Spices
Nuts & Seeds
Dairy
https://www.bbc.com/food/recipes/marys_cherry_cake_17869 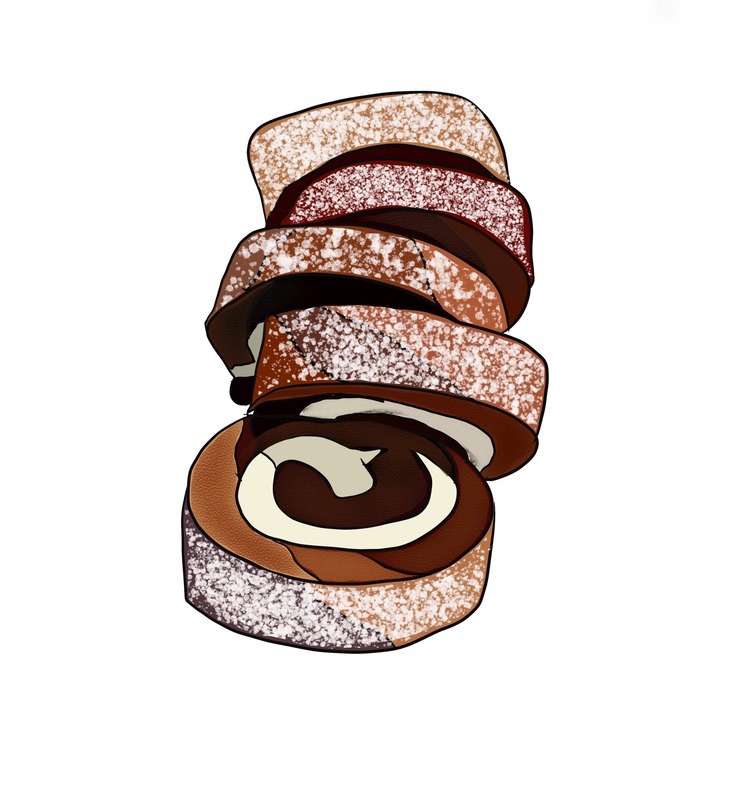
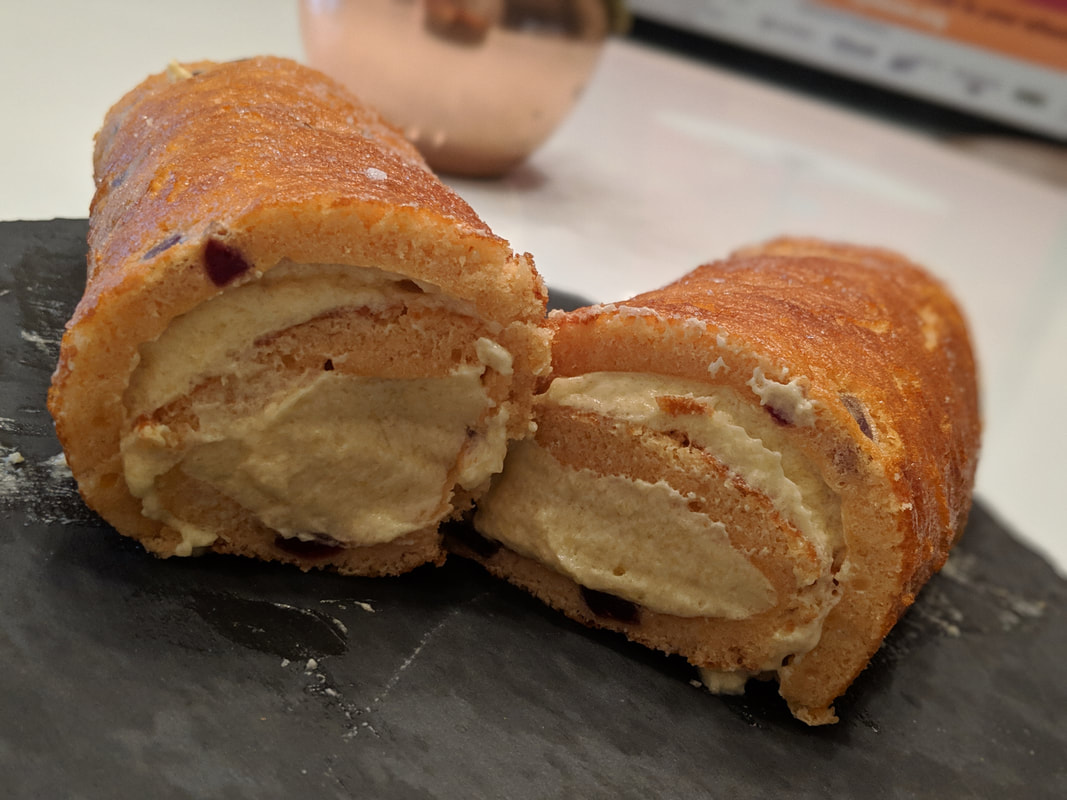
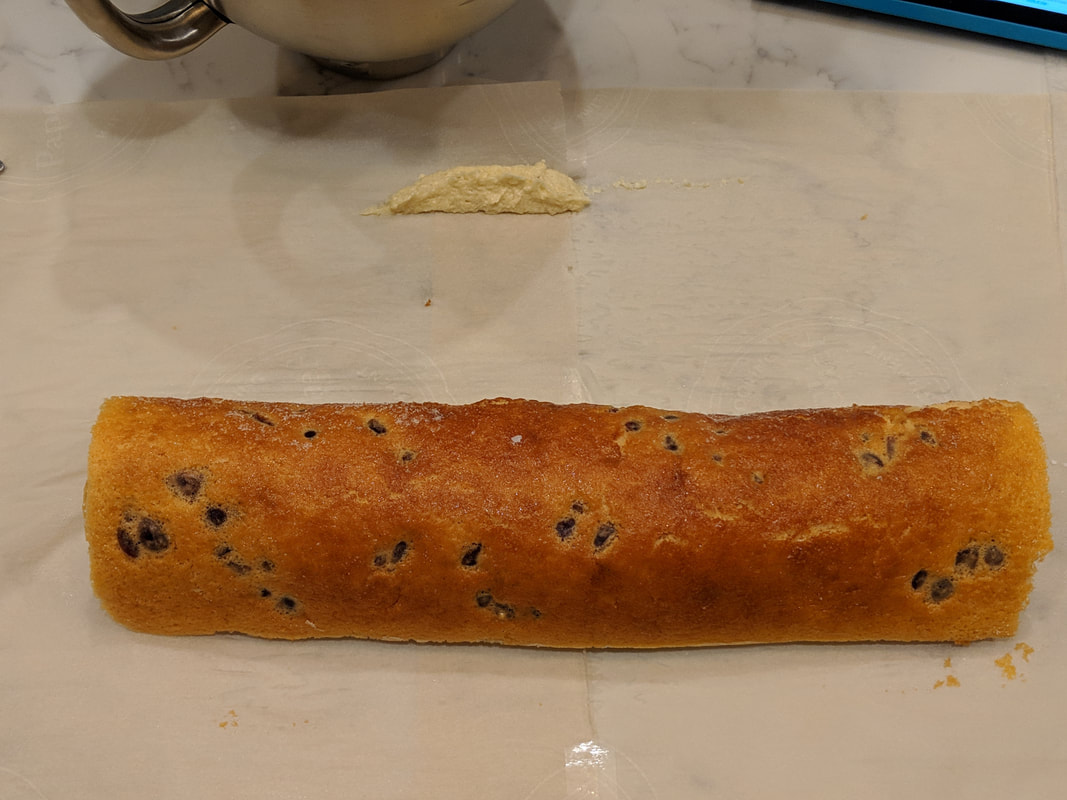
Ok let’s be real… I wasn’t too happy with the first swiss roll that I made. So, I decided that I needed to bake one more in order to really call it my “Signature” bake. Even though, I did get so many good ideas for swiss roll flavor combos, I decided to stick to my first inclination which was to make #snickerdoodle. Don’t worry your flavor combos won’t go to waste… I will definitely be using those suggestions in the future. I tried to time this bake - but in the process of doing this, I realized that I will try to keep to time as much as possible but because I am trying to snap pics and video...it’s a little tricky. But this particular bake clocked in at 1:14:26:02. The bakers in the tent at 2.5 hours soooo... I must have done something terribly wrong.
My last blog post, I took you through the journey of my practice bakes: Victoria Sandwich Cake, Lemon Drizzle, and a Cherry Almond Swiss Roll. I didn’t get to bake a Sticky toffee pudding or a Madeira cake before my first“cake week.” The struggle is real, folks (#bakerproblems). However, I’m doing the best I can. As I cultivate and evolve this site and blog, I hope to bring you inspiration and some insight of this #bakeoff. If you can learn from my mistakes and share a bake with someone- MY JOB IS COMPLETE! Now: for my first Signature bake. I used the same recipe for the sponge that I used for the cherry sponge (#foodnetwork). This time I was careful not to overbake and I actually took it out about 3 minutes before my cherry sponge… and it did start to pull away from the tin so I know that was the right choice… HOWEVER- remember how I said my cherry sponge was slightly closed textured...this one, unfortunately, was a little gummy in texture. How do you say: stodgy. So that was a bummer. I am not sure if it actually was just slightly underbaked or if it needed a little rising agent. Someone shout it out if you know! As I learned from my practice swiss roll bake- I made the filling first so I could get that nice and chilled. I decided to go with a cinnamon whipped cream. Making whipped cream is such an easy treat and it literally takes no time at all doing it in my Breville mixer (#weddinggift that I use ALL. THE. TIME. But I feel like it might be time to get an extra stand up mixer :)). I put the metal mixing bowl in the freezer for about 10- 15 minutes beforehand to make sure that it was extra cold for that cream. Instead of 2 cups of heavy whipping cream, I used 3 cups so I could make sure that was extra for piping. Added some sugar, cinnamon, and vanilla extract as it was whipping ...bing, bang, boom… delicious whipped cream! I stored the bowl in the fridge until I was ready spread onto the sponge.
Because this is a snickerdoodle swiss roll- I wanted that signature tang that comes from a snickerdoodle cookie, so I added that mysterious cream of tartar to the sponge. Perhaps, that cream of tartar also caused some of the gumminess. I will have to research. 2 teaspoons of that. I also added cinnamon. I combined that with the flour, essentially whisking together the dry ingredients. At the very end I folded cinnamon chips- yes, these exist! I believe my baking friend, Lindy, turned me on to these (#lindybakes). I didn’t feel that I needed to add any extra sugar or eggs to this (is this a mistake??) due to the fact that I felt that sponge would have good flavor- I was careful to beat the eggs and sugar together slightly longer to get a nice pale color and fluffier consistency.
So this time I turned the sponge out on sugar AND cinnamon to get that extra snickerdoodle-y flavor up in there… I may have turned the sponge a little too early because it was still extremely warm from the oven and the sugar melted onto the sponge....that may have contributed to the gummy texture. Learning...always learning. I tried to get a tighter roll from the beginning and I slathered on extra whipped cream in the filling to make a more well rounded cake. Next- the decorating. Aw, crap. I hadn’t given a THOUGHT as to how I was going to decorate this thing. Well, I guess I THOUGHT that I would pipe whipped cream on it...had no thought of design or anything. Sigh. My decorating skills are not up to par and after I spend so much time honing a bake for consistency and flavor… I don’t give much time to the decorating. This is obviously going to be my achilles heel of this #bakeoff. I’d better get on some youTube tutorials real quick… feeling the pressure! So what you see below is my sub par decorated swiss roll. The damn whipped cream is so delicious that I want to shove a bowl of it in my mouth hole. Can’t dwell on anything too long now because I have a Classic Cherry Cake to think about...that’s Mary Berry’s own recipe. Yikes. Happy baking. Happy Eating. All with Love. Drizzling my lemon
This week has been a little crazy. Right off the heels of the Thanksgiving holiday...and traveling… I have half a head cold, trying to figure out my workout schedule since I am baking so much I am puffing up more than a well-laminated puff pastry. I rushed off to auditions, shot a commercial, practiced piano, looked for Waitress the Musical tickets (hoping that they would do the #piebaking contest) and did laundry (it’s the little things, right?). All this to say, even though it gets hectic I am very effing grateful for my life.
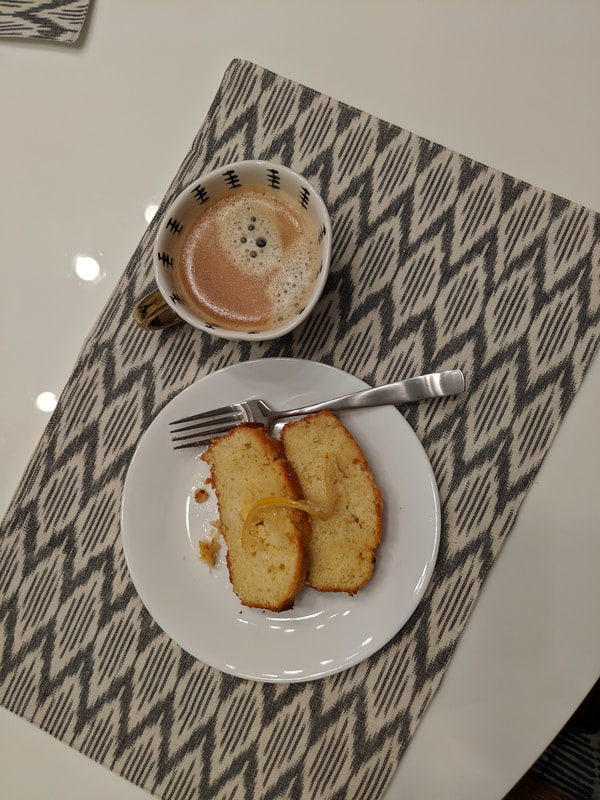
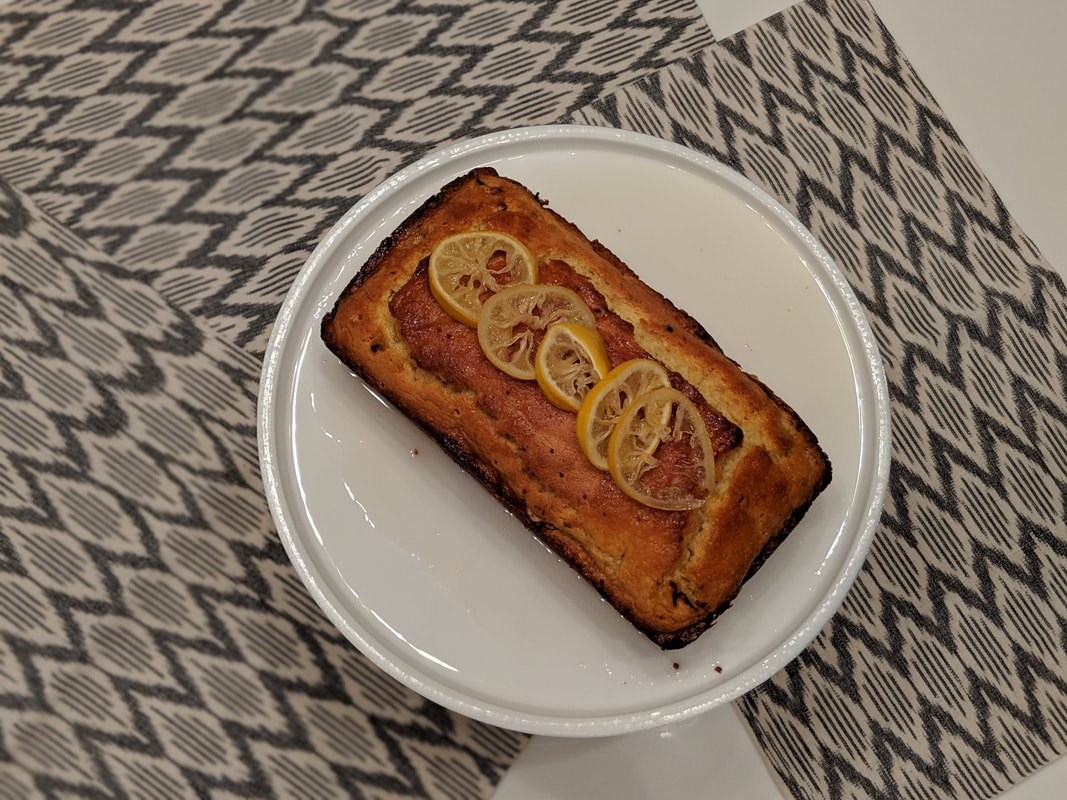
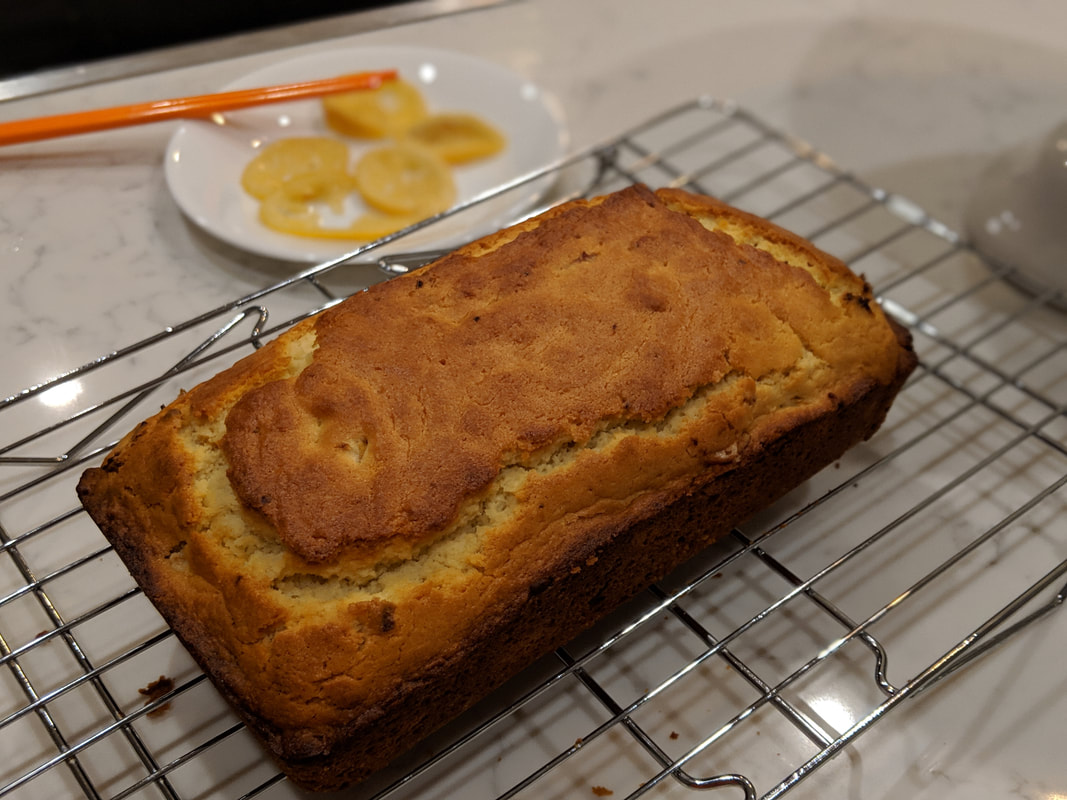
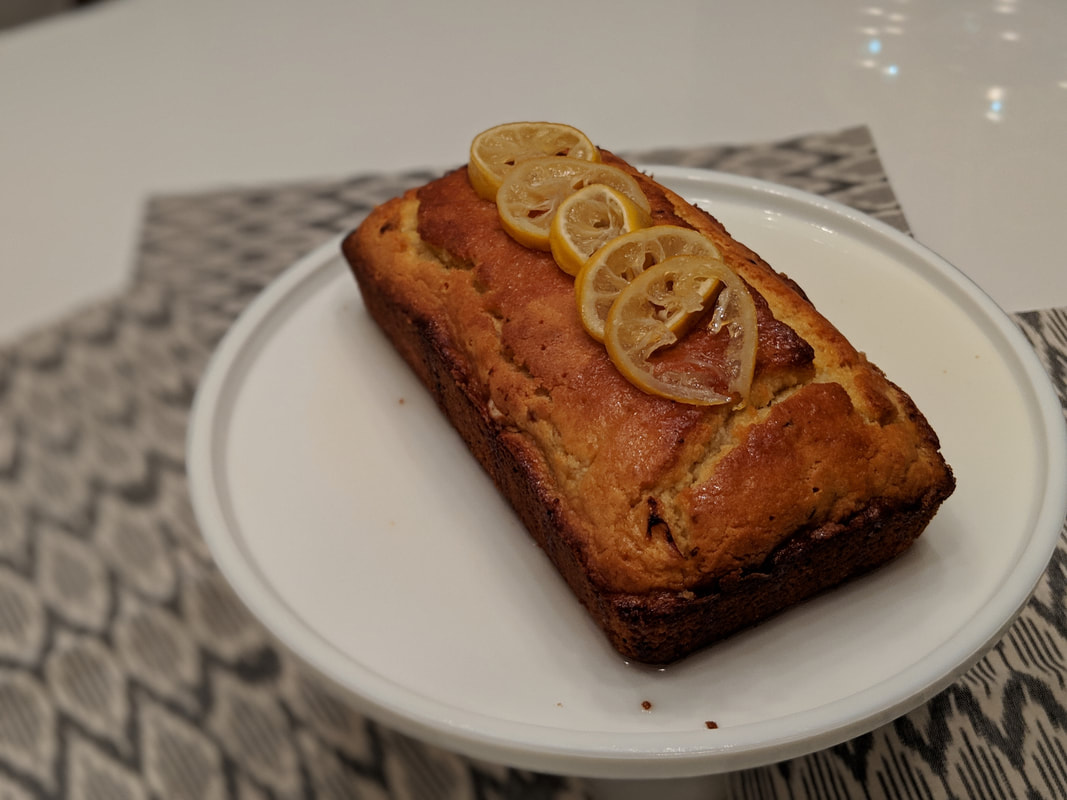
After my announcement that I am baking my way through GBBO, I had an outpouring of support from friends and excited acquaintances about my journey. But now it’s finally here. And the preparation beforehand came in handy but now I have to keep up with the journey. Research, baking, preparation and blogging/posting is a little crazy town but hopefully I am up to the challenge...since it is my own personal, self-imposed challenge. Ok- so my first practice cake for #cakeweek was a Victoria Sandwich Cake. Which I think turned out pretty well, despite some ramen wannabe buttercream piping. I feel like that particular sponge will come in handy for different recipes but for GBBO, different construction of cakes in the future. I couldn’t practice as much as I wanted due to the Thanksgiving holiday, but I was able to get some recipes from my mother-in-law’s Betty Crocker’s Cooky Book and research things for #biscuitweek (I’ll give you a hint, it rhymes with Pogwarts). So next up on the list to practice bake was the infamous Lemon Drizzle Cake. Now, I didn’t really know what to expect. I assumed a lemony piece of cake... but not sure if it was more of a pound cake or like a fluffy, yellow cake consistency. I looked at a bunch of different recipes to compare. And I settled on this one: INGREDIENTS
Full recipe here: https://www.sainsburysmagazine.co.uk/recipes/cakes/double-lemon-drizzle-cake Now if you notice, just like in the Victoria Sandwich recipe, this also calls for self raising flour… I don’t know why, but I find that interesting. If anyone has backstory on this, please tell me why. I know that raising agents didn’t really come into fashion because it hadn’t been invented until the early 1900s (am I getting that date wrong?) and it’s pretty easy to make your own self raising flour… I’ve done it once but sometimes it just feels easier to get a bag at the store. The other lemon drizzle recipes that I researched called for 3-4 tablespoons of milk. This one didn’t. Since I had large eggs in my fridge, I changed the recipe to 3 eggs instead of 4. The quantity of batter was less than I thought it should be- I was afraid that it wouldn’t rise…oh and this is after my #bakefail -- I creamed butter and eggs together...NOT butter and sugar … what is this? Amateur hour?! Oh wait… And my second goof was the lemon puree… which I was excited to learn about making a lemon puree… because I had really thought about it before. I chose to pierce a lemon a few times and then simmer in water on the stove top for about 20 minutes...but this is a reminder to you beginning bakers out there: READ THE FREAKING RECIPE, so I didn’t quarter my hot, boiled lemon afterwards and remove the seeds and the pith...so I put it in the blender whole as is… I got all the seeds out BUT the pith was still there… another #bakefail. I fail so you don’t have to :) I baked my first lemon drizzle- I noticed a crack or an uneven rise to the cake. A crack is good in a Madeira cake but I don’t know about a lemon drizzle. You be the judge. Pics below of the lemon drizzle. It had a great lemony flavor, despite my goof of leaving the pith on for the lemon puree, but I found it a little dry and too crumbly. When I make my next lemon drizzle cake I will definitely go with a the recipes that call for milk (about 3-4 tablespoons or so) and perhaps add a little extra lemon puree-- that is done correctly to counteract the dryness of this cake. As a practice bake - I figure that it’s about grade C - I always feel like I can do better and WANT to do better, but I am learning despite all the goofs and not always being able to execute well… and if you don’t try then you will never know.  Do the Swiss Roll (or just a panda rolling)
Ok so if you don’t know Season 1, episode 1 (on the Netflix in America) is the start of Cake Week and the first bake is the swiss roll. I have never made a swiss roll and I have barely thought of attempting it. The swiss rolls on the show look so fluffy and delicious… and it seems easy enough to roll sponge into a shape after slathering it with jelly, cream, or whatever filling you call for. Right? Easy, right?
So I decided that I would be catch up on the bakes and just bake my first swiss roll without a practice. How hard can sponge be? I did get some new hardware for my swiss journey. I got a jelly roll pan (10”x15”) and read up on some recipes… now to decide on a flavor. I got some GREAT ideas from people on Facebook and such… and even though my friend, Kürt, insisted that I turn my awesome (if I do say so myself) prosciutto and gruyere biscuits into a swiss roll, I decided to go with some different flavors. I opted for a Cherry sponge and almond cream filling - for my high school friend Liz. She lives in an Iowan town that is heavily influenced by all things Dutch, so cherry and almond has been speaking to her. Plus, since I have to bake a Classic cherry cake next… I might as well get going with those cherries. On my crusade to find glacé cherries to make the #maryberry recipe of Classic Cherry Cake, I found Amarena cherries (at your friendly neighborhood Trader Joe’s). These delicious little cherries hail from Italy and slightly darker and have a bold, bitter taste. They are used in desserts and cocktails and such. I decided that I could incorporate it into my cherry sponge for my inaugural swiss roll. Since, I did not find glacé cherries ANYWHERE except on the internet, I decided to make my own… which I will discuss in a future post- but basically you take maraschino cherries and simmer them in their own juice cocktail and sugar to candy them. I saved the excess maraschino cherry juice and added some to my sponge mixture -- I was hoping that it would give it some extra cherry color as well… it did give it a tinge but NOT a cherry color- next time I will have to bolster it with some food coloring. I chopped up the Amarena cherries and folded them into the batter before spreading it out on the jelly roll pan. Recipes and pics below. There is no rising agent in this recipe… so therefore my sponge did stay pretty flat… but I was going into this “Signature” challenge pretty blind, since I have never made a swiss roll before. I was really watching for the sponge to begin to pull away from the sides of the tin before taking it out of the oven… I do think that maybe my sponge was slightly overbaked by 30 sec or so… so I think pulling it out of the oven BEFORE the sides begin pulling away is perfectly fine. I tipped the sponge onto parchment paper dusted with sugar as called for in the recipe… came out easily and was still warm. Now I used my knowledge of the GBBO and tried to pre-roll the sponge so it could more easily roll and retain some of that “muscle memory.” I started getting a small crack as I pre-rolled. So I backed off and did not pre-roll the whole sponge. I made the almond cream when the sponge was in the oven and during the short cooling time… I realized that to make the filling first probably the way to go - #bakegoof - since the sponge has a short bake time and the cooling time isn’t too terribly long. And this way whatever filling you make has time to “set.” I opted to do a cream filling since I didn’t want to try my hand at getting a jelly set for my first challenge….. So then I slathered my almond cream onto the sponge - note to self- use more of it next time and began rolling - note to self (notice a pattern here?)- try to do the smallest roll possible to get a tighter roll next time. All in all- I felt disappointed in the look of this swiss roll. I guess I didn’t really know what to expect. But I felt like it looked small and not stately enough to be swiss roll… I had that weird straight roll thing on the inside and not the nice “snail” shape...and there was a gap with the filling. My sponge was a little dry, like I mentioned earlier, and seemed to be slightly closed textured. Ok but...the flavor… the almond cream...ugh! I couldn’t stop licking the bowl or my fingers. So. There’s that… and I felt that sponge had a good flavor and when you got a bit of Amarena cherry in a bite- it really popped. Not overly sweet...and a great combination. Thanks for the suggestion, Liz! But since I am not satisfied and I felt like I was stuck in #amateurhour (again, duh!) I decided that I had to try another one. Guess, I get to my #snickerdoodle flavor anyways. Until next time, bake on. And bake with love. RECIPE from Food Network: Ingredients 4 eggs 4 1/2 ounces caster sugar (superfine), plus 3 tablespoons for sprinkling or use icing sugar (confectioners'), for dusting 2 tablespoons warm water 1 teaspoon vanilla extract 4 1/2 ounces all-purpose flour For the filling6 tablespoons raspberry or strawberry jam 8 ounces heavy cream, whipped FULL Recipe and directions: https://www.foodnetwork.com/recipes/swiss-roll-2012199?soc=sharepin |
DanaAll the juicy facts will be right here. Archives
May 2022
|


 RSS Feed
